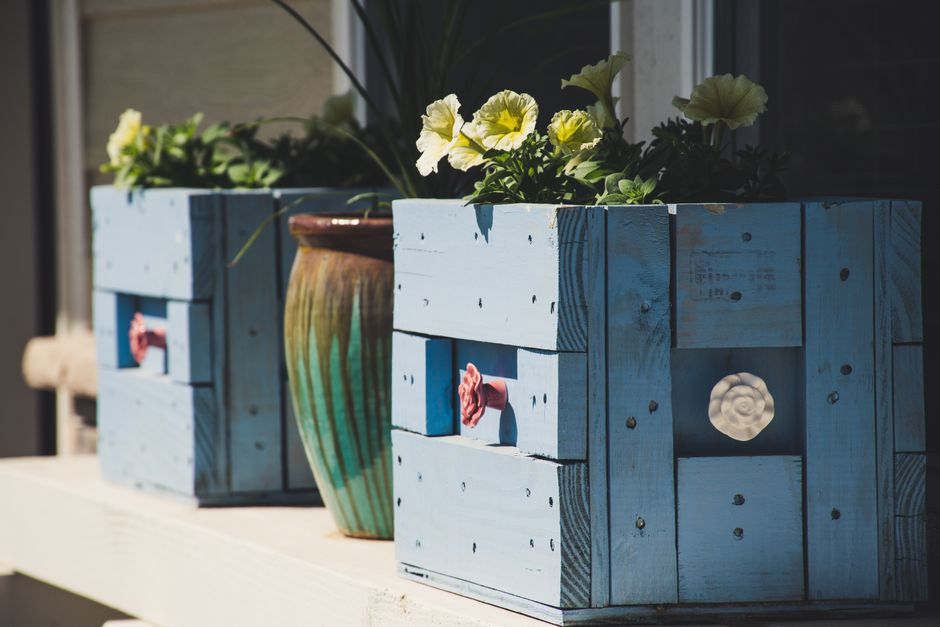
How to build a simple planter box
How to Build Planter Box Wood DIY Garden Cheap: Complete 2025 Guide
Introduction
Learning how to build planter box wood DIY garden cheap is one of the most rewarding projects you can undertake as a gardening enthusiast. Creating your own wooden planter boxes doesn’t require expensive equipment, advanced carpentry skills, or a massive budget—just some basic materials and a clear plan. Whether you’re looking to grow vegetables, herbs, or ornamental plants, building your own planter boxes allows you to customize the size, shape, and style to perfectly fit your gardening needs and outdoor space. In this comprehensive guide, we’ll walk you through everything you need to know to create beautiful, functional planter boxes that will serve you for years to come.
Table of Contents

- Introduction
- Why Build Planter Box Wood DIY Garden Cheap Matters
- Step-by-Step Build Planter Box Wood DIY Garden Cheap Guide
- Best Build Planter Box Wood DIY Garden Cheap Options
- Pro Tips for Build Planter Box Wood DIY Garden Cheap
- Common Mistakes to Avoid
- Key Takeaways
- Frequently Asked Questions about Build Planter Box Wood DIY Garden Cheap
- Conclusion
Why Build Planter Box Wood DIY Garden Cheap Matters
Building your own planter boxes offers numerous advantages over purchasing pre-made options from garden centers. First and foremost, the cost savings are substantial—creating a high-quality wooden planter box can cost 50-70% less than buying comparable products retail. When you build planter box wood DIY garden cheap, you have complete control over the dimensions, allowing you to maximize your growing space whether you have a small balcony or expansive backyard.
Wooden planter boxes also provide superior aesthetic appeal compared to plastic alternatives. They blend seamlessly into any garden design, from modern minimalist landscapes to rustic cottage gardens, and they naturally complement your home’s exterior. Additionally, wood offers better insulation for plant roots compared to other materials, helping maintain consistent soil temperatures throughout the growing season.
Another significant benefit is the environmental aspect. By building your own planter boxes, you’re reducing plastic waste and can source sustainable wood materials from local suppliers. You’ll also gain valuable DIY skills that extend beyond gardening—carpentry knowledge is useful for countless home improvement projects. When you decide to build planter box wood DIY garden cheap, you’re investing in a project that enhances your property value while creating a functional garden space.
Furthermore, building your own allows for customization in terms of wood type, finish, and drainage features. You can choose untreated wood for organic gardening, add decorative elements, or incorporate special features like trellises for climbing plants. The flexibility and personalization options simply aren’t available with mass-produced alternatives.
Step-by-Step Build Planter Box Wood DIY Garden Cheap Guide
Materials You’ll Need
Before starting your project, gather all necessary materials. You’ll need four pieces of untreated wood boards (typically 2×12 or 2×10 inches for the sides), wood screws (3-inch exterior grade), a power drill or screwdriver, a saw (if cutting custom sizes), sandpaper, and a level. For a basic 4×8 foot planter box, untreated cedar or pine lumber typically costs $30-50, making this an incredibly affordable option.
Optional but recommended materials include landscape fabric (to prevent soil from washing out), wood stain or sealant (for longevity), corner brackets for additional support, and metal hardware cloth (to keep burrowing pests out). These additions increase durability and functionality without significantly impacting your overall budget.
Choosing Your Wood Type
Selecting the right wood is crucial for building a durable planter box. Untreated cedar is the gold standard because it naturally resists rot and insects while being completely safe for edible plants. Cedar costs more than pine but lasts 10-15 years versus 3-5 years for pine. If you’re on a tight budget, untreated pine works well but will need regular maintenance.
Avoid pressure-treated wood for vegetable gardens, as the chemicals can leach into your soil. Reclaimed wood is an excellent budget-friendly option if you can source it locally—many construction sites and demolition companies give away usable wood materials. Oak and redwood are other naturally rot-resistant options, though they tend to be pricier than cedar.
For maximum budget-consciousness, look for sale prices at big-box retailers or mill ends from local lumber yards. Many suppliers sell slightly imperfect boards at discount prices, and these work perfectly fine for planter boxes.
Measuring and Cutting
Start by determining your desired planter box dimensions. Standard sizes work well: 4 feet long by 2 feet wide by 12 inches deep is ideal for most gardens. This size provides adequate growing space without being too heavy when filled with soil. Measure twice and cut once—this old carpentry axiom is absolutely essential.
If you don’t have a saw, many hardware stores offer free or low-cost cutting services. Simply provide your measurements, and they’ll cut all pieces to exact specifications. This eliminates the need to purchase or borrow tools while ensuring precise, professional cuts.
Mark your cut lines clearly with a pencil and use a straight edge as a guide. For straight cuts with a circular saw or miter saw, clamp your wood securely to prevent slipping. Always wear safety glasses and follow proper power tool safety protocols.
Assembling the Frame
Begin assembly by laying two long boards parallel to each other on a flat surface. Position your short boards perpendicular to create a rectangle, then drill pilot holes at each corner to prevent wood splitting. Pilot holes are small-diameter holes drilled before inserting screws, and they’re essential for preventing cracks in the wood.
Use at least three 3-inch exterior-grade wood screws at each corner for maximum strength. Drive screws at slightly different angles to create a stronger joint. Once the frame is assembled, use a level to ensure it sits perfectly flat—an unlevel planter box will cause water to pool unevenly and may shift over time.
For additional reinforcement, consider adding corner brackets on the inside of the frame. These metal L-brackets provide extra strength and are particularly important if you’re building larger boxes or using softer woods. Brackets typically cost $2-4 each and are available at any hardware store.
Adding Drainage
Proper drainage is absolutely critical for plant health. Place your completed frame in its final location before adding soil—relocating a full planter box is extremely difficult. Drill 5-10 drainage holes in the bottom boards, spacing them evenly about 12-18 inches apart. Holes should be approximately ½-inch in diameter.
To prevent soil from washing through drainage holes while allowing water to escape, line the bottom with landscape fabric. This inexpensive material ($0.10-0.20 per square foot) extends the life of your wood by keeping soil away from the bottom boards and preventing pest entry. Staple the fabric to the interior walls of the planter box, overlapping seams by at least 6 inches.
For areas with significant pest problems, consider adding hardware cloth under the landscape fabric. This wire mesh prevents moles, gophers, and other burrowing animals from accessing your plants while still allowing water drainage.
Finishing Touches
Sand the exterior wood with 120-grit sandpaper to remove splinters and rough edges. This prevents injury and improves the overall appearance. If desired, apply an untreated wood stain or natural sealant to enhance the appearance and extend wood lifespan. Allow at least 48 hours of drying time before adding soil.
Never paint the interior with any coating, as this can trap moisture and promote rot. Paint the exterior only if desired for aesthetic reasons. Water-based stains dry faster and are easier to apply than oil-based alternatives.

Best Build Planter Box Wood DIY Garden Cheap Options
Premium Cedar Construction
If budget allows, investing in cedar boards will provide the longest-lasting results. A cedar planter box 4×8 feet costs approximately $80-120 for materials and will last 10-15 years with minimal maintenance. Cedar’s natural beauty ages beautifully, developing an attractive silver-gray patina over time. The wood’s natural oils provide excellent rot resistance without toxic treatments.
Cedar boards do cost more upfront but offer superior value over time when you consider replacement costs of cheaper alternatives. A 2x12x12 cedar board typically costs $25-35, so a complete kit for a standard box runs $100-140. This higher initial investment pays dividends in durability.
Budget Pine Alternative
For minimal upfront investment, untreated pine offers decent performance at budget prices. A complete pine planter box costs $30-50 in materials, representing a 60% savings compared to cedar. Pine is softer than cedar, making it easier to cut and assemble, though it’s more prone to rot. A pine box typically lasts 3-5 years before requiring replacement or repair.
The trade-off is clear: pine costs less initially but requires more frequent maintenance and replacement. If you’re building multiple boxes or planning to expand your garden, the cumulative cost of replacement soon exceeds cedar’s initial premium. However, for temporary installations or testing garden layouts, pine is perfectly adequate.
Reclaimed Wood Solutions
Sourcing reclaimed wood from local demolition companies, pallet sources, or construction sites provides the absolute cheapest option—often free to $10 total. This approach requires more effort in sourcing suitable materials but yields significant savings. Reclaimed wood also carries environmental benefits and creates unique, character-filled planter boxes.
Inspect reclaimed wood carefully for nails, rot, or chemical treatments before using. Remove all nails carefully with a pry bar and sand thoroughly. This option requires more labor but appeals to environmentally conscious gardeners willing to invest time for savings.
Composite Wood Alternatives
Composite materials made from wood fibers and plastic offer a middle ground between wood and plastic. These materials cost $150-250 for a standard box but last 15-20 years with virtually no maintenance. Composite doesn’t rot, splinter, or require staining, though some gardeners prefer the aesthetic of natural wood.
Composites are excellent if you prefer durability over traditional appearance and are willing to pay slightly more for convenience. They work particularly well in humid climates where traditional wood deteriorates quickly. However, they may not align with an ultra-budget approach to building planter boxes.
Pro Tips for Build Planter Box Wood DIY Garden Cheap
Building planter boxes efficiently requires knowledge of proven techniques and shortcuts. First, pre-drill all screw holes to prevent wood splitting—this 30-second step prevents costly mistakes. Second, use exterior-grade fasteners exclusively; interior screws will rust quickly and weaken joints. Galvanized or stainless steel hardware adds minimal cost but dramatically improves longevity.
Invest in quality landscape fabric to line the bottom and interior sides. This inexpensive material prevents soil migration, extends wood life, and creates a root barrier that improves plant health. Apply fabric carefully, overlapping all seams by at least 6 inches and securing with staples every 12 inches.
Layer your soil properly for optimal results. Start with 2-3 inches of coarse gravel or wood chips for drainage, then add landscape fabric, followed by quality garden soil. This layering ensures proper drainage while maximizing nutrient availability. Never fill your planter with straight garden soil from your yard—invest in quality potting mix for better results.
Consider creating a soil recipe that combines quality potting mix with compost and perlite for improved drainage and nutrition. A budget-friendly mix uses 50% garden soil, 25% compost, and 25% perlite or sand. This combination costs substantially less than commercial potting mixes while providing excellent growing conditions.
Position planter boxes where they receive appropriate sunlight for your chosen plants. Most vegetables require 6-8 hours of direct sun daily, while shade-tolerant plants need 2-4 hours. Planning placement before final assembly saves time and frustration later. Consider water access and proximity to garden infrastructure like hoses or irrigation systems.

Common Mistakes to Avoid
The most frequent error when building planter boxes is using treated lumber for edible gardens. Pressure-treated wood contains chemicals that can leach into soil and accumulate in vegetables over time. Always specify untreated wood when purchasing materials, and verify this with your supplier. Many people mistakenly assume all lumber at hardware stores is safe for food gardens—it isn’t.
Another common mistake is inadequate drainage. Insufficient drainage holes cause water accumulation, promoting root rot and fungal diseases. Aim for at least one ¾-inch hole per 2 square feet of box bottom. If you only drill two holes in a 4×8 box, water will accumulate in areas far from drainage points.
Over-filling your planter box is another frequent error. Many beginners fill boxes with pure soil, which compacts over time and drains poorly. Use the layered approach described above: gravel, fabric, and soil mixture. This ensures proper aeration and prevents the brick-like compaction that prevents water and root penetration.
Skipping the landscape fabric step causes premature wood deterioration. Soil contact accelerates rot, even in naturally rot-resistant cedar. Fabric acts as a moisture barrier and extends wood life by 5+ years. This small investment (typically $5-10) pays major dividends in longevity.
Key Takeaways
-
Budget-friendly lumber: Untreated pine costs $30-50 for a complete basic planter box, making DIY construction significantly cheaper than retail options.
-
Cedar longevity: Investing $80-120 in cedar provides 10-15 year lifespan compared to pine’s 3-5 years, offering better long-term value despite higher initial cost.
-
Landscape fabric essential: Adding $5-10 of landscape fabric dramatically extends wood life and prevents soil erosion, making it a must-include component.
-
Proper drainage critical: Multiple drainage holes and layered soil composition prevent water accumulation, fungal disease, and root rot that destroy plants and deteriorate wood.
-
Reclaimed wood option: Free or cheap reclaimed wood sources provide maximum budget savings for environmentally conscious gardeners willing to invest sourcing time.
Frequently Asked Questions about Build Planter Box Wood DIY Garden Cheap
Q: What is the best wood for building a planter box on a budget?
A: Untreated cedar offers the best balance of cost ($25-35 per board) and durability (10-15 years). For absolute minimum budget, untreated pine costs $8-12 per board but lasts only 3-5 years. Reclaimed wood is free but requires sourcing time. Choose cedar if you prioritize longevity; choose pine if initial cost is the primary concern. Always avoid treated lumber for edible gardens due to chemical leaching risks.
Q: How much does it cost to build planter box wood DIY garden cheap?
A: A basic 4×8 foot planter box costs $30-50 with untreated pine, $80-120 with cedar, or free to $10 with reclaimed wood. These prices include boards, screws, and basic hardware but exclude optional finishing materials like stain or landscape fabric. Adding landscape fabric costs $5-10 extra. Total project time ranges from 2-4 hours for beginners. Budget an additional $50-100 for quality soil and amendments.
Q: Should I treat the wood in my planter box?
A: Never treat the interior of food-producing planter boxes—chemicals can accumulate in edible plants. For exterior decoration, water-based stains or sealants are safe and improve appearance without toxic concerns. Untreated wood naturally develops attractive patina over time. If using untreated pine in wet climates, reapply water-based sealant every 2-3 years to extend lifespan. Cedar’s natural oils provide sufficient protection without additional treatment.
Q: How deep should a planter box be?
A: Most vegetables require 12-18 inches of soil depth for healthy root development. Shallow-rooted plants like lettuce, spinach, and herbs need only 8-10 inches. Root vegetables like carrots and potatoes require 14-18 inches minimum. Deeper boxes retain moisture better in dry climates but are heavier and require more soil. Standard 12-inch depth accommodates most vegetables economically.
Q: Can I use treated wood in planter boxes?
A: Avoid pressure-treated lumber for food gardens—chemical preservatives like copper compounds can leach into soil and accumulate in edible plants, particularly with acidic soils. Treated wood is acceptable for ornamental-only boxes where food isn’t grown. If using older treated wood containing arsenic, absolutely avoid food production. Always specify untreated wood when ordering materials, and visually inspect for color consistency that indicates treatment.
Conclusion
Building your own wooden planter boxes is one of the most satisfying and economical gardening investments you can make. When you build planter box wood DIY garden cheap, you’ll save money while creating custom growing spaces perfectly suited to your needs and aesthetic preferences. Whether you choose budget-friendly pine or invest in durable cedar, the process remains straightforward and accessible to gardeners of all skill levels. Start with one box, master the technique, and expand your garden systematically over time. Your plants will thrive, your budget will thank you, and you’ll enjoy the pride of having created something with your own hands. Begin gathering materials today and transform your outdoor space into a productive, beautiful garden.
Recommended Products on Amazon
As an Amazon Associate I earn from qualifying purchases.