How to tile a kitchen floor yourself
Tile Kitchen Floor DIY Ceramic Beginner: Complete Guide for 2025
Learning how to tile kitchen floor DIY ceramic beginner projects is one of the most rewarding home improvement tasks you can tackle. Whether you’re looking to refresh your kitchen’s appearance or increase your home’s value, installing ceramic tiles yourself can save thousands of dollars in professional labor costs. This comprehensive guide will walk you through every step of the process, from preparation to finishing touches, ensuring that even first-time DIYers can achieve professional-looking results. With the right tools, materials, and knowledge, you’ll transform your kitchen floor into a stunning focal point that you can be proud of. Let’s dive into the world of tile installation and discover how accessible this project truly is.
Table of Contents
- Why Tile Kitchen Floor DIY Ceramic Beginner Matters
- Step-by-Step Tile Kitchen Floor DIY Ceramic Beginner Guide
- Best Tile Kitchen Floor DIY Ceramic Beginner Options
- Pro Tips for Tile Kitchen Floor DIY Ceramic Beginner
- Common Mistakes to Avoid
- Key Takeaways
- Frequently Asked Questions About Tile Kitchen Floor DIY Ceramic Beginner
- Conclusion
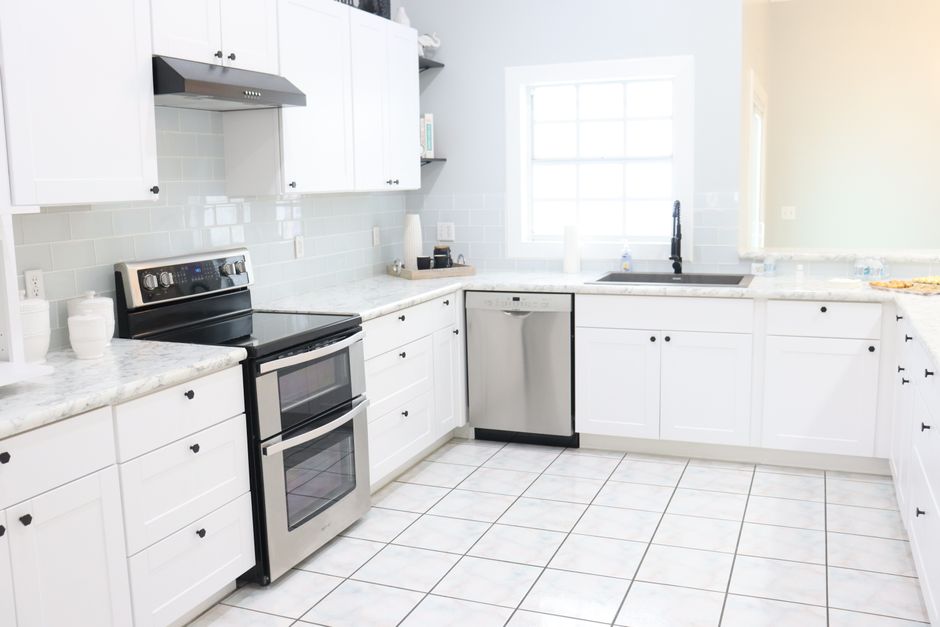
Why Tile Kitchen Floor DIY Ceramic Beginner Matters
Undertaking a tile kitchen floor DIY ceramic beginner project offers numerous advantages beyond simple cost savings. Ceramic tiles are incredibly durable, lasting 10-15 years or more with proper installation and maintenance, making them an excellent long-term investment for your kitchen space. They’re resistant to moisture, stains, and scratches, which are critical factors in kitchen environments where spills and foot traffic are inevitable occurrences.
The aesthetic flexibility of ceramic tiles cannot be overstated. Available in countless colors, patterns, and finishes, ceramic tiles allow you to express your personal style and create a kitchen that reflects your design vision. From sleek modern patterns to rustic farmhouse styles, the design possibilities are virtually limitless when you explore the ceramic tile market.
Beyond aesthetics and durability, learning to tile kitchen floor DIY ceramic beginner style empowers you with a valuable skill that increases your home’s property value. Real estate experts consistently note that updated kitchen flooring significantly impacts buyer perception and home valuation, often returning 50-80% of the renovation cost. Furthermore, completing this project yourself creates a sense of accomplishment and mastery that enhances your confidence for tackling future home improvement projects.
Ceramic tiles also offer superior hygiene benefits compared to other flooring options. Their non-porous surface prevents bacteria and allergen accumulation, making them ideal for kitchens where food preparation occurs daily. This practical advantage, combined with their easy cleaning requirements, makes ceramic tiles a smart choice for health-conscious homeowners.

Step-by-Step Tile Kitchen Floor DIY Ceramic Beginner Guide
Preparation Phase
Before you begin any actual installation work, proper preparation is absolutely crucial to your project’s success. Start by removing all kitchen appliances, cabinets, and furniture from the workspace, ensuring you have a completely clear floor to work with. Remove existing flooring carefully—whether it’s old tile, hardwood, or linoleum—using appropriate tools like pry bars and chisels, wearing safety gear throughout the process.
Once the floor is bare, inspect the subfloor for damage, rot, or unevenness. If you’re working over concrete, check for cracks and moisture issues by performing a moisture test with plastic sheeting. Sand down any high spots and fill low areas with self-leveling compound to create a perfectly flat surface, since proper substrate preparation prevents future tile cracking and shifting.
Measuring and Planning
Accurate measurements are fundamental to successful tile kitchen floor DIY ceramic beginner installations. Measure your kitchen floor dimensions carefully, accounting for all alcoves, angles, and irregularities. Calculate the total square footage and add 10% extra tiles to account for breakage, cutting, and future repairs.
Plan your layout to minimize visible cuts and ensure balanced tile placement. Find the center point of your room by snapping chalk lines along the midpoint of opposite walls. This centering technique ensures that edge tiles on opposite sides remain the same width, creating a professional appearance. Dry-lay tiles before starting to see exactly how your pattern will look and adjust accordingly.
Gathering Materials and Tools
You’ll need quality materials and proper tools to achieve professional results. Essential materials include thin-set mortar, grout, ceramic tiles, and grout sealer. Additionally, gather all necessary tools: a notched trowel, grout float, tile cutter or wet saw, spacers, sponges, buckets, and safety equipment including gloves and eye protection.
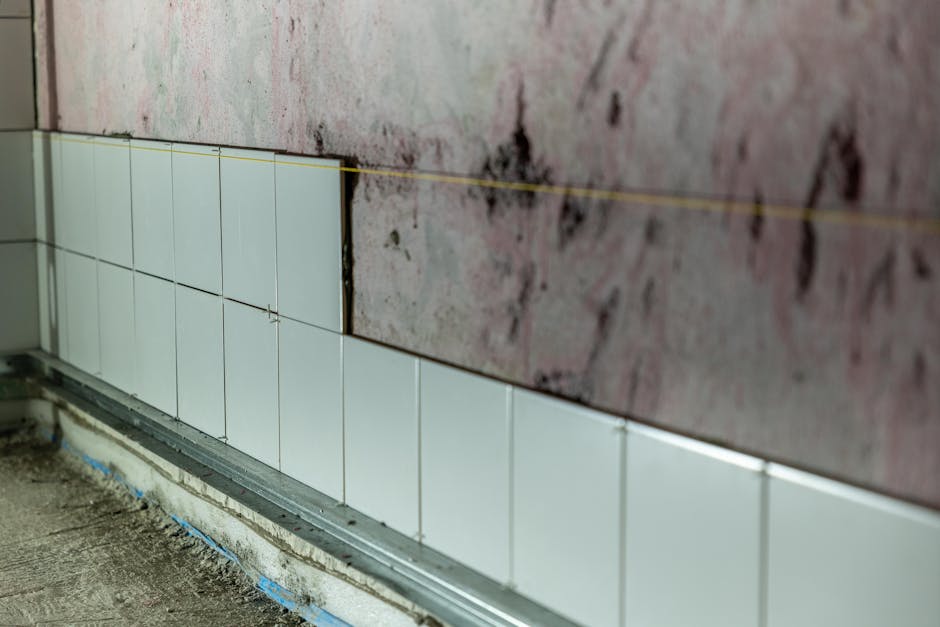
Application of Thin-Set Mortar
Start by mixing thin-set mortar according to manufacturer instructions, achieving a consistency similar to peanut butter. Using your notched trowel at a 45-degree angle, spread mortar across a 3-4 square foot section of the subfloor. The notched trowel creates ridges that provide better tile adhesion and allow proper mortar coverage underneath each tile.
Place your first tile at the center point, pressing firmly and twisting slightly to ensure proper seating in the mortar. Insert tile spacers on all sides to maintain consistent grout lines, typically 1/8 to 1/4 inch depending on your desired look. Continue this process, row by row, checking frequently with a level to ensure tiles remain even and flush.
Cutting Tiles
You’ll inevitably need to cut tiles to fit edges, corners, and obstacles like sink bases. For simple straight cuts, a manual tile cutter works well and is affordable. For more complex cuts, angled cuts, or delicate work, a wet saw provides precision and safety. Always measure twice before cutting, and wear safety glasses since tile shards can fly unexpectedly.
Grouting Process
Allow the thin-set mortar to cure for 24 hours before beginning the grouting process. Mix grout to a peanut butter-like consistency, then apply it diagonally across tiles using your grout float. Force grout deep into joints, ensuring complete filling without voids or air pockets that could cause future cracking.
After 15-20 minutes, when the grout becomes slightly firm, use a damp sponge to clean excess grout from tile surfaces. Rinse your sponge frequently and use gentle circular motions to avoid pulling grout from the joints. Allow grout to cure for 48-72 hours before allowing foot traffic or exposing the floor to water.
Best Tile Kitchen Floor DIY Ceramic Beginner Options
Glazed Ceramic Tiles
Glazed ceramic tiles represent the most popular choice for tile kitchen floor DIY ceramic beginner projects due to their versatility and affordability. These tiles feature a protective glass-like coating that provides durability, moisture resistance, and easy cleaning. Available in virtually unlimited colors and patterns, glazed ceramics work with any kitchen design aesthetic from contemporary to traditional.
The main advantage of glazed ceramic tiles is their non-porous surface, which prevents bacteria growth and moisture penetration. They’re generally priced between $1-8 per square foot, making them budget-friendly for larger projects. Their durability means you won’t need replacement for 10-15 years, providing excellent long-term value for your investment.
Porcelain Ceramic Tiles
Porcelain ceramic tiles are denser and more durable than standard glazed ceramics, making them ideal for high-traffic kitchen areas. While slightly more expensive at $3-15 per square foot, porcelain tiles offer superior moisture resistance and won’t chip or crack as easily as standard ceramics. They’re particularly beneficial if your kitchen experiences heavy traffic or moisture exposure.
Porcelain tiles accept stains and scratches less readily than ceramics, maintaining their appearance longer. They’re available in realistic wood and stone looks that provide designer aesthetics without the maintenance requirements of natural materials. Many homeowners choose porcelain for kitchens with kids and pets due to their superior durability.
Textured and Patterned Options
For those seeking visual interest and unique design elements, textured and patterned ceramic tiles offer endless creative possibilities. Subway tiles, hexagonal patterns, and hand-painted designs can transform your kitchen into a distinctive space that reflects your personality. These styles work particularly well in farmhouse, Mediterranean, or eclectic kitchen designs.
Textured tiles provide the added benefit of slip resistance, which is important in kitchens where spills occasionally occur. Patterned tiles can create focal points or accent areas, drawing the eye to specific kitchen zones. When selecting textured options, ensure they’re still easy to clean and maintain for practical kitchen functionality.

Pro Tips for Tile Kitchen Floor DIY Ceramic Beginner
Invest in Quality Tools
Using professional-grade tools makes tile kitchen floor DIY ceramic beginner projects significantly easier and produces better results. A wet saw is invaluable for making accurate cuts, while a high-quality notched trowel ensures proper mortar application. Quality tools reduce frustration, save time, and help prevent expensive mistakes that require rework.
Don’t skimp on safety equipment either. Proper eye protection, dust masks, and work gloves protect you throughout the installation process. When wet sawing tiles, always follow manufacturer safety instructions and never force tiles through the blade.
Maintain Consistent Grout Lines
Consistent, evenly-spaced grout lines create a professional appearance that elevates your entire installation. Use tile spacers religiously—don’t eyeball spacing as it appears uneven to viewers even if measurements are technically correct. Quarter-inch spacers are standard for most ceramic tile projects and work well for beginners.
Consistency in grout line width directly impacts visual perception of the installation’s quality. Even slight variations become glaringly obvious when viewed from different angles or under various lighting conditions. Taking time to maintain perfect spacing throughout installation pays dividends in the final appearance.
Allow Proper Curing Time
Rushing the curing process is one of the most common reasons tile installations fail. Thin-set mortar requires 24 hours to cure properly before grouting, and grout needs 48-72 hours before water exposure or heavy foot traffic. Don’t be tempted to speed this process as shortcuts create loose tiles, cracking grout, and failed installations requiring expensive repairs.
Create a schedule before beginning and factor in curing time so you’re not tempted to rush. Keeping the cured area protected from foot traffic during the hardening process ensures proper adhesion and durability. Plan your project timeline realistically to accommodate these essential waiting periods.
Protect Your Grout
Once your grout has properly cured, apply a quality grout sealer to protect against stains, moisture, and mold growth. Unsealed grout is porous and absorbs liquids that can stain and weaken the grout over time. Annual sealer reapplication maintains maximum protection for your investment.
Different grout types require different sealer applications—penetrating sealers work for most cementitious grouts while membrane-forming sealers provide additional water resistance. Read your grout manufacturer’s recommendations to select the appropriate sealer for your specific grout type.

Common Mistakes to Avoid
One of the most frequent errors beginner tile installers make is skipping proper subfloor preparation. Uneven or damaged subfloors cause tiles to settle unevenly, creating lip hazards where tiles meet and increasing crack risk. Always inspect and correct subfloor issues before beginning tile installation.
Insufficient mortar coverage beneath tiles is another common problem. Many DIYers apply mortar too thinly, creating voids that reduce tile support and cause cracking. Proper mortar application should create ridges through the notched trowel, ensuring complete coverage when tiles are seated.
Failing to maintain proper spacing between tiles is visually obvious and indicates amateur installation. Using spacers isn’t optional—they’re essential for professional results. Additionally, applying grout too early before mortar properly cures weakens the installation and causes tile movement or failure.
Ignoring moisture concerns in kitchen floors leads to long-term problems beneath the surface. Ensure proper drainage and moisture barriers, particularly if your kitchen is below-grade or experiences high humidity. Moisture-related problems develop slowly but prove expensive to fix once they manifest as mold, warping, or structural damage.
Key Takeaways
-
Proper preparation is essential—remove existing flooring, inspect subfloors, and correct any unevenness before beginning tile installation for a professional result.
-
Accurate planning prevents waste—measure carefully, plan your layout to minimize cuts, and dry-lay tiles to visualize the final appearance before applying mortar.
-
Quality tools and materials matter—invest in a wet saw, proper trowels, spacers, and quality thin-set mortar and grout for professional-quality results.
-
Maintain consistency throughout—use spacers religiously, apply mortar evenly, and ensure level tile placement across the entire floor for a polished appearance.
-
Allow proper curing time—don’t rush the process; allow 24 hours for mortar to cure and 48-72 hours for grout before exposing floors to water or traffic.
Frequently Asked Questions About Tile Kitchen Floor DIY Ceramic Beginner
Q: What is the best tile kitchen floor DIY ceramic beginner approach for someone with no experience?
A: Start with glazed ceramic tiles in neutral colors with a simple grid pattern—they’re forgiving and hide minor imperfections better than darker or patterned tiles. A wet saw is invaluable for beginners as it reduces cutting frustration and produces cleaner results. Take your time with layout planning and don’t rush curing periods, as these two factors most significantly impact beginner success rates.
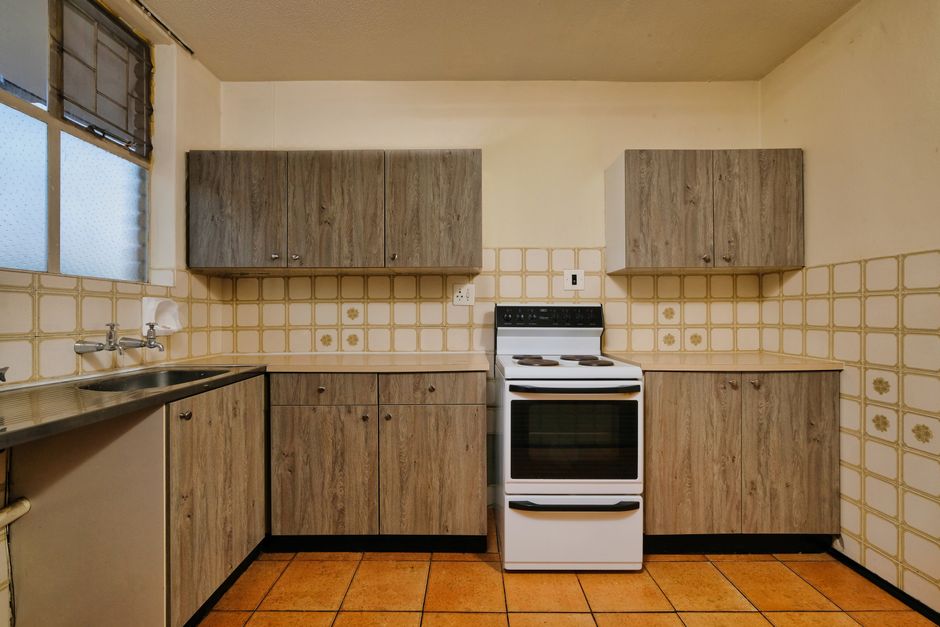
Q: How do I use tile kitchen floor DIY ceramic beginner products if I have existing tile I’m replacing?
A: Carefully remove old tiles using a pry bar and chisel, wearing eye protection and a dust mask to protect against debris and dust. Clean the subfloor completely, removing all old mortar and grout residue. Inspect for damage and level the surface using self-leveling compound before applying new tiles following standard installation procedures.
Q: How long does a tile kitchen floor DIY ceramic beginner installation typically take?
A: Most kitchen floors require 2-4 days of actual work spread over 3-5 weeks when accounting for curing time. Preparation typically takes 1-2 days, installation takes 2-3 days depending on kitchen size, and curing requires 3-5 weeks before the floor is fully usable. Planning your project timeline realistically prevents frustration and rushing, which compromises quality.
Q: What’s the most cost-effective approach to tile kitchen floor DIY ceramic beginner projects?
A: Choose standard glazed ceramic tiles in common sizes, which are less expensive than specialty options. Simple grid patterns require fewer cuts than complex designs, reducing waste and labor. Purchasing tiles from discount home improvement stores or online retailers can save 20-40% compared to premium tile showrooms while maintaining quality.
Q: Can I install ceramic tile over existing linoleum for a tile kitchen floor DIY ceramic beginner project?
A: Not recommended—linoleum can shift and move beneath tiles, causing cracking and failure. Always remove existing flooring completely and work directly on the subfloor. While removal adds extra work, it ensures a stable base and prevents future problems that would require expensive repairs or complete reinstallation.
Conclusion
Learning to tile kitchen floor DIY ceramic beginner style is an achievable goal that transforms your kitchen while building valuable skills. With proper preparation, quality materials, and patience through the curing process, you’ll create a beautiful, durable floor that serves your kitchen for years to come. Take your time with planning and layout, invest in essential tools like a wet saw, and never rush through curing periods—these three factors determine success more than any others. Your newly tiled kitchen floor will be a source of pride and an excellent return on your investment, both financially and personally. Start your kitchen transformation today and discover the satisfaction of completing this rewarding home improvement project yourself!
Recommended Products on Amazon
As an Amazon Associate I earn from qualifying purchases.