How to replace a bathroom floor yourself
Replace Bathroom Floor Tile Vinyl DIY: The Ultimate Guide for Success
Learning how to replace bathroom floor tile vinyl DIY is one of the most rewarding home improvement projects you can tackle yourself. Whether your bathroom floor has outdated tiles, stubborn stains, or visible damage, a complete floor replacement can transform your space while saving you hundreds of dollars in labor costs. This comprehensive guide will walk you through every step of the process, from preparation to installation, ensuring you have the knowledge and confidence to complete this project successfully. By the end of this tutorial, you’ll understand the tools you need, the best materials available, and expert techniques that professional installers use. Let’s dive into the world of DIY bathroom flooring and discover how empowering it can be to create the bathroom of your dreams.
Table of Contents
- Why Replace Bathroom Floor Tile Vinyl DIY Matters
- Step-by-Step Replace Bathroom Floor Tile Vinyl DIY Guide
- Best Replace Bathroom Floor Tile Vinyl DIY Options
- Pro Tips for Replace Bathroom Floor Tile Vinyl DIY
- Common Mistakes to Avoid
- Key Takeaways
- Frequently Asked Questions About Replace Bathroom Floor Tile Vinyl DIY
- Conclusion
Why Replace Bathroom Floor Tile Vinyl DIY Matters
Replacing your bathroom floor is more than just a cosmetic upgrade—it’s an investment in your home’s functionality and value. When you choose to replace bathroom floor tile vinyl DIY, you’re taking control of a project that can dramatically improve your daily bathroom experience. Old, damaged, or outdated flooring can make your bathroom feel tired and uninviting, while new flooring instantly modernizes the space and makes it feel fresh and clean.
The financial benefits of DIY installation cannot be overstated. Professional tile installers typically charge between $8 to $25 per square foot for labor alone, which can quickly add up for even a small bathroom. By handling the installation yourself, you can redirect those savings toward higher-quality materials or other home improvements. This is particularly significant in bathrooms, where the cost of professional installation often exceeds the cost of the materials themselves.
Beyond cost savings, completing a replace bathroom floor tile vinyl DIY project builds valuable skills you can apply to future home improvement endeavors. You’ll gain hands-on experience with essential tools, understand proper installation techniques, and develop problem-solving abilities that make subsequent projects easier. Additionally, a newly installed floor can increase your home’s resale value and appeal to potential buyers who appreciate updated bathrooms.
Bathroom floors endure constant moisture, temperature fluctuations, and heavy foot traffic, making regular maintenance and eventual replacement necessary. When you tackle this project yourself, you can ensure the job is done right, with attention to detail that prioritizes your home’s longevity. The sense of accomplishment that comes from completing a professional-looking bathroom floor installation is invaluable and often inspires homeowners to take on additional DIY projects.

Step-by-Step Replace Bathroom Floor Tile Vinyl DIY Guide
Preparation and Planning
Before you begin any actual work, spend time assessing your current bathroom floor and planning your approach. Remove all items from your bathroom, including bath mats, trash cans, and shower supplies, to create a completely clear workspace. Take measurements of your bathroom floor, accounting for all corners, nooks, and around the toilet base to calculate the exact square footage you’ll need to cover.
Inspect your existing floor for damage, water damage, or structural issues that might need repair before installation. If you notice soft spots in the subfloor or signs of water damage, these must be addressed first to prevent problems with your new flooring. Check that your subfloor is level using a four-foot level, as an uneven base can cause problems with tile alignment and vinyl sealing.
Determine whether you need to remove your existing flooring or if you can install over it. In most cases, you’ll want to remove old tile, vinyl, or other flooring materials down to the subfloor for the best results. This extra step ensures proper adhesion and eliminates lumps or ridges that could telegraph through your new floor.
Removing Existing Flooring
Start by removing baseboards if they extend around your bathroom perimeter using a pry bar and hammer. Work carefully to avoid damaging the walls, as you may want to reinstall these baseboards after your new floor is complete. Label the back of each baseboard piece so you can reinstall them in their original locations.
For tile removal, the process requires patience and the right tools. Use a cold chisel and hammer to break tiles into manageable pieces, working from corner to corner.
If you have a large area to cover, consider renting a power chisel, which will speed up the process significantly and reduce physical strain.
Once tiles are removed, scrape away the old adhesive and mortar using a floor scraper or putty knife. This step is crucial because any remaining debris will create an uneven surface for your new flooring. Continue scraping until you’ve reached bare subfloor, which typically consists of plywood, cement board, or concrete.
Subfloor Preparation
After removing all old flooring material, thoroughly clean your subfloor with a vacuum and damp cloth to remove dust and debris. Inspect the exposed subfloor for damage, rot, or structural issues that might compromise your new floor. If you find soft spots or water damage, cut out the affected area and replace it with new plywood or cement board.
For bathrooms, using cement board as your underlayment is highly recommended due to its moisture resistance and durability. Cut cement board sheets to fit your space using a utility knife and straightedge, scoring the surface and snapping along the line. Secure cement board with corrosion-resistant screws spaced approximately 8 inches apart, creating a solid, moisture-resistant foundation.
Apply waterproofing membrane over seams and around vulnerable areas like the toilet base and shower threshold. This extra layer of protection ensures water doesn’t penetrate to your subfloor, which would cause costly damage over time. Allow any applied membranes to cure according to manufacturer instructions before proceeding.
Choosing Your Layout
Plan your tile or vinyl layout to minimize cutting and create a balanced appearance. Start by finding the center point of your bathroom and work outward, adjusting your starting line so cut pieces along the edges are similar widths. For bathrooms, it’s often best to avoid extremely narrow slivers of tile along walls, as these look less professional and are more prone to cracking.
Mark your layout lines using a chalk line, creating a grid that guides your installation. These lines ensure rows and columns remain straight throughout the project. Double-check your layout by doing a dry run, placing tiles without adhesive to confirm everything fits as planned.
Installing Your New Floor
Begin installing tiles or vinyl planks according to your layout marks, starting at the center point and working toward walls. Apply thinset mortar (for tile) or adhesive (for vinyl) in small sections using a notched trowel held at a 45-degree angle.
This creates proper ridges that help achieve full coverage and proper bonding.
Press each tile or plank firmly into the adhesive, using spacers between tiles to maintain consistent grout lines if you’re installing tile. Check frequently with a level to ensure surfaces remain even as you work. Continue this process, working section by section, until you’ve covered your entire floor.
For tile installation, allow the thinset to cure for 24 hours before grouting. Mix grout according to package directions, achieving a consistency similar to peanut butter. Apply grout with a grout float, holding it at a 45-degree angle and pushing grout into joints from multiple directions.
Finishing Touches
After grouting, wipe excess grout from tile surfaces using a damp sponge, rinsing frequently and wringing well to avoid removing grout from joints. Allow grout to cure for the time specified by the manufacturer—typically 24 to 72 hours—before exposing the floor to water. Once cured, apply grout sealer to protect against moisture and staining, particularly important in bathrooms.
Reinstall baseboards, caulking the joint between baseboards and new floor with silicone caulk rather than grout for flexibility and water resistance. Allow all caulk and finishes to cure completely before returning bathroom furniture and rugs to the space.

Best Replace Bathroom Floor Tile Vinyl DIY Options
Ceramic and Porcelain Tile
Ceramic and porcelain tiles remain popular choices for bathroom floors due to their durability, water resistance, and aesthetic versatility. Ceramic tiles are made from clay fired at high temperatures, creating a hard surface suitable for bathrooms. Porcelain is denser and more durable than ceramic, making it an excellent choice for high-traffic bathrooms or households with heavy use patterns.
These tiles come in countless colors, patterns, and finishes, allowing you to create a bathroom floor that matches your design aesthetic perfectly. From sleek modern designs to classic patterns, tile offers unmatched design flexibility. Textured surfaces provide slip resistance, which is important for safe bathroom flooring, while glazed finishes are easier to clean and maintain.
The installation process for tile requires more skill than some alternatives, but it’s absolutely achievable for determined DIYers. Tiles typically last 20+ years with proper installation and maintenance, making them a long-term investment in your home. The main disadvantage is that grout lines require regular sealing and can harbor mold or mildew if not properly maintained.
These professional-grade tiles offer excellent durability and a modern aesthetic perfect for contemporary bathrooms. MSI tiles are known for consistent quality and realistic stone appearances that elevate any bathroom design.
Vinyl Plank Flooring
Luxury vinyl plank (LVP) flooring has revolutionized the DIY bathroom flooring market by combining ease of installation with impressive durability and water resistance. Vinyl planks feature realistic wood or stone textures, allowing you to achieve high-end looks at fraction of the cost. Installation is significantly faster and easier than tile, making it ideal for first-time DIYers.
Most vinyl planks use click-lock systems that don’t require adhesive, simply interlocking at edges and corners. This design allows for quick, straightforward installation without messy adhesives or long curing times. You can walk on vinyl floors immediately after installation, enabling you to use your bathroom right away.
Vinyl is inherently waterproof, making it an excellent choice for moisture-prone bathrooms. However, ensure proper underlayment installation to prevent water from penetrating to your subfloor. Vinyl flooring typically lasts 10-20 years depending on quality and maintenance, and it’s relatively easy to repair by replacing individual planks if damaged.
This premium vinyl plank offers superior durability, enhanced water resistance, and authentic wood appearance that rivals real hardwood at a fraction of the cost and with superior moisture performance.
Sheet Vinyl Flooring
Sheet vinyl remains one of the most budget-friendly and practical bathroom flooring options, particularly for smaller spaces. It comes in large rolls that minimize seams and can be custom-cut to fit your bathroom precisely. Sheet vinyl installation is relatively straightforward, requiring only basic tools and moderate DIY experience.
The main advantage of sheet vinyl is its seamless appearance when properly installed, creating a clean, easy-to-clean surface. Water cannot penetrate seams since properly installed sheet vinyl has minimal or no seams in typical bathroom spaces. Cleanup is simple—just sweep and mop regularly to maintain a beautiful appearance.
Sheet vinyl typically lasts 10-15 years and requires less maintenance than grout-based tile options. It’s comfortable underfoot due to inherent softness and offers excellent slip resistance, important for safety in bathrooms. The primary disadvantage is that it can be torn or punctured by sharp objects, and repairs are more difficult than with plank systems.
This high-quality sheet vinyl offers realistic wood appearances, superior durability, and excellent water resistance with a protective wear layer that stands up to bathroom moisture and daily wear.

Pro Tips for Replace Bathroom Floor Tile Vinyl DIY
Invest in Quality Tools
Having proper tools makes the entire project easier and produces better results. A quality notched trowel, essential for applying consistent adhesive layers, prevents common problems like hollow spots and improper bonding. A reliable level ensures your floor remains even, which is critical for proper water drainage and longevity.
For cutting vinyl or tile, a quality power saw saves time and produces clean, professional cuts. Renting specialized tile saws is often worthwhile for significant tile work, as these produce perfect cuts with minimal chipping or breakage.
Consider renting a power scraper or oscillating tool for removing existing flooring, as these can reduce labor time from hours to minutes. Working smarter rather than harder means less physical strain and more time to focus on quality installation work. Quality tools also last for future projects, making them worthwhile investments for any homeowner.
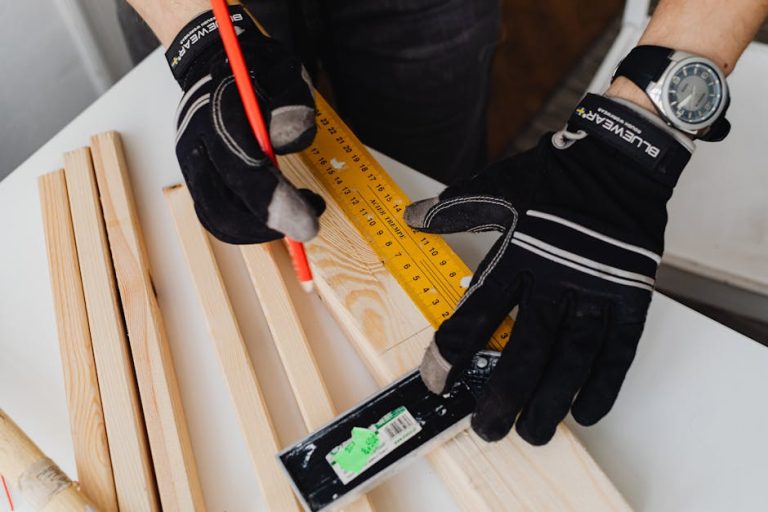
Measure Twice, Cut Once
Accurate measurements prevent costly mistakes and material waste during installation. Measure your bathroom floor multiple times from different reference points, as some bathrooms aren’t perfectly square. Use these measurements to create a detailed layout plan before purchasing materials.
When cutting tiles or vinyl, always dry-fit pieces to ensure they fit properly before adhesive application. This practice catches measurement errors before they result in permanent installation mistakes. For complex cuts around toilet bases or irregular wall features, create cardboard templates that you can transfer to your flooring material.
Allow Proper Curing Time
Rushing the curing process is one of the most common mistakes that compromises floor longevity and appearance. Thinset mortar, adhesives, grout, and sealers all require specific curing times that shouldn’t be shortened regardless of how anxious you are to use your bathroom. Read manufacturer instructions carefully and follow their recommended timelines exactly.
Most tile projects require 24-48 hours of curing before grouting and an additional 24-72 hours before water exposure. Vinyl floors may cure more quickly, often allowing use within 24 hours, but confirming with your specific product is essential. Patience in this phase prevents problems like loose tiles, failed grout lines, or water damage that could undo all your hard work.
Use Proper Waterproofing
Water is the enemy of bathroom floors, so waterproofing should never be overlooked or underestimated. Apply waterproofing membrane over your entire cement board base, paying special attention to seams and vulnerable areas like corners and around the toilet flange.
For tile applications, consider waterproofing wall areas to the full height of shower enclosures, not just the floor. Some professionals use waterproofing membranes under the entire tile surface, creating a continuous moisture barrier. This extra step prevents water from migrating to your subfloor through grout lines and micro-fractures.

Common Mistakes to Avoid
Inadequate Subfloor Preparation
Many DIYers rush through subfloor preparation, the most critical step in any flooring project. An uneven, dirty, or damaged subfloor will cause problems that compound throughout the installation and result in premature failure. Take time to completely remove old flooring, thoroughly clean surfaces, and repair any damage before proceeding.
Installing flooring over existing materials often seems to save time but typically causes problems later. New flooring installed over old flooring may show lumps or uneven patterns, and moisture can become trapped, causing deterioration. The small amount of extra time spent removing old flooring pays huge dividends in floor longevity and appearance.
Insufficient Adhesive Application
Applying too little adhesive or thinset is a leading cause of failed installations, as tiles or planks won’t bond properly without complete coverage. Always use enough adhesive to create consistent ridges when holding the trowel at 45 degrees. Press each piece firmly into place, ensuring the back comes into complete contact with the adhesive layer.
Hollow spots under tiles or planks are nearly invisible during installation but become obvious later as water seeps in and causes deterioration. Use the “back-butter” method where you also apply adhesive to the back of each tile before pressing it down, particularly important for larger tiles that need complete coverage.
Improper Spacing and Layout
Tiles or planks placed too close together or with inconsistent spacing look unprofessional and may buckle or crack as materials expand and contract with temperature and humidity changes. Use spacers consistently and double-check alignment frequently with a level. An hour spent on proper layout planning prevents days of problems during installation.
Improper layout that results in very narrow slivers of tile along walls looks amateurish and is structurally weak. Plan your layout to ensure cut pieces along edges are at least half-width, and adjust your starting point if needed. Professional-looking floors always appear balanced with similar-sized pieces around all edges.
Neglecting Grout Sealing
For tile installations, many DIYers apply grout and then neglect to seal it, allowing moisture to seep into grout lines and cause mold, mildew, and deterioration. Grout is porous and absorbs moisture, making sealing absolutely essential in bathrooms. Apply grout sealer according to manufacturer instructions, typically 48-72 hours after grout cures.
Proper sealing prevents water from penetrating your subfloor and protects against staining and discoloration. Re-seal grout every 1-2 years depending on bathroom usage and humidity levels. This simple maintenance task adds years of life to your grout lines and prevents expensive water damage.

Key Takeaways
-
Replace bathroom floor tile vinyl DIY projects save hundreds of dollars in labor costs while building valuable home improvement skills and confidence for future projects.
-
Proper subfloor preparation, including removal of existing materials and repair of any damage, is the most critical step determining long-term floor success and appearance.
-
Choosing between tile, vinyl plank, or sheet vinyl depends on your budget, design preferences, and willingness to invest time in more complex installations.
-
Using quality tools, investing time in planning and layout, and following manufacturer curing times ensures professional-quality results that last for decades.
-
Waterproofing, proper adhesive application, and grout sealing protect your investment and prevent costly water damage to your home’s structure.
Frequently Asked Questions About Replace Bathroom Floor Tile Vinyl DIY
Q: What is the best replace bathroom floor tile vinyl DIY method for beginners?
A: Luxury vinyl plank flooring is the best choice for beginners because it requires minimal tools, features click-lock installation requiring no adhesive, and allows immediate use. Installation typically takes one weekend for a standard bathroom, and mistakes are easily corrected by replacing individual planks. Sheet vinyl is another beginner-friendly option, though it requires more precise measuring and custom-cutting.
Q: How do I use replace bathroom floor tile vinyl DIY tools properly to achieve professional results?
A: Proper tool usage begins with understanding each tool’s purpose—notched trowels create consistent adhesive ridges, levels ensure surfaces remain even, and grout floats apply and finish grout properly. Always hold trowels at 45-degree angles for correct adhesive application, and press firmly on all pieces for complete adhesive contact. Practice on a small area first, and watch professional installation videos to see proper technique demonstrated by experienced installers before beginning your project.
Q: How long does replace bathroom floor tile vinyl DIY installation typically take?
A: Installation time depends on your chosen material and bathroom size. Vinyl plank flooring can be installed in 1-2 days for standard bathrooms, while sheet vinyl takes 1 day, and tile typically requires 2-3 days of work plus additional time for proper curing. Most of the time after installation is spent waiting for materials to cure rather than active installation work.
Q: What’s the cost difference between DIY and professional replace bathroom floor tile vinyl DIY installation?
A: Professional tile installation typically costs $8-25 per square foot in labor, while DIY only costs materials. A 50-square-foot bathroom floor could save $400-1,250 in labor costs by choosing DIY installation. Material costs are identical regardless of who performs installation, so savings directly relate to labor that you’re providing yourself.
Q: Can I install replace bathroom floor tile vinyl DIY over existing flooring, or must I remove old materials?
A: While some modern vinyl products can be installed over existing vinyl, it’s generally recommended to remove all old flooring down to the subfloor for best results. Existing materials can create uneven surfaces that cause problems with new installation, and moisture can become trapped underneath, causing deterioration. Complete removal ensures your new floor rests on a proper foundation and will last as long as possible.
Conclusion
Learning how to replace bathroom floor tile vinyl DIY empowers you to tackle one of the most impactful home improvement projects with confidence and skill. Whether you choose durable ceramic tile, convenient vinyl planks, or economical sheet vinyl, understanding proper installation techniques ensures a floor that looks beautiful and lasts for years. Throughout this guide, you’ve learned everything from subfloor preparation to finishing touches, common mistakes to avoid, and pro tips that separate amateur from professional-looking results.
Your bathroom deserves to be a beautiful, functional space that you’re proud to showcase to guests and family members. By investing time in careful planning, proper preparation, and meticulous installation, you’ll create a floor that enhances your home’s value and your daily life. Don’t let the complexity of this project intimidate you—thousands of homeowners successfully complete bathroom floor installations every year, and you can too. Start gathering your materials, clear your calendar for a focused weekend project, and transform your bathroom into the space you’ve always wanted. Your future self will thank you for taking control of this important home improvement investment.
Recommended Products on Amazon
As an Amazon Associate I earn from qualifying purchases.