How to fix a broken cabinet door hinge
How to Fix Cabinet Door Hinge Broken Loose Repair: Complete Guide for Homeowners
Introduction
Learning how to fix cabinet door hinge broken loose repair is one of the most practical skills every homeowner should master. Cabinet door hinges are among the most frequently used hardware in your home, bearing the weight and stress of daily opening and closing. Over time, these essential components can become loose, broken, or misaligned, causing your cabinet doors to sag, swing unevenly, or fail to close properly. Rather than calling an expensive contractor or replacing entire cabinets, understanding the fundamentals of cabinet hinge repair can save you hundreds of dollars and restore your kitchen or bathroom to perfect working order. This comprehensive guide will walk you through every aspect of diagnosing, maintaining, and repairing cabinet door hinges, ensuring your cabinetry functions flawlessly for years to come.
Table of Contents
- Introduction
- Why Fix Cabinet Door Hinge Broken Loose Repair Matters
- Step-by-Step Guide to Fix Cabinet Door Hinge Broken Loose Repair
- Best Options for Fix Cabinet Door Hinge Broken Loose Repair
- Pro Tips for Cabinet Door Hinge Repair
- Common Mistakes to Avoid
- Key Takeaways
- Frequently Asked Questions About Fix Cabinet Door Hinge Broken Loose Repair
- Conclusion
Why Fix Cabinet Door Hinge Broken Loose Repair Matters
Cabinet door hinges are hardworking hardware components that often go unnoticed until they fail. These small metal brackets bear tremendous responsibility, supporting the weight of cabinet doors while allowing smooth, consistent movement. When hinges become loose or break, the consequences extend far beyond mere inconvenience. A sagging cabinet door can prevent proper closure, allowing dust, pests, and moisture to enter your storage spaces and potentially damage the contents inside.
Beyond functionality, broken hinges affect the aesthetic appeal of your home. Visible gaps, doors hanging at odd angles, or doors that slam shut unexpectedly create an impression of poor maintenance and neglect. This visual deterioration can impact your home’s overall appearance and potentially affect its resale value. Kitchen and bathroom cabinets are focal points in these spaces, and misaligned doors draw unwanted attention.
The financial implications of ignoring broken cabinet hinges are significant. Replacing entire cabinet doors or cabinet sets can cost hundreds or even thousands of dollars, depending on the quality and style of your cabinetry. In contrast, learning to fix cabinet door hinge broken loose repair typically requires only basic tools and inexpensive replacement parts. Many hinge issues can be resolved with a simple screwdriver, a few minutes of your time, and perhaps a new hinge if the existing one is damaged beyond repair. Furthermore, addressing hinge problems promptly prevents secondary damage to the cabinet frame itself, which could require more extensive repairs down the line.
Regular maintenance and prompt repair of cabinet hinges also extends the lifespan of your entire cabinet system. By keeping hinges functioning properly, you reduce stress on the cabinet frame, ensure even weight distribution, and maintain the structural integrity of your cabinetry. This proactive approach demonstrates the wisdom of addressing small problems before they become major ones.

Step-by-Step Guide to Fix Cabinet Door Hinge Broken Loose Repair
Identifying the Problem
Before you can fix cabinet door hinge broken loose repair issues, you must accurately diagnose what’s wrong. Start by opening and closing each cabinet door slowly, observing how it moves and where it makes contact with the cabinet frame. Look for visible gaps between the door and frame, noting whether they’re larger at the top or bottom. Listen for squeaking or grinding sounds, which indicate friction or wear. Gently push on the door edge while it’s closed—excessive movement indicates loose hinges. Inspect the hinges themselves for visible cracks, rust, or bending, and check whether the screws appear tight or loose.
Tools and Materials You’ll Need
Gather the essential tools before beginning any repair work. You’ll need a screwdriver set with both Phillips and flathead options, a power drill for efficiency with stubborn screws, a level to ensure proper alignment, and a flashlight to see into tight cabinet spaces. Keep a magnetic parts tray handy to organize small screws and prevent losing them. For repairs, have available a hinge adjustment wrench if your hinges require one, wood filler for stripped screw holes, sandpaper for smoothing surfaces, and replacement hinges that match your existing hardware.
Tightening Loose Hinges
The most common cabinet door problem involves loose screws rather than damaged hinges. Start by closing the cabinet door and examining where it meets the frame. If the door sags downward, the upper hinge’s screws have likely loosened. Using your screwdriver, carefully tighten each screw on both the hinge’s mounting plate and the plate attached to the door itself. Turn clockwise slowly, applying steady pressure to avoid stripping the screws. Don’t over-tighten, as this can strip the wood fibers or crack the hinge.
After tightening the visible screws, check if the door closes properly and aligns with the cabinet frame. If the door still doesn’t close correctly, the hinges may require adjustment rather than tightening. Many modern cabinet hinges feature adjustment screws that move the door forward, backward, or side-to-side without removing the door from the frame.
Adjusting Cabinet Door Hinges
Modern concealed hinges typically feature three adjustment mechanisms. The horizontal adjustment screw, usually located at the side of the hinge, moves the door left or right relative to the cabinet frame. The vertical adjustment screw, often positioned on the hinge body itself, moves the door up or down to correct sagging. The depth adjustment screw moves the door forward or backward relative to the cabinet frame face.
Begin with small adjustments, turning each screw only a quarter-turn and checking the result before making additional changes. Use a level to verify that the door aligns properly with the cabinet frame both horizontally and vertically. This methodical approach prevents over-adjustment and ensures precise positioning.
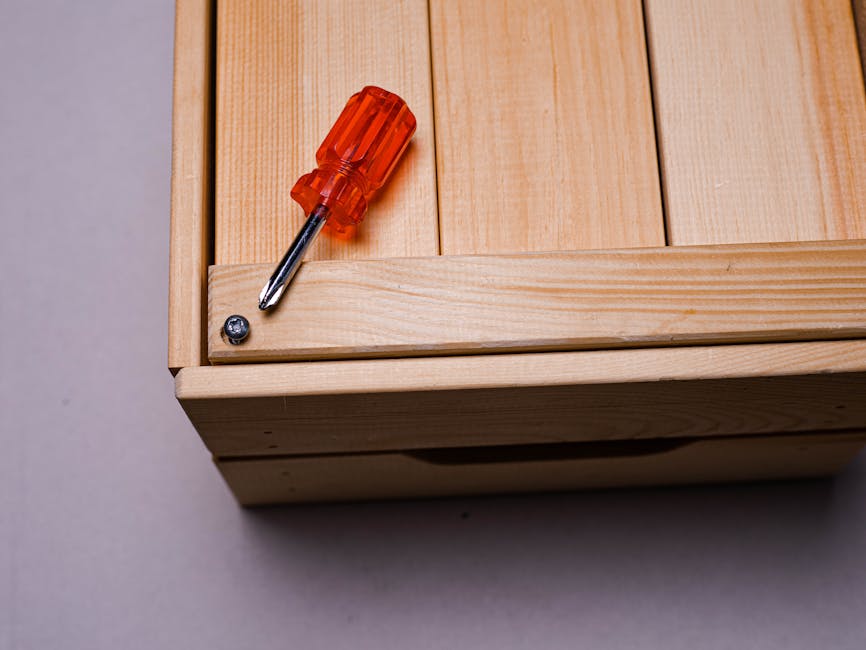
Replacing Screws in Stripped Holes
If screw holes have become enlarged or stripped, simply retightening won’t solve the problem. Remove the loose screw and examine the hole. If it’s slightly enlarged, try using a slightly larger diameter screw that matches the original length. If the hole is severely damaged, wrap one or two layers of thread seal tape around the original screw’s shaft to increase its diameter slightly, then reinstall it.
For heavily stripped holes, you may need to fill the hole before reinstalling the screw. Remove the hinge completely and clean the area. Fill the hole with wood filler, allow it to dry completely per the manufacturer’s instructions, then drill a new pilot hole and reinstall the hinge with a fresh screw.
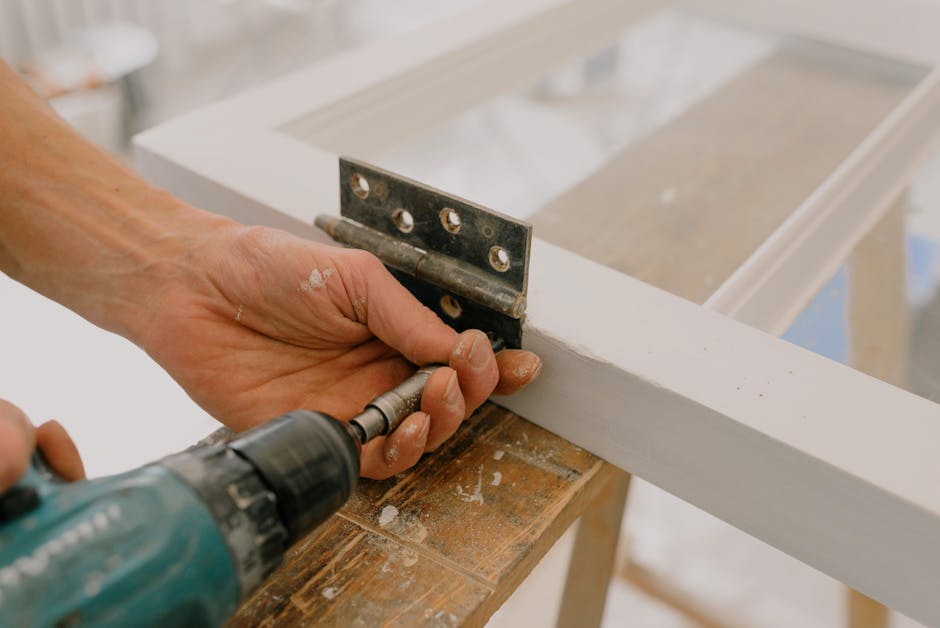
Replacing a Broken Hinge
When a hinge is cracked, bent, or severely corroded, replacement becomes necessary. Note the hinge type, size, and finish before purchasing a replacement to ensure compatibility. Most cabinet hinges are standard European 35mm cup hinges, but some specialty cabinets use different styles.
Close the cabinet door and remove all screws connecting the broken hinge to both the door and the cabinet frame. Carefully separate the hinge from the door. If the door is heavy, have someone support it during this process to prevent injury or damage. Note the position and orientation of the old hinge before removal.
Position the new hinge in the same location and orientation, installing the mounting screws into the existing holes. If the old screw holes don’t align perfectly with the new hinge, fill the old holes with wood filler first, allow them to dry, and drill new pilot holes for the replacement hinge. Install all screws hand-tight first, verify alignment with a level, then tighten completely.

Best Options for Fix Cabinet Door Hinge Broken Loose Repair
European Cup Hinges
European cup hinges, also called concealed hinges, represent the most common choice for modern cabinetry. These hinges feature a cup-shaped component that sits inside a drilled hole on the door’s interior edge, with the mounting plate screwed to the inside of the cabinet frame. This design keeps hinges hidden from view when the door is open, creating a clean, contemporary appearance. Cup hinges are adjustable in three directions, allowing fine-tuning of door position without removing the door. They’re available in various finishes including polished brass, chrome, and stainless steel, and in different opening angles from 90 to 175 degrees.
The primary advantage of cup hinges is their adjustability and refined appearance. They work well with frameless (European-style) cabinets and can handle doors of various weights. However, they require precise drilling of the cup hole during cabinet construction, making them less suitable for retrofitting onto older cabinets without the proper hole.
Butt Hinges
Butt hinges, the traditional choice for cabinetry, consist of two rectangular plates that overlap and pin together. These hinges mount to the edge of the door and the face of the cabinet frame, remaining visible even when the door is closed. While less contemporary in appearance than concealed hinges, butt hinges are incredibly durable and can support very heavy cabinet doors.
Butt hinges come in various sizes, from small 1-inch hinges for lightweight applications to substantial 4-inch hinges for heavy-duty use. Brass and steel construction options offer different durability and aesthetic characteristics. These hinges are particularly valuable for repairs because they work with most existing cabinet frames without requiring specialized drilling or holes.
Self-Closing Hinges
Self-closing hinges incorporate a spring mechanism that automatically closes the cabinet door after you release it. These hinges prevent doors from being left open accidentally, which is particularly valuable in kitchens where open cabinet doors can create safety hazards or appear untidy. Self-closing hinges come in both European concealed and traditional styles, though they’re somewhat more expensive than standard hinges due to their mechanical complexity.
The main drawback of self-closing hinges is their higher cost and the adjustment required to prevent slamming. However, for households with children or pets, or for those simply preferring automatic door closure, self-closing hinges offer exceptional functionality and peace of mind.
Pivot Hinges
Pivot hinges represent an excellent choice when traditional hinges don’t fit your cabinet design or when you need maximum adjustability. These hinges use a pivot point rather than a traditional pin, allowing wider door opening angles and smoother motion. Pivot hinges work particularly well for heavy doors or specialty cabinet applications.
Pivot hinges require different installation than cup hinges, with top and bottom mounting points that distribute the door’s weight across multiple support locations. This distribution makes pivot hinges ideal for tall cabinet doors or doors made from heavy materials like solid wood or glass.
Pro Tips for Cabinet Door Hinge Repair
Understanding industry secrets can dramatically improve your repair results and extend the life of your cabinet hinges. First, always check and tighten hinges at least once per year, even if they appear to be functioning correctly. This preventive maintenance catches developing problems before they become serious, keeping your cabinets in excellent condition year-round.
When working with screw holes that have become loose, apply thread-locking compound before reinstalling screws. This specialized adhesive prevents screws from loosening due to vibration and repeated opening and closing of the door. Allow the compound to cure for the recommended time before using the cabinet.
For sticky or squeaking hinges, apply a light machine oil or specialized hinge lubricant to the pivot points and moving parts. A few drops of lubricant can restore smooth operation and eliminate irritating squeaks. Avoid using WD-40 or similar penetrating oils, as these leave residue that attracts dust and dirt to your hinges.
When replacing hinges, consider upgrading to self-closing or soft-close models if your budget allows. These premium hinges not only function better but also enhance your kitchen’s overall feel and functionality. The quiet, controlled closing of soft-close hinges demonstrates quality craftsmanship and adds to your home’s perceived value.
Keep detailed notes about your hinge types, sizes, and finishes for future reference. Take photographs of your existing hinges before removing them, making it much easier to source matching replacements. Store these notes and photos in a home maintenance file or digital folder where you can easily access them years later.

Common Mistakes to Avoid
One critical error homeowners make involves tightening screws excessively, assuming that more pressure equals better results. Over-tightened screws strip the wood fibers surrounding the hole, actually making the screw looser and less effective over time. Apply steady, moderate pressure when tightening screws, stopping as soon as you feel solid resistance.
Another common mistake involves replacing only one hinge when both hinges require adjustment or repair. Cabinet doors depend on both hinges working in harmony, so if one hinge is failing, the other is probably stressed and failing too. Always inspect and service both hinges when addressing door problems, even if only one appears obviously broken.
Many people attempt to force cabinet doors closed when they’re misaligned, assuming that more pressure will help them fit. This approach damages both the door and cabinet frame, creating bigger problems. Instead, stop immediately and adjust the hinges properly to achieve correct alignment.
Failing to use the correct screw size or type represents another frequent mistake. Cabinet hinges require specific screws to function properly—using inappropriate fasteners can strip holes, damage hinges, or fail to hold the door securely. Always replace fasteners with exact matches to the originals.
Key Takeaways
- Loose screws cause the majority of cabinet door problems – Regular inspection and tightening prevent most hinge issues before they develop into serious problems
- Modern cabinet hinges are adjustable without door removal – Learn to use adjustment screws to fine-tune door alignment and positioning
- Different hinge types serve different purposes – Cup hinges work best for modern cabinetry, while butt hinges excel for heavy doors and traditional styles
- Preventive maintenance saves money and extends cabinet life – Regular inspections and lubrication keep hinges functioning properly for decades
- Professional-quality results require proper tools and techniques – Investing in quality tools and learning correct procedures ensures successful repairs
Frequently Asked Questions About Fix Cabinet Door Hinge Broken Loose Repair
Q: What is the best solution when I can’t tighten my cabinet door hinges because the screw holes are stripped?
A: When screw holes become enlarged or stripped, simply replacing the screw won’t solve the problem. Wrap one to two layers of thread seal tape around the screw shaft to increase its diameter, then reinstall it with the same screw hole. For severely stripped holes, remove the hinge completely and fill the hole with high-quality wood filler. Allow the filler to cure completely per manufacturer instructions, then drill a new pilot hole and reinstall the hinge with a fresh screw. This approach maintains the original hinge placement while creating a secure foundation for the fastener.
Q: How do I use the adjustment screws on my cabinet door hinges to fix misalignment issues?
A: Most modern concealed hinges feature three separate adjustment mechanisms: horizontal (left-right), vertical (up-down), and depth (forward-back) screws. Locate these screws on your hinge body—they’re typically small Allen head or Phillips head fasteners. Close the door and observe where it’s misaligned relative to the cabinet frame. For left-right movement, adjust the horizontal screw; for up-down adjustment, use the vertical screw; and for forward-back movement, use the depth screw. Make only quarter-turn adjustments and test the door position before making additional changes. This methodical approach ensures precise alignment without over-adjusting.
Q: Should I replace both cabinet hinges at the same time, or can I replace just the broken one?
A: While you can technically replace a single broken hinge, it’s generally recommended to replace both hinges simultaneously. Cabinet doors depend on both hinges working in perfect harmony, so when one hinge fails or becomes loose, the other hinge is usually stressed and likely to fail soon. Replacing both hinges ensures balanced support, prevents premature failure of the remaining original hinge, and guarantees that both hinges are adjusted consistently. This approach saves time and money by avoiding a second repair in the near future.
Q: What type of hinge should I choose when replacing old cabinet hinges that don’t have any visible adjustment features?
A: Your old cabinets likely used traditional butt hinges, which are stationary and offer no adjustment capabilities. When replacing these hinges, you have several options. Modern European concealed hinges offer superior adjustability and a cleaner contemporary appearance, but they require precise cup holes drilled during cabinet construction. If your cabinets lack these holes, butt hinges remain your best option since they work with any cabinet design. Alternatively, consider pivot hinges, which offer excellent adjustability and support for heavy doors. Choose the option that best fits your cabinet construction and desired aesthetic appearance.
Q: How often should I inspect and maintain my cabinet door hinges to prevent problems?
A: Schedule a thorough hinge inspection and maintenance routine at least twice per year, ideally in spring and fall when you’re doing general home maintenance. During these inspections, check that all screws are tight, observe how smoothly doors open and close, listen for squeaking or grinding sounds, and examine hinges for visible damage or corrosion. If you have very frequent cabinet usage—such as in busy kitchens or commercial settings—increase inspections to quarterly. This preventive maintenance approach catches developing problems early, before they affect door function or aesthetics, and keeps your cabinets operating smoothly for decades.
Conclusion
Learning how to fix cabinet door hinge broken loose repair is an essential home maintenance skill that saves money, prevents damage, and maintains the beauty of your cabinetry. Whether you’re simply tightening loose screws, adjusting misaligned doors, or replacing damaged hinges entirely, this comprehensive guide provides the knowledge and confidence you need to succeed. The investment of just a few minutes in regular inspection and preventive maintenance prevents costly repairs down the road while keeping your cabinets functioning flawlessly. By implementing these techniques and following the pro tips shared throughout this guide, you’ll ensure your cabinet doors operate smoothly and silently for many years to come. Don’t let minor hinge problems turn into major cabinet failures—take action today and enjoy the satisfaction of a job well done.
Recommended Products on Amazon
As an Amazon Associate I earn from qualifying purchases.