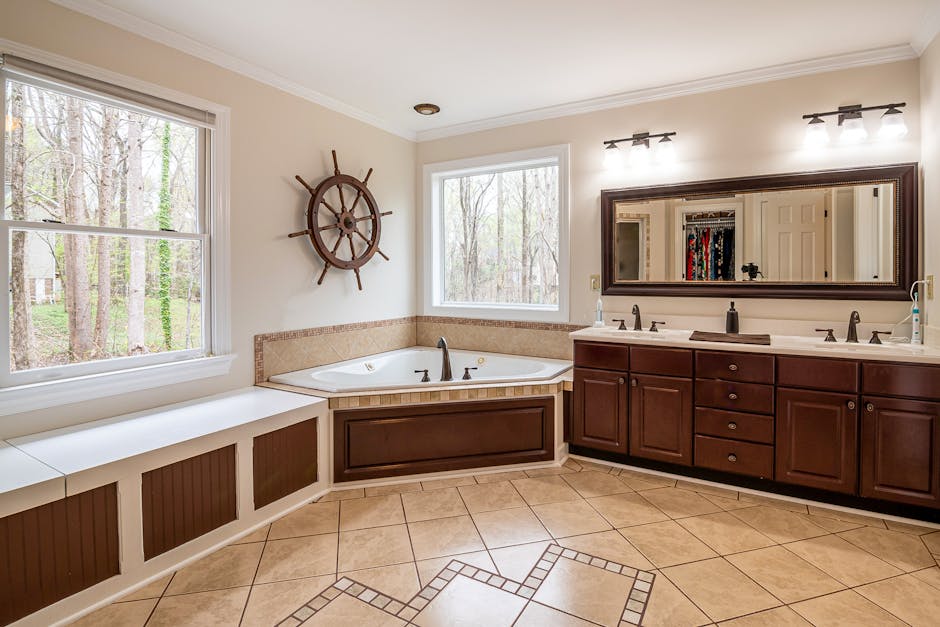
How to caulk a bathtub perfectly
Complete Guide: How to Caulk Bathtub Bathroom Waterproof Like a Professional
Learning how to caulk bathtub bathroom waterproof effectively is one of the most essential home improvement skills every homeowner should master. A properly caulked bathtub not only prevents water damage and mold growth but also creates a clean, finished appearance that enhances your bathroom’s overall aesthetic. Whether you’re dealing with cracked, discolored, or missing caulk around your bathtub, understanding the proper techniques and materials will ensure a long-lasting, professional-quality seal. This comprehensive guide will walk you through every step of the process, from selecting the right caulk type to achieving that perfect, smooth finish that keeps your bathroom completely waterproof. With the right tools, preparation, and technique, you’ll be able to tackle this project with confidence and achieve results that rival professional work while saving money on contractor fees.
Table of Contents
- Essential Tools and Materials for How to Caulk Bathtub Bathroom Waterproof Projects
- Understanding Different Types of Caulk
- Best How to Caulk Bathtub Bathroom Waterproof Products
- Step-by-Step Preparation Process
- Professional Application Techniques
- Finishing and Curing Guidelines
- Key Takeaways
- Frequently Asked Questions
- Conclusion
Essential Tools and Materials for How to Caulk Bathtub Bathroom Waterproof Projects
Before beginning any caulking project, gathering the proper tools and materials is crucial for achieving professional results. The success of your waterproofing efforts depends heavily on using high-quality products and having the right equipment at your disposal.
Primary Tools Required
A caulk gun is your most important tool, and investing in a quality model will make the application process significantly smoother. Look for guns with a smooth trigger action and reliable pressure release mechanism. Additionally, you’ll need a sharp utility knife for removing old caulk and cutting the caulk tube tip to the desired size.
Caulk removal tools, such as a 5-in-1 painter’s tool or specialized caulk removal knife, will help you completely remove old, deteriorated caulk. These tools are designed to scrape away stubborn residue without damaging your bathtub or tile surfaces.
Cleaning and Preparation Supplies
Proper surface preparation is essential when learning how to caulk bathtub bathroom waterproof areas effectively. You’ll need denatured alcohol or a similar cleaning solvent to remove soap scum, mildew, and any remaining caulk residue. Lint-free cloths or paper towels are necessary for wiping surfaces clean and dry.
Masking tape is invaluable for creating clean, straight caulk lines. Choose a high-quality painter’s tape that removes cleanly without leaving residue. Some professionals prefer using specialized caulk tape designed specifically for this purpose.
Safety Equipment
Don’t overlook safety when working with caulks and solvents. Disposable gloves protect your hands from chemicals and make cleanup easier. Ensure adequate ventilation in your bathroom, and consider using a respirator mask when working with solvent-based products or in poorly ventilated spaces.
Understanding Different Types of Caulk
Selecting the appropriate caulk type is fundamental to creating an effective waterproof seal around your bathtub. Different caulk formulations offer varying benefits, cure times, and durability characteristics that make them suitable for specific applications.
Silicone Caulk
Pure silicone caulk remains the gold standard for bathroom applications due to its exceptional waterproofing properties and flexibility. This type of caulk maintains its elasticity over time, allowing it to expand and contract with temperature changes without cracking or losing adhesion.
Silicone caulk offers superior mold and mildew resistance, making it ideal for high-moisture environments. However, it cannot be painted and requires mineral spirits for cleanup during application. The curing process typically takes 24-48 hours for complete waterproofing.
Acrylic Latex Caulk
Acrylic latex caulk provides easier application and cleanup with soap and water, making it more user-friendly for DIY projects. This type can be painted once cured, offering more finishing options. However, pure acrylic latex is less suitable for areas with constant water exposure.
Many manufacturers now offer modified acrylic latex caulks with added silicone for improved water resistance while maintaining paintability and easy cleanup properties.
Polyurethane Caulk
Polyurethane caulk offers exceptional durability and adhesion strength, making it excellent for high-stress applications. It provides excellent waterproofing while remaining flexible throughout its lifespan. However, polyurethane caulk is more challenging to work with and requires solvents for cleanup.
This type of caulk is ideal for areas where both waterproofing and structural integrity are important, such as where bathtubs meet different materials like tile and drywall.

Best How to Caulk Bathtub Bathroom Waterproof Products
Choosing the right products can make the difference between a professional-looking job and a disappointing result. Here are the top-rated products that consistently deliver excellent waterproofing performance.
Premium Silicone Caulks
stands out as a professional-grade option that offers 40-year durability with advanced mold and mildew resistance. This product maintains flexibility in extreme temperatures and provides excellent adhesion to multiple surfaces.
delivers exceptional waterproofing with a fast 30-minute skin-over time. Its thick consistency makes it ideal for filling larger gaps while maintaining a smooth, professional appearance.
Specialized Bathroom Caulks
For those seeking the ultimate in mold prevention,
incorporates Microban antimicrobial technology that provides continuous protection against bacterial growth and staining.
Professional-Grade Tools
The quality of your tools significantly impacts your results.
features a smooth rod design that provides consistent pressure and precise control during application.
For surface preparation,
efficiently removes old caulk without damaging surrounding surfaces, ensuring proper adhesion for your new waterproof seal.

Step-by-Step Preparation Process
Proper preparation forms the foundation of any successful caulking project. Rushing through this phase will compromise the longevity and effectiveness of your waterproof seal, regardless of the quality of materials used.
Removing Old Caulk
Begin by softening the existing caulk using a caulk softener or warm, soapy water. Allow the softener to penetrate for the recommended time before attempting removal. Use your caulk removal tool to carefully scrape away all old caulk, working in small sections to maintain control.
Pay particular attention to corners and areas where caulk tends to accumulate. Any remaining caulk residue will prevent proper adhesion of the new material, potentially creating weak points in your waterproof barrier.
Surface Cleaning and Preparation
After removing all old caulk, thoroughly clean the area with denatured alcohol or a similar solvent to remove soap scum, mineral deposits, and any remaining residue. The surface must be completely clean and dry for optimal adhesion.
Allow adequate drying time, especially in humid conditions. Any moisture trapped beneath new caulk can lead to adhesion failure and mold growth. Consider using a hair dryer to ensure complete dryness in corners and crevices.
Masking and Protection
Apply masking tape along both edges where you’ll be applying caulk, leaving a gap slightly wider than your desired caulk bead. This technique ensures straight, clean lines and prevents caulk from spreading onto adjacent surfaces.
Position the tape carefully, ensuring it follows the natural lines of your bathtub and wall surfaces. Remove any air bubbles or wrinkles that could allow caulk to seep underneath.

Professional Application Techniques
The actual application of caulk requires steady hands, consistent pressure, and proper technique to achieve professional results. Understanding the mechanics of caulk application will help you create smooth, even beads that provide optimal waterproofing.
Preparing the Caulk Tube
Cut the caulk tube tip at a 45-degree angle, with the opening size matching your desired bead width. A smaller opening allows for more precise control but requires more passes, while a larger opening covers more area quickly but requires steadier hands.
Pierce the inner seal completely and load the tube into your caulk gun, ensuring it’s properly seated. Test the flow on a piece of cardboard to establish consistent pressure and flow rate.
Application Technique
Hold the caulk gun at a 45-degree angle to the surface, with the tip touching both surfaces you’re sealing. Maintain steady pressure on the trigger while moving at a consistent speed along the joint. The key to professional results is maintaining constant motion and pressure.
Apply caulk in one continuous bead whenever possible, avoiding stops and starts that create weak points. If you must stop, overlap the new bead slightly with the existing one to ensure continuity.
Smoothing and Finishing
Within 5-10 minutes of application, smooth the caulk bead using your finger, a caulk smoothing tool, or a damp sponge. Work quickly but deliberately, as most caulks begin to skin over rapidly, making smoothing difficult.
Remove masking tape immediately after smoothing, pulling it away at a 45-degree angle to prevent disturbing the fresh caulk. Clean up any excess caulk immediately using the appropriate solvent.
Finishing and Curing Guidelines
The curing process is critical for achieving maximum waterproofing performance. Understanding cure times and environmental factors will help you avoid premature exposure to water that could compromise your seal.
Initial Cure Phase
Most bathroom caulks develop a skin within 30 minutes to 2 hours, depending on temperature, humidity, and caulk type. During this phase, avoid touching or disturbing the caulk bead, as this can create surface imperfections or compromise adhesion.
Maintain adequate ventilation to facilitate proper curing, but avoid direct airflow that might cause rapid surface drying while leaving the interior uncured.
Complete Cure Requirements
Full cure typically requires 24-72 hours, depending on the product and environmental conditions. Silicone caulks generally require longer cure times than latex-based products. Avoid water exposure until complete curing is achieved to ensure maximum waterproofing performance.
Higher humidity levels can extend cure times, while increased temperature generally accelerates the process. Follow manufacturer recommendations for your specific product and environmental conditions.
Post-Installation Maintenance
Once fully cured, inspect your work for any gaps, bubbles, or imperfections that might compromise waterproofing. Small imperfections can often be addressed with additional caulk application over the cured surface.
Establish a regular inspection schedule to identify potential issues before they become major problems. Well-maintained caulk seals can last 5-10 years or more with proper care.
Key Takeaways
- Proper preparation is essential: Removing all old caulk and thoroughly cleaning surfaces ensures optimal adhesion and longevity
- Choose the right caulk type: Silicone offers the best waterproofing for bathroom applications, while modified latex provides easier cleanup
- Use quality tools: Professional-grade caulk guns and removal tools significantly improve results and make the job easier
- Master the application technique: Consistent pressure, steady movement, and proper angle create professional-looking beads
- Allow adequate cure time: Rushing the curing process compromises waterproofing effectiveness and can lead to premature failure
Frequently Asked Questions about How to Caulk Bathtub Bathroom Waterproof
Q: How often should I recaulk my bathtub to maintain proper waterproofing when learning how to caulk bathtub bathroom waterproof techniques?
A: Generally, bathtub caulk should be inspected annually and replaced every 5-7 years under normal conditions. However, several factors can necessitate earlier replacement, including frequent use, poor ventilation, and inferior caulk quality. Signs that indicate immediate replacement include cracking, discoloration, mold growth, or gaps forming between the caulk and surfaces. Regular maintenance and prompt attention to small issues can extend the life of your caulk seal significantly.
Q: What’s the best way to prevent mold growth in newly applied caulk?
A: Preventing mold growth starts with selecting a high-quality, mold-resistant caulk and ensuring proper surface preparation. After application, maintain good bathroom ventilation by using exhaust fans during and after showers. Regular cleaning with mild, non-abrasive cleaners helps prevent soap scum buildup that can harbor mold. Additionally, periodically wiping down caulk lines with a diluted bleach solution can help prevent mold establishment while preserving the caulk’s integrity.
Q: Can I apply new caulk over existing caulk that appears to be in good condition?
A: It’s generally not recommended to apply new caulk over existing caulk, even if it appears to be in good condition. The new caulk may not adhere properly to the old surface, creating potential failure points and compromising waterproofing effectiveness. Additionally, the underlying old caulk may harbor bacteria or have hidden damage that could affect the new application. Complete removal and fresh application ensure optimal adhesion and longevity.
Q: How do I achieve perfectly straight caulk lines without professional experience?
A: Achieving straight caulk lines requires proper masking technique and consistent application speed. Use high-quality painter’s tape positioned parallel to your desired caulk line, leaving an appropriate gap width. Apply caulk in one continuous motion while maintaining steady gun angle and pressure. Remove the tape immediately after smoothing the bead, pulling at a 45-degree angle away from the fresh caulk. Practice on cardboard first to develop muscle memory and consistent technique.
Q: What should I do if I notice gaps or imperfections after the caulk has cured?
A: Small gaps or imperfections in cured caulk can often be addressed without complete removal. Clean the area thoroughly and apply a small amount of fresh caulk over the imperfection, smoothing it to blend with the existing seal. For larger gaps or widespread issues, complete removal and reapplication may be necessary. Always ensure the existing caulk is fully cured before applying additional material, and use the same caulk type for compatibility.
Conclusion
Mastering how to caulk bathtub bathroom waterproof areas effectively is a valuable skill that protects your home from water damage while maintaining a professional appearance. By following the detailed steps outlined in this guide, selecting appropriate materials, and taking time for proper preparation and application, you can achieve results that rival professional work. Remember that patience during the curing process and attention to detail during application are key factors in creating a long-lasting, waterproof seal.
The investment in quality tools and materials pays dividends in both immediate results and long-term performance. Regular maintenance and prompt attention to any issues will help preserve your work for years to come. With practice, you’ll develop the confidence and skill to tackle more complex caulking projects throughout your home. Take pride in this practical skill that combines functionality with aesthetics, knowing that your careful work protects your investment while enhancing your bathroom’s appearance and value.
★ Recommended Products on Amazon
As an Amazon Associate I earn from qualifying purchases.