How to install a motion sensor light switch
How to Install Motion Sensor Light Switch DIY: Complete 2025 Guide
Learning how to install motion sensor light switch DIY is one of the most practical home improvement projects you can tackle yourself this year. Motion sensor light switches automatically turn lights on and off based on movement detection, saving energy and adding convenience to your home. Whether you’re upgrading your hallway, bathroom, garage, or outdoor areas, this comprehensive guide will walk you through every step of the installation process with professional tips and recommendations.
Table of Contents
- Why Install Motion Sensor Light Switch DIY Matters
- Step-by-Step Install Motion Sensor Light Switch DIY Guide
- Best Install Motion Sensor Light Switch DIY Options
- Pro Tips for Install Motion Sensor Light Switch DIY
- Common Mistakes to Avoid
- Key Takeaways
- Frequently Asked Questions About Install Motion Sensor Light Switch DIY
- Conclusion
Why Install Motion Sensor Light Switch DIY Matters
Installing a motion sensor light switch DIY offers numerous advantages that extend far beyond simple convenience. Energy efficiency represents one of the most compelling reasons homeowners invest in these smart switches, as they eliminate the possibility of leaving lights on unnecessarily. Motion-activated lighting can reduce your electricity consumption by up to 40% in certain areas of your home, particularly in spaces like bathrooms, closets, laundry rooms, and hallways.
Beyond energy savings, motion sensor switches enhance home safety and security significantly. When you arrive home with hands full of groceries or return late at night, automatic lighting provides immediate illumination without fumbling for switches in the dark. For elderly family members or individuals with mobility challenges, motion-activated lights eliminate the need to reach for wall switches, reducing fall risks and improving accessibility throughout the home.
The convenience factor cannot be overstated, especially in high-traffic areas where you frequently carry items that prevent easy switch operation. Motion sensor switches prove invaluable in mudrooms, kitchens during meal preparation, and bathrooms during nighttime visits. Additionally, these switches contribute to your home’s modern aesthetic and resale value, as potential buyers increasingly recognize the value of smart home technology and energy-efficient features.
From a security perspective, motion-activated outdoor lighting deters potential intruders while you’re away or during evening hours. The automatic illumination of pathways, driveways, and entry points creates the appearance of activity around your home, providing peace of mind and enhanced protection for your family and property.

Step-by-Step Install Motion Sensor Light Switch DIY Guide
Before beginning your installation, gather all necessary tools and materials to ensure a smooth, uninterrupted project. You’ll need a flathead screwdriver, Phillips head screwdriver, wire strippers, a voltage tester, electrical tape, and wire connectors. Most motion sensor switches come with installation instructions, so read these thoroughly before starting work.
Safety First: Turn Off Power
The most critical step in any electrical project is safety. Locate your home’s electrical panel and switch off the breaker controlling the light fixture you’re replacing. Once the breaker is off, verify the power is truly disconnected by attempting to turn on the light switch—it should not respond. Use a voltage tester on the existing wires to confirm there’s no electrical current present before proceeding with any work.
Remove the Old Switch
With power safely disconnected, use your screwdriver to remove the cover plate from your existing light switch. Remove the screws holding the switch body to the electrical box and carefully pull the switch out. Note the wire connections carefully—typically, you’ll see a black (hot) wire, white (neutral) wire, and a green or bare copper (ground) wire connected to the switch terminals.
Disconnect the Existing Wires
Loosen the terminal screws on the old switch to release each wire from the connection points. Some switches use push-in terminals rather than screw terminals—if so, use a small screwdriver or paper clip to release the wires by pushing the release slot while pulling the wire free. Gently pull each wire away from the old switch, being careful not to damage the wire insulation or yank wires deeper into the wall cavity.
Prepare the Wires
Examine the wire ends to ensure they’re clean and undamaged. If the copper is oxidized or the insulation is cracked, use wire strippers to remove approximately one-half inch of insulation from each wire. This fresh copper ensures better electrical contact and connection reliability with your new motion sensor switch.
Connect to the Motion Sensor Switch
Following your motion sensor switch’s instruction manual, connect the wires to the appropriate terminals. Generally, the black hot wire connects to the dark-colored terminal, the white neutral wire connects to the silver terminal, and the ground wire connects to the green terminal. Twist each wire around its corresponding terminal screw clockwise, then tighten the screw firmly with your screwdriver to ensure a secure connection that won’t loosen over time.
Secure the Switch in the Electrical Box
Carefully push the motion sensor switch back into the electrical box, ensuring no wires are pinched or folded uncomfortably behind the switch. Once all wires are properly positioned, align the screw holes and insert the two mounting screws, tightening them evenly until the switch is flush against the electrical box without being over-tightened.
Install the Cover Plate
Attach the motion sensor switch’s cover plate to complete the installation. Most motion sensor switches include a specialized cover plate with an integrated sensor lens, so follow the manufacturer’s specific instructions for proper attachment. Test the installation by restoring power at the breaker and observing the switch’s functionality.

Best Install Motion Sensor Light Switch DIY Options
The market offers several excellent motion sensor switch options suited to different needs, budgets, and technical preferences. Understanding the key differences helps you select the best choice for your specific application.
Passive Infrared Motion Sensors
Passive infrared (PIR) motion sensors detect heat signatures from moving objects, making them ideal for most indoor applications. These switches offer reliable performance in hallways, bathrooms, garages, and closets where moderate range and standard motion detection suffice. PIR sensors typically cost less than alternative technologies and consume minimal power, making them energy-efficient choices for budget-conscious homeowners.
The reliability of PIR sensors comes from decades of proven technology, and they work effectively in various lighting conditions from complete darkness to bright daylight. However, PIR sensors may occasionally miss movements from individuals moving very slowly or remaining motionless within the detection range.
Dual-Technology Motion Sensors
Dual-technology motion sensors combine passive infrared and microwave detection capabilities, offering superior accuracy and fewer false triggers. These switches activate lights only when both technologies simultaneously detect motion, significantly reducing false activations from pets, shadows, or air currents. Although dual-technology sensors cost more initially, they provide excellent performance in applications prone to false triggers.
Smart Motion Sensor Switches
Smart motion sensor switches connect to your home automation system, offering remote control via smartphone apps and integration with other smart devices. These advanced options allow scheduling, adjustment of sensitivity settings, and integration with voice assistants like Alexa or Google Home. Smart motion sensors typically cost significantly more but provide unmatched convenience and customization for tech-savvy homeowners.
Outdoor Motion Sensor Switches
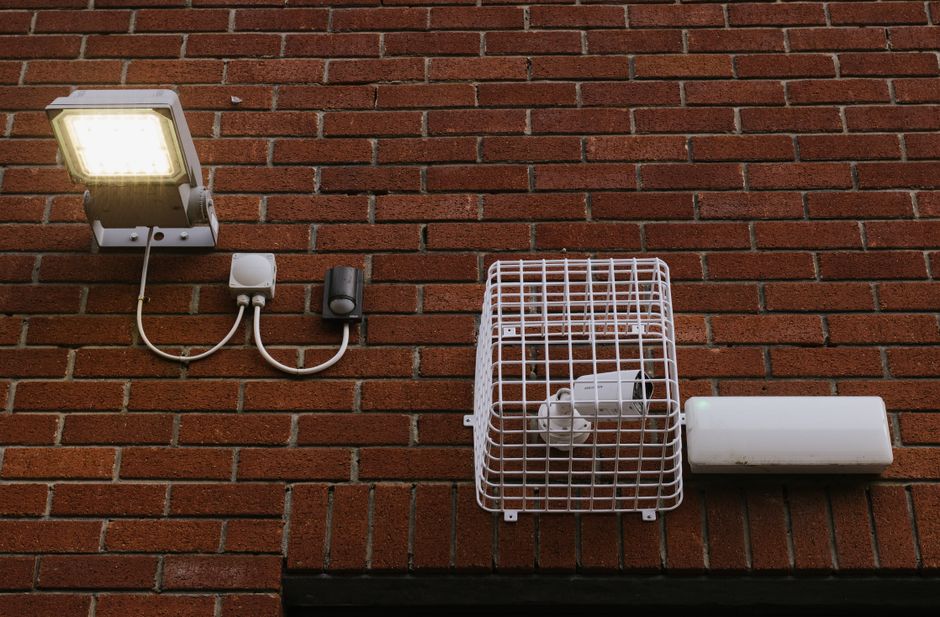
Specifically designed for exterior applications, outdoor motion sensor switches withstand weather exposure, moisture, and temperature fluctuations. These units feature enhanced sealing, corrosion-resistant materials, and broader detection ranges suitable for driveways, porches, and perimeter lighting. Weatherproof construction ensures long-term reliability even in harsh climates.
Pro Tips for Install Motion Sensor Light Switch DIY
Successfully installing a motion sensor light switch DIY involves more than following basic instructions—professional techniques ensure optimal performance and longevity. Proper positioning of the motion sensor ensures reliable detection throughout the intended area, so plan your sensor placement carefully before installation. Position sensors at eye level or slightly higher, angled downward to detect motion across the room most effectively.
Test your sensor’s range and sensitivity settings during installation to understand its detection capabilities fully. Most motion sensors include adjustable sensitivity controls and time-delay settings that allow customization for your specific needs. In high-traffic areas like hallways, set shorter time delays so lights turn off quickly after detecting no motion, saving energy while preventing inconvenient darkness.
Consider your room’s lighting conditions when selecting sensor types and positioning. Sensors placed in areas receiving bright direct sunlight may require different settings than those in dim interior spaces. Always check that your electrical box has neutral wires available—some older installations lack them, necessitating specialized switches designed for two-wire configurations.
During installation, wear safety glasses and gloves to protect against dust, debris, and accidental electrical contact. Never rush electrical work; take time to ensure connections are tight, wires are properly seated, and everything is positioned correctly before restoring power. After installation, test the sensor thoroughly in various lighting conditions and with different movement speeds to confirm proper operation.

Common Mistakes to Avoid
Many homeowners make preventable mistakes during motion sensor light switch installation that compromise safety or functionality. The most critical error involves failing to verify power disconnection before beginning work—always use a voltage tester to confirm no electricity flows through the existing switch before touching any wires.
Another common mistake involves improper wire connections that create loose contacts or reversed polarity. Take time to ensure each wire connects securely to its correct terminal, following color coding and the manufacturer’s diagram precisely. Never skip the voltage tester step, as even small oversights can create fire hazards or damage equipment.
Inadequate sensor positioning represents a frequent cause of poor performance after installation. Placing sensors behind obstacles, in direct sunlight, or at inappropriate heights reduces their detection effectiveness. Understanding your sensor’s specific detection range and angle before positioning prevents future frustration and performance issues.
Ignoring the instruction manual specific to your switch model creates various problems. Different manufacturers implement different terminal arrangements, sensitivity adjustments, and time-delay settings, so relying on generic knowledge rather than your product’s specific guidance invites failure.

Key Takeaways
- Motion sensor light switches reduce energy consumption while enhancing home convenience and security
- Proper safety procedures, particularly power disconnection, are essential for safe electrical installation
- Wire connections must be secure and correctly matched to corresponding terminals for reliable operation
- Multiple motion sensor types exist, each suited to different applications and budget requirements
- Professional installation techniques, proper sensor positioning, and manufacturer guidelines ensure optimal performance
Frequently Asked Questions About Install Motion Sensor Light Switch DIY
Q: What is the best install motion sensor light switch DIY option for my bathroom?
A: For bathroom applications, choose a motion sensor specifically rated for humid environments with IP44 or higher water resistance ratings. PIR sensors work excellently in bathrooms due to their reliability in smaller enclosed spaces. Consider dual-technology sensors if frequent false triggers occur from shower steam or ventilation fan activity. Ensure your bathroom’s electrical box contains neutral wires, as some motion sensors require them for operation. Test sensitivity settings to accommodate your family’s typical movement patterns and preferences.
Q: How do I use install motion sensor light switch DIY once installation is complete?
A: After installation, locate the sensitivity adjustment dial, typically found behind the sensor lens or on the switch body. Start with medium sensitivity and adjust upward if the sensor misses normal movements or downward if it triggers too frequently. Most motion sensors include a time-delay knob controlling how long lights remain on after detecting no motion—set this between 5 and 30 minutes depending on your preferences. Test the sensor in various lighting conditions and with different movement speeds to ensure optimal performance for your household’s specific patterns.
Q: Can I install a motion sensor light switch DIY if my electrical box lacks neutral wires?
A: Yes, specialized two-wire motion sensor switches exist for older homes without neutral wires. These switches sacrifice some functionality and compatibility with smart home systems but provide basic motion detection capabilities. Alternatively, you can hire an electrician to run a neutral wire from your breaker panel to the light fixture, enabling use of standard motion sensor switches. While this requires professional installation, it provides superior long-term flexibility and compatibility with future smart home additions.
Q: How long do motion sensor light switches typically last after DIY installation?
A: Quality motion sensor switches last 10-15 years with proper installation and maintenance. Sensors positioned away from excessive heat, moisture, and direct sunlight experience longer lifespans. Environmental factors significantly impact longevity—outdoor sensors in harsh climates may require replacement every 7-10 years, while indoor sensors in controlled environments often exceed 15 years of reliable service.
Q: What’s the difference between occupancy and vacancy motion sensor modes?
A: Occupancy mode automatically turns lights on when motion is detected and off after a preset delay with no motion. Vacancy mode requires manual light activation but automatically turns lights off after the time delay expires. Vacancy mode saves more energy in spaces where occupants frequently forget to turn off lights, while occupancy mode provides maximum convenience in high-traffic areas.
Conclusion
Learning how to install a motion sensor light switch DIY represents an achievable project that delivers immediate practical benefits and long-term energy savings. By following proper safety procedures, carefully reviewing your equipment’s specific instructions, and implementing professional installation techniques, you’ll successfully enhance your home’s functionality and efficiency. Motion sensor switches transform how you interact with lighting throughout your home, from eliminating nighttime fumbling for switches to reducing unnecessary energy consumption. Start with a single high-traffic area like a hallway or bathroom to build confidence, then expand to additional locations. With the comprehensive guidance provided in this tutorial, you’re ready to tackle this rewarding home improvement project and enjoy the convenience and savings motion sensor lighting provides for years to come.
Recommended Products on Amazon
As an Amazon Associate I earn from qualifying purchases.