
Best miter saws for beginners
Miter Saw Beginner Crosscut Angle Cutting: Ultimate Guide for Perfect Cuts Every Time
Finding the right miter saw beginner crosscut angle cutting techniques can transform your woodworking projects from amateur attempts into professional-quality results. Whether you’re building your first picture frame or tackling crown molding, mastering these fundamental skills opens doors to countless DIY possibilities. This comprehensive guide breaks down everything beginners need to know about selecting the right saw, executing precise cuts, and avoiding common pitfalls that can ruin your materials and discourage your woodworking journey.
Table of Contents
- Why Miter Saw Beginner Crosscut Angle Cutting Matters
- Step-by-Step Miter Saw Beginner Crosscut Angle Cutting Guide
- Best Miter Saw Beginner Crosscut Angle Cutting Options
- Pro Tips for Miter Saw Beginner Crosscut Angle Cutting
- Common Mistakes to Avoid
- Key Takeaways
- Frequently Asked Questions about Miter Saw Beginner Crosscut Angle Cutting
- Conclusion
Why Miter Saw Beginner Crosscut Angle Cutting Matters
Understanding proper miter saw beginner crosscut angle cutting fundamentals separates successful DIY projects from frustrating failures that waste time and materials. Crosscuts, which cut across the wood grain, require specific blade angles and feeding techniques to prevent tear-out and ensure clean edges. When beginners master these basics early, they build confidence while developing muscle memory for consistent results across various wood species and project types.
The angle cutting aspect becomes crucial when creating joints for frames, trim work, or furniture construction. Even small inaccuracies in angle measurements translate to visible gaps in finished projects, making the difference between amateur and professional-looking results. Proper technique ensures your 45-degree cuts actually measure 45 degrees, your 90-degree crosscuts remain perfectly square, and your compound angles align seamlessly when assembled.
Modern miter saws offer incredible precision capabilities, but only when operators understand how to leverage their features correctly. Beginners who learn proper setup procedures, safety protocols, and cutting techniques from the start avoid developing bad habits that become difficult to correct later. This foundation knowledge accelerates skill development and enables tackling more complex projects with confidence rather than hesitation.

Step-by-Step Miter Saw Beginner Crosscut Angle Cutting Guide
Successful miter saw beginner crosscut angle cutting starts with proper saw setup and workpiece preparation before making any cuts. Begin by ensuring your saw sits level on a stable surface, checking that the blade aligns perfectly with the fence when lowered. Mark your cut lines clearly using a sharp pencil and quality square, then position the workpiece against the fence with the waste portion falling to the right side of the blade.
For basic crosscuts, set your miter gauge to zero degrees and ensure the bevel angle remains at zero unless compound cuts are required. Lower the blade slowly until it just touches your material, then check alignment with your marked line before powering on. Once the blade reaches full speed, lower it smoothly through the material in one continuous motion, maintaining steady downward pressure without forcing the cut.
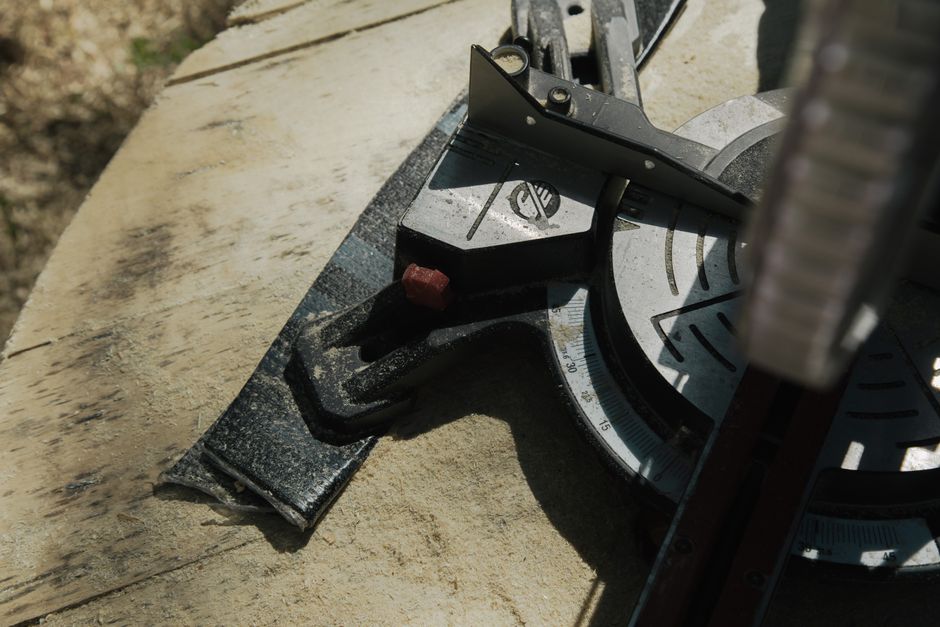
Angle cuts require extra attention to measurement accuracy and workpiece positioning since small errors compound quickly in multi-piece assemblies. Use the saw’s built-in angle stops for common angles like 22.5 and 45 degrees, but verify these settings with a reliable angle gauge before cutting finished pieces. Practice on scrap material first to dial in your technique and confirm angle accuracy, especially when switching between different wood species that may cut differently.
Best Miter Saw Beginner Crosscut Angle Cutting Options
Choosing the right saw for miter saw beginner crosscut angle cutting depends on balancing cutting capacity, accuracy features, and budget constraints while prioritizing safety and ease of use. Compound miter saws offer the most versatility for beginners since they handle both miter and bevel cuts, eliminating the need for multiple tools as skills develop. Look for models with clear angle scales, positive stops at common angles, and adequate dust collection to maintain visibility during cuts.
Ten-inch saws provide sufficient cutting capacity for most beginner projects while remaining affordable and manageable in smaller workshops. The blade size limits crosscut capacity to approximately 6 inches, which handles standard lumber dimensions and most trim materials without difficulty. Twelve-inch models offer greater capacity but cost significantly more and may overwhelm beginners with features they won’t immediately use.
Sliding compound miter saws extend crosscut capacity significantly but require more setup space and careful alignment maintenance. Beginners should consider these only if projects regularly involve wide boards or panel materials. Non-sliding models often provide better accuracy for typical beginner applications since they eliminate potential play in the sliding mechanism that can affect cut quality.

Pro Tips for Miter Saw Beginner Crosscut Angle Cutting
Mastering miter saw beginner crosscut angle cutting accelerates dramatically when you understand these professional techniques that separate clean cuts from ragged results. Always use sharp, appropriate blades for your material – crosscut blades with 60-80 teeth produce smooth cuts in hardwood, while 40-tooth combination blades handle most general cutting tasks effectively. Replace or sharpen blades at the first sign of burning or tear-out, as dull blades create more problems than they solve.
Support longer workpieces with roller stands or extension tables to prevent binding and ensure straight cuts throughout the entire cut length. Never attempt to support heavy pieces by hand alone, as this compromises both safety and accuracy. Set up your workspace so cutoff pieces can fall freely without hitting obstacles or binding against the blade, which can cause dangerous kickback situations.
Create a reliable measuring and marking system using stop blocks for repetitive cuts rather than measuring each piece individually. This technique eliminates cumulative measurement errors while dramatically speeding up production for projects requiring multiple identical pieces. Quality stop block systems pay for themselves quickly in improved accuracy and reduced material waste from measurement mistakes.

Common Mistakes to Avoid
Beginning woodworkers frequently struggle with miter saw beginner crosscut angle cutting because they rush through setup procedures or ignore fundamental safety practices. Never skip the blade guard or attempt to hold small pieces by hand during cutting – use clamps or specialized jigs to secure workpieces safely. Forcing cuts through dull blades or inappropriate blade types creates tear-out, burning, and potential safety hazards that proper blade selection easily prevents.
Measurement errors plague beginners who fail to account for blade kerf width when marking cut lines or setting up stop blocks. The blade removes approximately 1/8 inch of material, so always mark and cut on the waste side of your line. Double-check measurements before cutting expensive materials, and maintain a consistent measuring system throughout entire projects to prevent cumulative errors.
Inadequate workpiece support causes binding, kickback, and inaccurate cuts that frustrate beginners and waste materials unnecessarily. Set up proper infeed and outfeed support for every cut, regardless of workpiece length. Never attempt to catch or support cutoff pieces during the cutting process, as this can pull your hands toward the blade or cause the workpiece to shift unexpectedly.

Key Takeaways
- Master basic crosscut techniques before attempting complex angle cuts to build fundamental skills safely
- Invest in quality blades appropriate for your materials since sharp tools produce better results with less effort
- Always support workpieces properly with appropriate stands or extensions to ensure straight, safe cuts
- Practice on scrap materials when learning new techniques or working with unfamiliar wood species
- Maintain consistent measuring and marking systems throughout projects to eliminate cumulative errors
Frequently Asked Questions about Miter Saw Beginner Crosscut Angle Cutting
Q: What is the best miter saw beginner crosscut angle cutting technique for clean results?
A: The best miter saw beginner crosscut angle cutting technique involves using sharp crosscut blades, supporting workpieces properly, and making smooth, continuous cuts without forcing the blade. Always let the blade reach full speed before contacting the material, and maintain steady downward pressure throughout the cut. Practice on scrap materials first to develop muscle memory and confidence.
Q: How do I use miter saw beginner crosscut angle cutting for picture frames?
A: Picture frame construction requires precise 45-degree miter cuts that fit together without gaps. Set your miter gauge to exactly 45 degrees and verify accuracy with a reliable square. Cut all pieces slightly long initially, then fine-tune lengths by taking light passes until joints fit perfectly. Use a stop block system to ensure opposite pieces match exactly.
Q: What blade should I use for crosscut angle cutting as a beginner?
A: Beginners should start with a high-quality 60-80 tooth crosscut blade for hardwoods or a 40-50 tooth combination blade for mixed materials. These blades produce smooth cuts with minimal tear-out while remaining versatile enough for various project types. Avoid aggressive rip blades or specialty blades until you master basic cutting techniques.
Q: How do I prevent tear-out when crosscutting with a miter saw?
A: Prevent tear-out by using sharp, appropriate blades and supporting the workpiece fully against the fence. Score the cut line lightly with a utility knife for particularly prone materials, or apply masking tape across the cut line. Always cut with the good face up since most tear-out occurs on the bottom face where the blade exits.
Q: What safety equipment do I need for miter saw crosscut angle cutting?
A: Essential safety equipment includes safety glasses, hearing protection, and dust masks for extended cutting sessions. Never remove blade guards or safety features, and avoid loose clothing or jewelry that could catch in moving parts. Keep hands well away from the blade path and use clamps or jigs for small pieces rather than holding them by hand.
Conclusion
Mastering miter saw beginner crosscut angle cutting opens doors to countless woodworking projects while building confidence and fundamental skills that translate to more advanced techniques. The key lies in understanding proper setup procedures, selecting appropriate tools and blades, and practicing consistently on scrap materials before tackling finished projects. Remember that accuracy and safety always trump speed, especially during the learning phase. Start with simple crosscuts, gradually progress to angle cuts, and don’t rush the process – your skills will develop naturally with consistent practice and attention to detail.
Recommended Products on Amazon
As an Amazon Associate I earn from qualifying purchases.