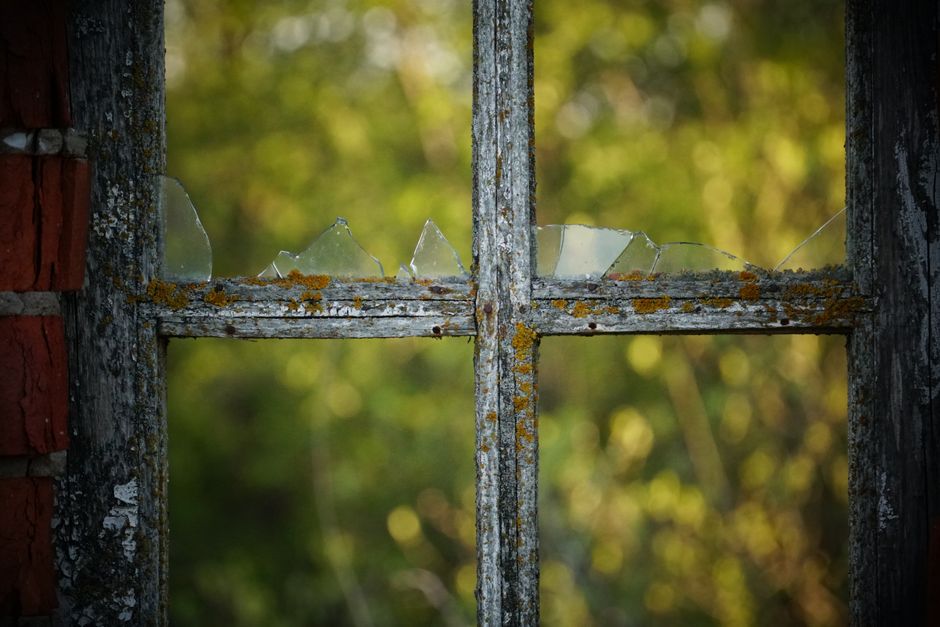
How to replace a broken window pane
Replace Broken Window Pane DIY Glass: The Complete Beginner’s Guide
Learning how to replace broken window pane DIY glass is one of the most valuable home maintenance skills you can master. Whether your window suffered damage from weather, an accident, or age, knowing how to tackle this repair yourself can save you hundreds of dollars in professional installation costs. This comprehensive guide will walk you through every step of the process, from safety precautions to final installation, ensuring your windows are restored to perfect working condition. By the end of this tutorial, you’ll have the confidence and knowledge to handle any broken window situation in your home.
Table of Contents
- Why Replace Broken Window Pane DIY Glass Matters
- Step-by-Step Replace Broken Window Pane DIY Glass Guide
- Best Replace Broken Window Pane DIY Glass Options
- Pro Tips for Replace Broken Window Pane DIY Glass
- Common Mistakes to Avoid
- Key Takeaways
- Frequently Asked Questions about Replace Broken Window Pane DIY Glass
- Conclusion
Why Replace Broken Window Pane DIY Glass Matters
Broken windows aren’t just cosmetic problems—they pose real threats to your home’s safety, energy efficiency, and structural integrity. When a window pane breaks, it compromises your home’s insulation, allowing heated or cooled air to escape and driving up your utility bills. Additionally, broken glass is a safety hazard for children and pets, and the exposed opening can invite pests and weather-related damage into your home. Professional window replacement services can charge anywhere from $300 to $1,000 or more per window, depending on the type and size.
Learning to replace broken window pane DIY glass empowers you to handle maintenance quickly without waiting for contractor appointments. Many homeowners find that tackling this project themselves gives them confidence to handle other home repairs. The actual process is simpler than you might imagine, requiring only basic tools and materials that are affordable and readily available. Once you understand the fundamentals, you’ll be able to maintain your windows for years to come, ensuring they remain functional and energy-efficient.
Broken windows can also affect your home’s curb appeal and property value. A well-maintained home with intact windows presents better to potential buyers and neighbors alike. Beyond aesthetics, addressing broken windows promptly prevents water damage and mold growth that can develop when moisture enters through damaged panes. Taking action immediately after discovering a broken window shows responsible homeownership and protects your investment.
Step-by-Step Replace Broken Window Pane DIY Glass Guide
Safety First: Preparing Your Workspace
Before you begin any work, safety must be your top priority. Wear heavy-duty work gloves, safety glasses, and long sleeves to protect yourself from sharp glass edges. If the glass is severely shattered, consider wearing a dust mask to avoid inhaling small glass particles. Clear the area around the window and lay down drop cloths or newspaper to catch falling glass debris. Have a broom, dustpan, and heavy-duty trash bag ready for quick cleanup.
Step 1: Assess the Damage and Gather Tools
Examine your broken window carefully to understand the extent of damage. Is the entire pane shattered, or is it just cracked? Are you dealing with a single-pane, double-pane, or triple-pane window? Different window types require slightly different approaches. Single-pane windows are the easiest for DIY replacement, while double-pane windows demand more precision because you’re replacing an insulated glass unit.
Gather all necessary tools before starting: a putty knife, glazing compound, replacement glass cut to size, glazing points (or tabs for modern windows), a glass cutter if needed, and a heat gun or hairdryer. You’ll also need newspaper, a vacuum with a glass attachment, and a level to ensure your new pane sits perfectly. Having everything prepared prevents mid-project frustration.
Step 2: Remove Broken Glass Safely
Put on your gloves and safety glasses, then carefully remove any remaining broken glass from the frame. Start from the top corners and work downward, wiggling each piece gently to loosen it. Older windows may have glazing compound holding the glass in place, so you might need to use your putty knife to chip away at this hardened sealant first. Work slowly and deliberately to avoid cutting yourself on sharp edges.
For severely shattered windows, consider duct-taping the remaining glass to hold pieces together, which makes removal safer. Once you’ve removed the loose pieces, vacuum the frame thoroughly to remove all glass fragments and old glazing compound. A clean frame is essential for proper installation of your new pane.
Step 3: Prepare the Frame
Clean the wooden frame thoroughly, removing all old glazing compound and debris. Use your putty knife to scrape away dried sealant until you reach bare wood. If the frame is damaged, this is an excellent time to apply wood filler to any gouges or cracks. Allow filler to dry completely according to product instructions. Sand the frame lightly to create a smooth surface for the new glazing compound.
Applying a thin coat of primer or wood sealer to the prepared frame helps protect the wood and creates a better surface for glazing compound adhesion. This step is especially important for older windows or frames that appear weathered. Allow primer to dry fully before proceeding.
Step 4: Measure and Order Replacement Glass
Accurate measurements are crucial for a proper fit. Measure the width and height of the opening in at least three places each, using the smallest measurements for ordering. Subtract 1/8 inch from both width and height to allow for fitting and expansion. Many glass suppliers will cut glass to your specifications for free or minimal charge—it’s worth having them do this rather than attempting to cut glass yourself, especially if you’re inexperienced.
Specify whether you need regular clear glass, tempered glass, or specialty glass options. Tempered glass is safer for windows near doors or in high-traffic areas since it breaks into small, less dangerous pieces if shattered. For exterior-facing windows, consider low-emissivity (low-E) glass for better energy efficiency.
Step 5: Install the New Pane
Apply a thin bead of glazing compound to the cleaned frame, pressing it firmly into the corners and along the edges. This creates a cushion for your glass. Carefully position your new pane in the frame, pressing it gently but firmly to ensure it sits evenly. Use your level to confirm the pane is perfectly straight before the compound sets.
Once positioned, insert glazing points (small triangular pieces) into the frame every 4-6 inches around all sides. These hold the pane firmly in place while the compound cures. For modern windows, you might use plastic tabs or spring clips instead. Press glazing points carefully with your putty knife, ensuring they don’t crack the glass.
Step 6: Seal with Glazing Compound
Apply a second, more generous bead of glazing compound around the entire perimeter of the glass. Using your putty knife at a 45-degree angle, smooth the compound into a neat bevel that slopes from the glass to the frame. This professional-looking finish sheds water effectively and looks intentional. Work around the entire window, maintaining consistent pressure and angle throughout.
Allow glazing compound to cure for the time specified on the product—typically 2-3 weeks for traditional putty, though modern compounds cure faster. During this curing period, avoid opening the window or applying pressure to the pane. Once fully cured, paint over the glazing compound to match your window frame and protect it from weathering.
Best Replace Broken Window Pane DIY Glass Options
Single-Pane Window Replacement
Single-pane windows represent the simplest DIY replacement project. These windows contain just one layer of glass in the frame, making them straightforward to repair if you follow proper procedures. The process involves basic glass removal, frame preparation, and installation with glazing compound. Single-pane windows are common in older homes and are often the most affordable to repair since replacement glass is inexpensive and the installation process requires minimal specialized knowledge.
However, single-pane windows offer poor insulation compared to modern alternatives. If you’re replacing a broken pane in a single-pane window, you might want to consider upgrading to a double-pane window during your next major renovation. For now, DIY single-pane replacement is perfectly adequate and cost-effective.
Double-Pane and Insulated Glass Unit (IGU) Replacement
Double-pane windows, also called Insulated Glass Units (IGUs), contain two glass panes separated by a spacer filled with inert gas, typically argon or krypton. Replacing the entire IGU is more complex than replacing a single pane but still achievable for determined DIYers. The advantage is that you don’t need to work with glazing compound in the same way—modern windows often use silicone sealant and mechanical fasteners instead.
If your double-pane window has failed (meaning the seal between panes is broken and condensation forms between the layers), you must replace the entire IGU rather than individual panes. Attempting to repair individual panes in a failed IGU won’t restore its insulating properties. Contact your window manufacturer or a local glass supplier to order an exact replacement IGU. Installation follows similar principles to single-pane replacement, though you’ll need to be more careful with the heavier unit.
Tempered Glass vs. Standard Glass
Tempered glass is heat-treated to be four times stronger than standard annealed glass. When tempered glass breaks, it shatters into small, granular pieces rather than sharp shards, making it much safer around children and pets. Building codes typically require tempered glass in certain locations: windows within 24 inches of doors, bathroom windows near bathtubs or showers, and sliding glass doors. If your broken window is in one of these locations, you must use tempered replacement glass.
Standard annealed glass is less expensive and sufficient for most other window locations. Unless your window is subject to code requirements for tempered glass, standard glass works perfectly well. However, upgrading to tempered glass is always a reasonable safety choice if your budget allows.
Specialty Glass Options
Modern homeowners have access to specialty glass options that enhance energy efficiency and performance. Low-emissivity (low-E) glass reflects heat, keeping warmth inside during winter and outside during summer, which reduces heating and cooling costs. Laminated glass provides security and sound-dampening benefits by bonding two layers with a plastic interlayer. Frosted or tinted glass offers privacy while maintaining natural light.
For most DIY projects, standard or tempered clear glass remains the most practical choice. However, if you’re in a climate with extreme temperatures or high cooling costs, investing in low-E glass could provide long-term savings. Discuss specialty options with your glass supplier to understand costs and benefits for your specific situation.

Pro Tips for Replace Broken Window Pane DIY Glass
Timing and Temperature Considerations
Weather conditions significantly impact your success with window replacement. Avoid working in extremely cold weather (below 40°F) or excessive heat (above 85°F), as both can affect how glazing compound cures. Overcast, mild days are ideal for this project. Cold temperatures slow curing dramatically, while excessive heat can cause compound to dry too quickly and crack. Plan your project for spring or fall when temperatures are moderate.
Work during daytime hours when natural light illuminates the frame and helps you see the glazing compound clearly as you smooth it. Adequate lighting prevents mistakes and helps you achieve a professional appearance. If you’re working on an exterior window, consider the time of day and sun angle to avoid glare that might obscure your vision.
Using Modern Glazing Products
Traditional glazing putty remains the standard for wooden window frames, but modern silicone and acrylic-based products offer advantages. These newer products cure faster, require less cleanup, and provide excellent weatherproofing. Some modern glazing compounds can be applied in single application rather than the traditional two-bead method. Research product options and choose one that suits your skill level and timeline.
For windows that will be painted, traditional glazing compound remains excellent. For natural wood frames or windows you want to finish naturally, consider clear or sanded acrylic latex caulk designed specifically for windows. Always follow manufacturer instructions regarding application, drying time, and painting requirements.
Creating Professional Results
The appearance of your finished window project depends largely on your glazing compound technique. Invest in a quality putty knife with a smooth, flat blade—cheap tools make this task unnecessarily difficult. Before starting, practice your putty knife angle and motion on a scrap board. The ideal angle is 45 degrees, creating a neat bevel that sheds water and looks professional.
Maintain consistent pressure throughout the process, and work in sections rather than trying to complete the entire window at once. If you make mistakes, simply scrape off the compound and start again. The compound is forgiving during the initial application period. Take your time, and don’t rush—a slow, careful application looks infinitely better than hurried work.
Common Mistakes to Avoid
Incorrect Glass Measurements
Ordering glass that’s slightly too large or too small is one of the most common mistakes that frustrate DIYers. Always measure three times and use the smallest measurements. Subtract the 1/8-inch allowance properly, and double-check your math before ordering. If glass arrives and doesn’t fit, you’ve wasted both money and time. Most glass suppliers won’t accept returns on cut glass, so accuracy is essential.
When measuring, use a metal tape measure rather than a soft ruler, and measure to the actual visible edge of the frame opening, not to where wood might be damaged. If the frame is out of square (measurements vary at different heights), measure each location separately and provide all measurements to your supplier.
Rushing the Curing Period
Attempting to open, close, or paint your window before glazing compound has fully cured is a common mistake that ruins projects. Glazing compound doesn’t simply look dry—it needs time for chemical curing to occur, typically 2-3 weeks depending on product and conditions. Opening the window too early allows air gaps to form between compound and glass, causing leaks and reducing the seal’s effectiveness.
Resist the temptation to use your window until fully cured. Mark the window with a note or tape to remind yourself and family members. If you must open the window before the full curing period, do so very gently and minimize movement. Better yet, choose a window you can leave closed for the required time.
Inadequate Frame Preparation
Skipping proper frame preparation is a shortcut that leads to poor results. Old glazing compound, paint chips, and debris must be completely removed for new compound to adhere properly. A frame that isn’t clean and smooth prevents good contact between compound and frame, leading to gaps and potential water infiltration. Spend adequate time preparing the frame—it’s the foundation for success.
Pay special attention to corners where old compound tends to accumulate. Remove every trace of deteriorated glazing material. If wood is damaged, repair it before proceeding. A properly prepared frame might add an hour to your project but will significantly improve results and longevity.

Key Takeaways
- Safety is paramount: Always wear gloves, safety glasses, and long sleeves when handling broken glass and sharp frame edges.
- Accurate measurements matter: Measure your window opening multiple times and subtract 1/8 inch for proper fit and allowance for expansion.
- Frame preparation determines success: Thoroughly clean the frame and remove all old glazing compound before installing new glass.
- Modern products offer advantages: Consider using faster-curing modern glazing compounds and sealants instead of traditional putty.
- Patience during curing is essential: Allow 2-3 weeks for glazing compound to fully cure before opening windows or applying excessive pressure.
Frequently Asked Questions about Replace Broken Window Pane DIY Glass
Q: What is the best replace broken window pane DIY glass approach for beginners?
A: Single-pane window replacement is ideal for beginners because it’s straightforward and forgiving. Measure carefully, prepare your frame thoroughly, and take your time with the glazing compound application. Modern faster-curing glazing products also make the project more beginner-friendly. Don’t rush, and you’ll achieve professional results even if this is your first attempt.
Q: How do I use replace broken window pane DIY glass materials correctly for maximum durability?
A: Use quality materials and apply them according to manufacturer instructions. Prime wooden frames before glazing compound application. Apply compound in proper beveled beads, and allow full curing time before opening windows. Paint over cured compound to protect it from weathering and UV damage. These practices ensure your repair lasts for years without requiring re-glazing.
Q: Can I replace broken window pane DIY glass in double-pane windows?
A: Yes, but with modifications. Individual pane replacement in double-pane windows is possible if the frame structure allows access, but it’s more complex than single-pane replacement. However, if the seal between panes is compromised (causing fogging), you must replace the entire IGU rather than individual panes. Consult your window manufacturer for the specific replacement unit needed.
Q: How much does replace broken window pane DIY glass typically cost?
A: DIY replacement typically costs $20-$100 per window depending on glass type and size. Replacement glass costs $10-$50, glazing compound costs $5-$15, and glazing points cost minimal amounts. Compare this to professional replacement at $300-$1,000 per window to understand the substantial savings of DIY work.
Q: What tools do I absolutely need for replace broken window pane DIY glass projects?
A: Essential tools include a putty knife, glazing compound, replacement glass, glazing points, safety glasses, work gloves, and a level. A heat gun helps soften old compound for removal. A glass cutter is optional if your supplier cuts glass. A vacuum with glass attachment is helpful for cleanup. Most of these tools are inexpensive and worth keeping for future projects.
Conclusion
Learning to replace broken window pane DIY glass is an achievable skill that saves money and empowers homeowners to maintain their properties effectively. By following this comprehensive guide, preparing adequately, and exercising patience during the curing phase, you’ll restore your windows to perfect condition. Whether you’re dealing with a single broken pane or planning to refresh multiple windows, these techniques will serve you well. Don’t let broken windows intimidate you—tackle this project with confidence and enjoy the satisfaction of a completed home improvement task that protects your investment and improves your home’s comfort and appearance.
Recommended Products on Amazon
As an Amazon Associate I earn from qualifying purchases.