How to replace a light switch safely
Replace Light Switch DIY Electrical Beginner: Complete 7-Step Guide for Best Results
Learning how to replace light switch DIY electrical beginner projects can seem intimidating at first, but with the right tools, knowledge, and safety precautions, it becomes a manageable home improvement task. Whether you’re dealing with a faulty switch, upgrading to a dimmer, or simply want to modernize your home’s electrical fixtures, this comprehensive guide will walk you through every step of the process. With proper preparation and attention to safety, even complete novices can successfully tackle this essential home maintenance skill.

Table of Contents
- Why Replace Light Switch DIY Electrical Beginner Matters
- How to Choose the Right Tools and Switches
- Top Recommendations for Switches and Tools
- Expert Tips for Safe Installation
- Common Mistakes to Avoid
- Key Takeaways
- FAQs
- Conclusion
Why Replace Light Switch DIY Electrical Beginner Projects Matter
Understanding how to replace light switch DIY electrical beginner tasks is crucial for several compelling reasons that extend beyond simple cost savings. First and foremost, electrical switches wear out over time, developing issues like flickering lights, loose connections, or complete failure to operate. When these problems arise, having the skills to address them immediately prevents inconvenience and potential safety hazards.
The financial benefits are substantial when you can handle these repairs yourself. Professional electricians typically charge between $150-$300 for simple switch replacements, including labor and markup on materials. By learning these skills, you can complete the same work for under $20 in materials, representing significant savings over the lifetime of homeownership.
Safety considerations make this knowledge even more valuable. Faulty switches can create fire hazards through arcing, overheating, or poor connections. When you understand proper installation techniques, you can identify potential problems early and address them before they become dangerous. This proactive approach protects your family and property from electrical fires.
Modern switch technology offers features that weren’t available in older homes, including dimmer controls, motion sensors, timer functions, and smart home integration. Upgrading these components yourself allows you to take advantage of energy-saving technologies and convenience features without paying premium installation costs. Many contemporary switches also provide better tactile feedback and longer operational life than their predecessors.
How to Choose the Right Replace Light Switch DIY Electrical Beginner Tools and Materials
Selecting appropriate tools and materials forms the foundation of any successful replace light switch DIY electrical beginner project. The process begins with identifying your current switch type and determining what replacement will best serve your needs. Single-pole switches control lights from one location, while three-way switches operate from multiple locations and require different wiring configurations.
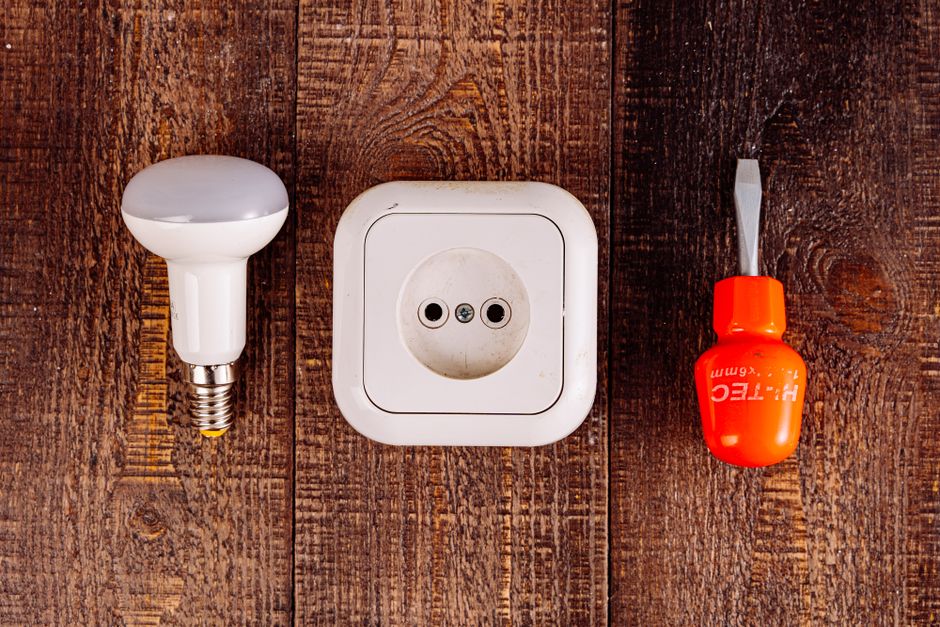
Essential tools include a non-contact voltage tester, which serves as your primary safety device by detecting live wires without direct contact. Wire strippers are necessary for preparing connections, while needle-nose pliers help manipulate wires in tight spaces. A flathead and Phillips head screwdriver set covers most switch mounting requirements, and electrical tape provides insulation for connections.
Circuit breaker identification becomes critical before beginning work. Your electrical panel should have clearly labeled breakers corresponding to different areas of your home. If labels are missing or unclear, invest time in properly mapping your circuits using a circuit finder tool. This step prevents accidental contact with live wires during installation.
Wire nuts in appropriate sizes ensure secure connections between wires. Standard residential applications typically use yellow wire nuts for two or three 12-gauge wires, though orange nuts work for smaller 14-gauge conductors. Always choose wire nuts rated for your specific wire gauge and connection requirements. Quality electrical tape provides additional protection and helps organize wire connections within the switch box.
Switch selection depends on your specific application and desired features. Standard toggle switches work well for basic on-off control, while rocker switches offer a more modern appearance and easier operation. Dimmer switches require compatibility with your light fixtures, particularly LED and CFL bulbs which need specific dimmer types to function properly.
Top Replace Light Switch DIY Electrical Beginner Product Recommendations
When embarking on replace light switch DIY electrical beginner projects, having reliable, high-quality components ensures successful outcomes and long-term reliability. The following recommendations represent proven products that combine affordability with professional-grade performance, making them ideal for homeowner installations.
Leviton stands as the industry leader in residential electrical devices, offering switches that meet rigorous safety standards while remaining accessible to DIY installers. Their Decora line provides contemporary styling with reliable performance, featuring clear terminal markings that simplify wiring for beginners. The company’s switches undergo extensive testing for durability and electrical safety, providing confidence for first-time installers.
For dimmer applications, Lutron Maestro dimmers offer excellent compatibility with LED lighting while providing smooth, quiet operation. These units include clear installation instructions and feature push-wire connections that eliminate the need for wire nuts on certain installations. The built-in LED compatibility ensures your dimmer will work properly with modern energy-efficient lighting.
Tool selection significantly impacts project success and safety. Klein Tools produces professional-grade electrical tools that remain affordable for homeowner use. Their wire strippers feature precision cutting edges and comfortable grips, while their voltage testers provide reliable safety verification. Investing in quality tools pays dividends across multiple projects and ensures safe working conditions.
Smart switch options from TP-Link Kasa provide entry-level home automation without complex installation requirements. These switches connect to your home WiFi network, allowing remote control through smartphone apps. They maintain standard switch functionality while adding scheduling, remote access, and integration with voice assistants like Alexa and Google Assistant.
Expert Tips for Replace Light Switch DIY Electrical Beginner Success
Achieving professional results on replace light switch DIY electrical beginner projects requires attention to detail and adherence to proven techniques developed by experienced electricians. These expert strategies help ensure safe, reliable installations that will function properly for years to come.
Safety preparation begins before touching any tools or switches. Always turn off power at the circuit breaker, not just the wall switch, as switches can fail and still allow power to flow to the electrical box. Use your non-contact voltage tester to verify power is off by testing both the switch terminals and the wire connections within the box.
Photograph existing wiring before disconnecting anything. Modern smartphones provide excellent documentation of wire positions, terminal connections, and general box layout. These photos become invaluable references during installation, particularly when dealing with three-way switches or unusual wiring configurations that might confuse beginners.
Wire preparation techniques significantly impact connection reliability. Strip wire insulation carefully, removing just enough to make solid terminal connections without exposing excess bare wire. Twisted stranded wires should be kept tightly wound, and solid wires should be bent into smooth curves rather than sharp angles that can cause stress fractures.
Terminal connections require proper torque to ensure safety and reliability. Hand-tighten terminal screws firmly, but avoid over-tightening which can damage switch internals or break wires. Most residential switches use brass or silver-plated terminals that provide good conductivity when properly secured. Clean any corrosion from terminals before making connections.
Box organization prevents future problems and ensures safe operation. Fold wires neatly within the electrical box, avoiding sharp bends or pressure points where the switch might pinch conductors. Ground wires should connect securely to both the switch ground terminal and the box grounding screw if metal boxes are present.

Common Mistakes with Replace Light Switch DIY Electrical Beginner Projects
Understanding typical errors helps replace light switch DIY electrical beginner enthusiasts avoid dangerous situations and ensure successful installations. These mistakes range from minor inconveniences to serious safety hazards, making awareness crucial for first-time installers.
The most dangerous mistake involves failing to verify power is off before beginning work. Many beginners assume turning off the wall switch eliminates electrical danger, but faulty switches can still pass current even in the “off” position. Always turn off power at the circuit breaker and test with a voltage detector before touching any wires or terminals.
Incorrect wire connections create both safety hazards and operational problems. Mixing up hot and neutral wires can cause switches to function improperly or create shock hazards. Black wires typically carry current (hot), while white wires serve as neutral conductors. Ground wires, usually bare copper or green insulated, must connect to proper grounding terminals.
Using incompatible dimmers with LED or CFL bulbs causes flickering, buzzing, or premature bulb failure. Standard incandescent dimmers use different control methods than LED-compatible units, making proper selection crucial for modern lighting systems. Always verify dimmer compatibility with your specific bulb types before installation.
Overcrowding electrical boxes with too many wires or oversized switches can create dangerous conditions. National Electrical Code specifies maximum wire fill for different box sizes, and exceeding these limits can cause overheating or difficulty making proper connections. If boxes appear overcrowded, consult a professional electrician for evaluation.
Ignoring local electrical codes or permit requirements can create legal and insurance issues. Some jurisdictions require permits or professional inspection for electrical work, even simple switch replacements. Check with local building departments before beginning work, particularly in older homes where electrical systems might not meet current standards.
Key Takeaways
- Always turn off power at the circuit breaker and verify with a voltage tester before beginning any electrical work
- Take photos of existing wiring before disconnecting to ensure proper reconnection during installation
- Use appropriate tools including non-contact voltage testers, wire strippers, and properly rated wire nuts
- Choose switches and dimmers compatible with your specific lighting types, especially LED and CFL bulbs
- Follow proper wire preparation techniques and make secure terminal connections without over-tightening
Frequently Asked Questions about Replace Light Switch DIY Electrical Beginner
Q: What is the best replace light switch DIY electrical beginner approach for someone with no electrical experience?
A: The best approach for replace light switch DIY electrical beginner projects starts with thorough preparation and safety education. Begin by reading electrical safety guides, watching instructional videos, and gathering proper tools including a non-contact voltage tester. Start with simple single-pole switch replacements before attempting more complex three-way switches or dimmers, and always verify power is off before beginning work.
Q: How do I use replace light switch DIY electrical beginner techniques safely?
A: Safe techniques involve turning off power at the circuit breaker, testing wires with a voltage detector, photographing existing connections, and using proper tools for wire preparation and connections. Always work methodically, double-check connections before restoring power, and don’t hesitate to consult professionals if you encounter unexpected wiring configurations.
Q: What tools are absolutely essential for light switch replacement?
A: Essential tools include a non-contact voltage tester for safety verification, wire strippers for preparing connections, screwdrivers for mounting switches, needle-nose pliers for wire manipulation, and appropriate wire nuts for connections. A flashlight or headlamp provides adequate lighting when power is turned off, and electrical tape offers additional connection protection.
Q: Can I replace any type of switch myself, or are some too complex for beginners?
A: Simple single-pole switches are ideal for beginners, while three-way and four-way switches require more advanced understanding of electrical circuits. Smart switches with neutral wire requirements can be challenging in older homes lacking neutral conductors. Stick to basic replacements initially, and consult professionals for complex switching arrangements or when adding circuits.
Q: How do I know if my electrical box can accommodate a new switch?
A: Check box depth and width to ensure adequate space for the new switch and wire connections. Standard switches require boxes at least 2.5 inches deep, while dimmers and smart switches often need deeper boxes. Count existing wires and compare to National Electrical Code box fill requirements, ensuring you don’t exceed safe capacity limits.
Conclusion
Mastering replace light switch DIY electrical beginner skills empowers homeowners to handle essential electrical maintenance safely and cost-effectively. With proper preparation, quality tools, and attention to safety protocols, even complete novices can successfully upgrade their home’s electrical switches. Remember that safety always comes first, and don’t hesitate to consult professionals when facing complex situations. Check out the recommended Amazon products above to get started with your electrical projects today.
★ Recommended Products on Amazon
As an Amazon Associate I earn from qualifying purchases.