How to install vinyl plank flooring
How to Install Vinyl Plank Flooring DIY Click Lock: Complete Step-by-Step Guide for Beginners
Learning how to install vinyl plank flooring DIY click lock is one of the most rewarding home improvement projects you can tackle yourself. Vinyl plank flooring has revolutionized the DIY flooring market, making professional-looking installations accessible to homeowners without specialized skills or expensive tools. Click lock technology has eliminated the need for adhesives and complex installation methods, allowing even beginners to achieve stunning results in just a weekend. Whether you’re replacing outdated carpet, refinishing hardwood, or updating tired tile, vinyl plank flooring offers durability, waterproofing, and aesthetic appeal at a fraction of the cost of traditional materials. This comprehensive guide will walk you through every step of the installation process, helping you understand why this flooring solution has become America’s favorite choice for renovations.
Table of Contents
- Why Install Vinyl Plank Flooring DIY Click Lock Matters
- Step-by-Step Install Vinyl Plank Flooring DIY Click Lock Guide
- Best Install Vinyl Plank Flooring DIY Click Lock Options
- Pro Tips for Install Vinyl Plank Flooring DIY Click Lock
- Common Mistakes to Avoid
- Key Takeaways
- Frequently Asked Questions About Install Vinyl Plank Flooring DIY Click Lock
- Conclusion
Why Install Vinyl Plank Flooring DIY Click Lock Matters
Installing vinyl plank flooring DIY click lock has become a game-changer for homeowners looking to upgrade their spaces affordably and efficiently. Traditional flooring installation required hiring professionals, spending thousands of dollars, and dealing with multi-week projects disrupting your home. Click lock vinyl planks eliminate these barriers, enabling you to complete entire room installations over a weekend without adhesives, special equipment, or contractor expertise.
The click lock mechanism works by creating a tight interlocking groove system between planks, forming a floating floor that doesn’t require nailing or gluing to the subfloor. This revolutionary design means planks simply snap together at angles, creating an incredibly stable, attractive surface that rivals hardwood and tile installations in appearance. The waterproof nature of vinyl makes it ideal for kitchens, bathrooms, basements, and laundry rooms—areas where traditional wood flooring would swell and fail.
Choosing to install vinyl plank flooring DIY click lock yourself provides tremendous financial benefits beyond material savings. Professional installation typically costs $8-15 per square foot, which on a 300-square-foot room adds $2,400-$4,500 to your project budget. By doing the work yourself, you retain those labor costs while gaining the satisfaction of completing a professional-quality project with your own hands. Additionally, vinyl planks resist staining, scratching, and fading better than natural materials, offering superior long-term value and durability for busy households.
Step-by-Step Install Vinyl Plank Flooring DIY Click Lock Guide
Preparation and Planning
Before opening a single box of planks, successful installation requires thorough preparation of your substrate. Begin by removing all existing flooring if necessary, or ensure your current floor is clean, dry, and level if you’re installing vinyl over existing surfaces. Most vinyl planks can be installed over concrete, tile, hardwood, or vinyl as long as the surface is flat—any high spots or dips create gaps that compromise both appearance and stability.
Use a 10-foot straightedge or laser level to identify low spots and high spots across your entire installation area. Vinyl plank flooring tolerates only 1/8-inch variation per 10 feet; greater variations require self-leveling compound on concrete or careful sanding of wood subfloors. Mark any high spots with chalk and sand them down using 80-grit sandpaper and a floor sander, or use self-leveling compound for low areas on concrete.
Moisture testing is absolutely critical, especially when installing vinyl plank flooring DIY click lock over concrete basements. Concrete wicks moisture from the ground, which can damage vinyl plank flooring and create mold issues beneath your new floor. Perform a calcium chloride moisture test or use a moisture meter on concrete; readings should be below 3 pounds per 1,000 square feet per 24 hours. If moisture levels are elevated, install a vapor barrier before laying planks.
Acclimation and Room Measurements
Vinyl planks require acclimation to your room’s temperature and humidity before installation, typically 48-72 hours. Open all cartons and lay planks throughout your installation area, allowing them to reach equilibrium with the space’s climate conditions. This prevents expansion or contraction after installation, which causes buckling, peaking, or gapping between planks.
Measure your room’s length and width to determine the most aesthetically pleasing plank layout. Ideally, you want planks to run perpendicular to windows and along the room’s longest dimension, maximizing visual appeal and making spaces feel larger. Calculate the total square footage by multiplying length by width, then add 10-15% to account for cuts, waste, and future repairs—always purchase extra material.
Mark a reference line using chalk and a straightedge, positioned perpendicular to the direction your planks will run. This line ensures straight, aligned rows and is essential for professional-looking results when learning how to install vinyl plank flooring DIY click lock. Many installers recommend starting about half the plank width from one wall, then alternating cut sides to minimize visible seams and create a more aesthetically balanced appearance.
Installing the First Row
The first row sets the stage for your entire installation, so spend extra time ensuring it’s perfectly straight. Position your first plank along your chalk reference line with the click lock groove facing the wall, leaving 1/4-inch expansion space between the plank and all walls. These expansion gaps prevent buckling and allow for seasonal wood subfloor movement if you’re installing over hardwood.
Use wood shims or spacers to maintain consistent gaps throughout the first row, checking alignment frequently with your level. Once the first plank is positioned perfectly, click the second plank into place at a 45-degree angle, then gently lower it flat to engage the locking mechanism. You should hear and feel a satisfying “click” when the connection is complete—if you don’t, the planks aren’t properly engaged and won’t form a tight, waterproof seal.
Continue clicking planks together to complete your first row, checking straightness every 3-4 planks. If the row drifts out of alignment, gently tapping the planks sideways with a rubber mallet and wooden block corrects the problem without damaging the delicate click lock edges. The first row is the foundation; any deviation multiplies through subsequent rows.
Cutting and Installing Subsequent Rows
Your last plank in the first row will need cutting to fit the remaining space—use a miter saw or hand saw to cut planks lengthwise, always supporting them properly to prevent splintering. The cut edge facing the wall remains covered by baseboards, so focus on keeping cut edges clean. Save the cut-off piece from the first row to begin the second row if it’s longer than half a plank (this staggers joints and creates a more professional appearance).
Begin the second row with this partial plank, maintaining the 1/4-inch wall spacing with shims. Click this plank into the row below by engaging the side lock first at a 45-degree angle, then the end lock while lowering the plank flat. This double-lock engagement—side and end simultaneously—is what makes click lock vinyl plank flooring so incredibly stable and effective.
Continue adding planks across the second row, then subsequent rows, working across the room systematically. Install vinyl plank flooring DIY click lock requires checking alignment every 2-3 rows to catch and correct any drifting before it becomes problematic. As you approach walls, measure remaining distances and cut planks to appropriate lengths, always maintaining that critical 1/4-inch expansion gap.
Completing the Final Rows and Transitions
The final rows in your space require careful measurement and cutting to fit the remaining width. Measure from the wall to the last installed row, subtract 1/4 inch for expansion, then divide by the plank width to determine how wide your final pieces should be. Use a table saw or miter saw to rip planks lengthwise to this width, being extremely careful with your measurements—mistakes are expensive and frustrating at this stage.
Install these final planks just as you would standard planks, maintaining the 1/4-inch gap at the wall. Once the entire floor is installed, allow 24 hours before removing spacers and installing baseboards or trim. Quality baseboards or quarter-round molding hide the expansion gaps while creating a finished appearance that looks professionally installed.
For doorways and transitions to other flooring types, use appropriate trim pieces designed for vinyl plank flooring. Threshold pieces for exterior doorways ensure proper waterproofing, while transition strips to tile, hardwood, or carpet create smooth, safe surfaces. These finishing touches are what differentiate amateur-looking installations from professional-quality results.

Best Install Vinyl Plank Flooring DIY Click Lock Options
Luxury Vinyl Plank (LVP) vs. Rigid Core Options
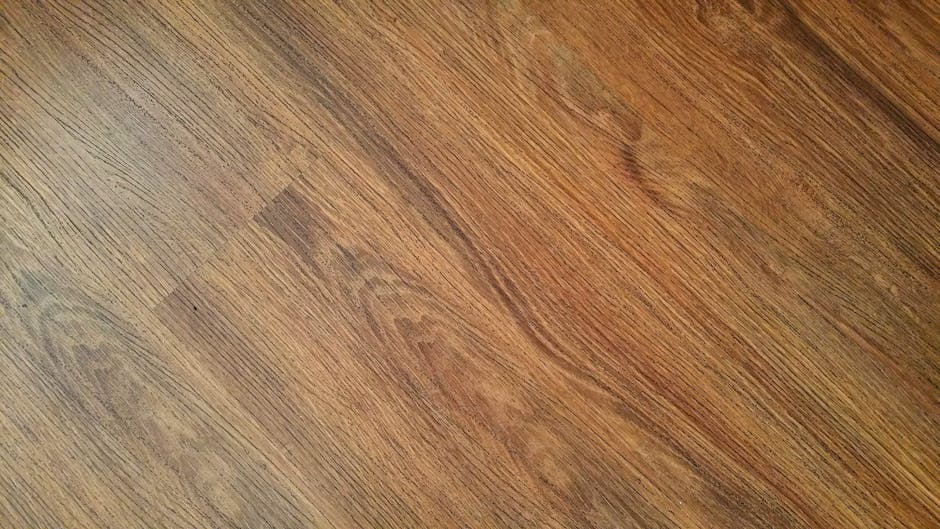
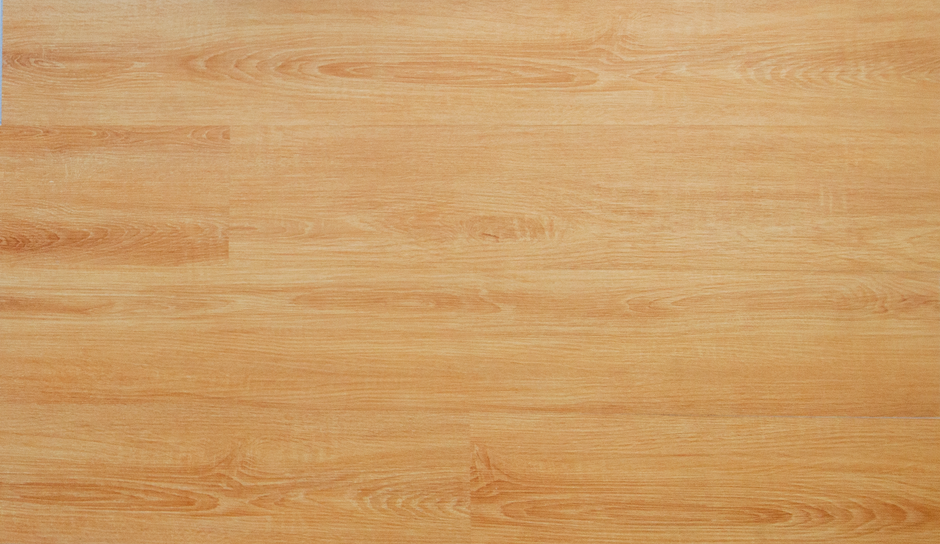
Luxury vinyl planks (LVP) represent the traditional click lock option, offering impressive durability combined with elegant wood and stone-look designs. Standard LVP ranges from 4-6mm thickness with built-in underlayment, making installation over concrete, tile, or subfloors straightforward without additional preparation. These products absorb some foot impact, offering slightly more comfort underfoot compared to rigid cores while maintaining superior scratch and stain resistance.
Rigid core vinyl planks have emerged as premium alternatives, featuring 6-8mm thick construction with enhanced structural integrity and superior waterproofing. Brands like Coretec and Lifeproof offer rigid core click lock options that withstand extreme moisture exposure, making them ideal for basements prone to periodic flooding or kitchens with frequent water spills. The added rigidity reduces movement in the finished floor and improves the overall feel of stability, particularly in larger installations.
Budget-Friendly and Premium Brands
Budget-conscious homeowners will appreciate vinyl click lock options from brands like Smartcore and Hydro Step, offering solid construction at $2-3 per square foot. These products deliver excellent value for bedrooms, living rooms, and low-moisture areas, performing admirably for 10-15 years with proper care. Reviews consistently praise these budget options for easy installation and attractive wood grain patterns that convincingly mimic authentic hardwood.
Premium brands like Mohawk WetProtect, Lifeproof, and Karndean justify higher price points ($4-6 per square foot) through superior wear layers, realistic wood grain photography, and enhanced waterproofing. Professional designers often specify these brands for high-traffic commercial spaces and demanding residential applications. When learning how to install vinyl plank flooring DIY click lock, the installation process remains identical regardless of price point—you’re primarily paying for improved appearance and longevity.
Mid-range options from brands like Vinylplank and Mannington offer exceptional balance between cost and quality, delivering 15-20 year lifespans at $2.50-4.00 per square foot. These manufacturers invest heavily in click lock mechanism engineering, reducing installation frustration and ensuring tight, permanent connections. For most homeowners, mid-range brands represent the optimal value proposition, combining affordability with genuine quality improvements over budget options.

Pro Tips for Install Vinyl Plank Flooring DIY Click Lock
Workspace Organization and Tool Preparation
Organizing your workspace before beginning prevents frustrating delays and installation errors. Arrange plank cartons in rows matching your installation sequence, keeping opened planks in the acclimation zone for 48 hours minimum. Gather all tools and materials in one central location: miter saw or hand saw, rubber mallet, spacers, measuring tape, chalk line, level, and safety equipment.
Set up a cutting station with proper ventilation if cutting indoors, ideally outside when weather permits. Vinyl plank flooring cuts create plastic dust that shouldn’t accumulate in living spaces, and outdoor sawing is infinitely more pleasant than creating mess indoors. Always wear safety glasses and hearing protection when operating power tools, and keep water nearby when using a miter saw on vinyl (wet cutting reduces dust generation).
Angle Installation and Directional Considerations
The direction you orient vinyl planks dramatically impacts perceived room size and light distribution. Installing planks parallel to windows or running lengthwise through open floor plans creates visually expansive spaces that feel larger and brighter. Conversely, planks running parallel to walls or perpendicular to windows emphasize room boundaries and can make spaces feel more confined.
For hallways and long, narrow rooms, run planks along the length to create continuous visual flow. In kitchens with island seating, orient planks to draw sightlines toward seating areas and views. When installing vinyl plank flooring DIY click lock in multiple rooms, maintain consistent direction throughout for visual continuity, creating seamless transitions between spaces.
Expansion Management and Climate Control
Proper expansion gap management separates professional installations from amateur results prone to buckling and peaking. Beyond the 1/4-inch perimeter gaps, maintain 1/8-inch gaps around all fixed obstacles: door frames, heating vents, structural posts, and permanent fixtures. These gaps allow the floating floor to expand and contract seasonally without damaging installation integrity.
In high-moisture areas like kitchens and bathrooms, slightly increase expansion gaps to 3/8 inch to accommodate seasonal humidity fluctuations. Temperature swings matter too; if your home temperature varies significantly between seasons, account for this in gap sizing. Vinyl expands about 0.3mm per linear meter per 10°C temperature change—small amounts individually but significant across a 20-foot span.
Sealing and Waterproofing Considerations
While vinyl plank flooring is inherently waterproof, gaps between planks can allow water infiltration to subfloors. Apply clear waterproofing sealant into seams and around perimeter gaps before installing baseboards, particularly in bathrooms and kitchens. This additional protection safeguards your investment and prevents catastrophic water damage if plumbing leaks occur.

Common Mistakes to Avoid
Skipping Substrate Preparation
Many DIY installers rush through preparation, assuming vinyl planks will somehow accommodate unlevel or dirty surfaces. In reality, high spots in subfloors create visible gaps that catch dust and dirt, while low spots cause planks to rock underfoot and create movement that eventually damages click locks. Spend 20% of your project time on preparation; it’s the difference between professional-quality results and disappointing installations.
Improper Acclimation and Expansion Gaps
Ignoring acclimation requirements causes planks to expand after installation, buckling and peaking across your newly finished floor. Forget expansion gaps, and seasonal movement creates popping sounds and visible gaps between planks. These mistakes are expensive to correct, often requiring complete removal and reinstallation of partially installed flooring.
Misaligned Starting Rows
Rushing through the first row’s alignment cascades problems through your entire installation. A 1/4-inch misalignment over 20 feet becomes a 5-inch problem across the room’s width, forcing extreme cuts in final rows and looking obviously amateur. Use chalk lines, check alignment constantly, and don’t advance past initial rows until they’re genuinely perfect.
Inadequate Tool Selection and Safety Practices
Attempting installation without a miter saw forces hand-cutting every piece, consuming endless time and producing frustratingly imprecise cuts. Skipping safety glasses when using power tools risks eye injuries that permanently damage vision. Protecting your health and using appropriate tools transforms a frustrating, unsafe experience into an enjoyable weekend project.
Key Takeaways
- Click lock technology makes vinyl plank flooring installation accessible to beginners without professional experience or specialized tools
- Thorough substrate preparation and proper acclimation are non-negotiable requirements for successful, long-lasting installations
- Starting with a perfectly straight, aligned first row ensures subsequent rows follow suit and creates professional-quality results
- Maintaining expansion gaps around perimeter walls and obstacles prevents buckling and seasonal movement damage
- Selecting quality vinyl plank flooring options from reputable manufacturers ensures durability and aesthetic appeal for 15-20+ years
Frequently Asked Questions About Install Vinyl Plank Flooring DIY Click Lock
Q: What is the best vinyl plank flooring option for DIY click lock installation?
A: Mid-range brands like Mannington and Smartcore offer exceptional value for DIY installers, providing durable click lock systems and attractive designs at $2.50-4.00 per square foot. For moisture-prone areas like bathrooms and basements, invest in rigid core options like Lifeproof that resist warping and provide superior waterproofing. Consider your room’s function, moisture exposure, and aesthetic preferences when selecting between budget, mid-range, and premium options.
Q: How do I know if my subfloor is suitable for vinyl plank flooring installation?
A: Your subfloor must be clean, dry, and level within 1/8-inch variation per 10 feet. Concrete requires moisture testing showing levels below 3 pounds per 1,000 square feet per 24 hours; elevated moisture requires vapor barrier installation. Wood subfloors need sanding to smooth high spots and removal of any loose or damaged boards. Always test levelness with a straightedge and laser level before opening flooring cartons.
Q: Can I install vinyl plank flooring over existing tile or hardwood flooring?
A: Yes, vinyl plank flooring installs successfully over existing tile, hardwood, and even vinyl when surfaces are clean and level. Remove any loose tile or protruding grout lines that create high spots, then use self-leveling compound for low areas. Ensure the substrate is stable and won’t move when walked on, as movement damages click lock connections and creates visible gaps over time.
Q: How long does vinyl plank flooring installation typically take for an average room?
A: A 300-square-foot room typically requires 8-12 hours for preparation and installation, depending on complexity and experience level. Budget additional time for substrate preparation, with many DIYers spending as long preparing as installing. Corner installations, multiple doorways, and complex layouts extend timelines, while simple rectangular rooms progress quickly once you develop a rhythm.
Q: Should I hire professionals or DIY install vinyl plank flooring myself?
A: DIY installation is genuinely feasible when you follow preparation and alignment guidelines carefully, potentially saving $2,400-4,500 in labor costs. Professionals complete installations faster and guarantee results, valuable if you lack confidence or have complex room layouts. Consider your skills, timeline, and comfort level with power tools when deciding; either approach produces quality results when executed properly.
Conclusion
Learning how to install vinyl plank flooring DIY click lock empowers homeowners to complete professional-quality flooring projects while preserving significant portions of their renovation budgets. Click lock technology has fundamentally transformed flooring installation, eliminating adhesives, specialized tools, and contractor requirements while maintaining beautiful, durable results. By following the comprehensive preparation, installation, and finishing steps outlined in this guide, you’ll create a floor that rivals professional installations while gaining the satisfaction of completing meaningful home improvement work yourself. Start your project today, invest in quality materials and basic tools, and transform your living spaces into beautifully updated rooms that reflect your personal style. Your dream flooring is completely within reach—let this guide empower your installation success.
Recommended Products on Amazon
As an Amazon Associate I earn from qualifying purchases.