How to fix squeaky floors permanently
Fix Squeaky Floor DIY Cheap Easy: Complete Solutions Guide 2025
Looking to fix squeaky floor DIY cheap easy without calling expensive contractors? Squeaky floors are one of the most common household annoyances that can disrupt your peace and quiet. The good news is that most floor squeaks can be eliminated using simple tools and techniques that won’t break the bank. This comprehensive guide will walk you through proven methods to silence those irritating creaks and squeaks permanently, saving you hundreds of dollars in professional repair costs.
Table of Contents
- Why Fix Squeaky Floor DIY Cheap Easy Matters
- Step-by-Step Fix Squeaky Floor DIY Cheap Easy Guide
- Best Fix Squeaky Floor DIY Cheap Easy Options
- Pro Tips for Fix Squeaky Floor DIY Cheap Easy
- Common Mistakes to Avoid
- Key Takeaways
- Frequently Asked Questions about Fix Squeaky Floor DIY Cheap Easy
- Conclusion
Why Fix Squeaky Floor DIY Cheap Easy Matters
Understanding why floors squeak is crucial before attempting any repairs. Most squeaks occur when wooden subfloors separate from floor joists, creating gaps that allow movement and friction between materials. This movement generates the annoying sounds that echo through your home, especially during quiet nighttime hours. Environmental factors like humidity changes, seasonal temperature fluctuations, and normal house settling contribute to these gaps over time.
Beyond the obvious noise annoyance, squeaky floors can indicate underlying structural issues that may worsen without intervention. Loose subflooring can lead to uneven surfaces, increased wear on finished flooring materials, and potential safety hazards. Addressing these issues promptly prevents more expensive repairs down the road and maintains your home’s value.
The financial benefits of DIY floor squeak repair are substantial compared to professional services. Contractors typically charge $200-500 for squeak repairs, while DIY solutions cost under $50 in most cases. You’ll also gain valuable home maintenance skills and the satisfaction of solving the problem yourself. Most importantly, you can address multiple squeaky areas throughout your home using the same tools and techniques, maximizing your investment.
Modern squeak repair products have made DIY solutions more effective and accessible than ever before. Advanced screw systems, specialized lubricants, and innovative fasteners allow homeowners to achieve professional-quality results. These solutions work on various flooring types including hardwood, laminate, and engineered floors, making them versatile additions to any homeowner’s toolkit.
Step-by-Step Fix Squeaky Floor DIY Cheap Easy Guide
Begin your repair project by identifying the exact location and cause of each squeak. Walk slowly across the affected area while someone listens from below if possible, marking squeaky spots with masking tape. Test the floor’s movement by applying pressure with your foot – excessive give indicates loose subflooring that needs securing. This diagnostic phase ensures you target the root cause rather than just treating symptoms.
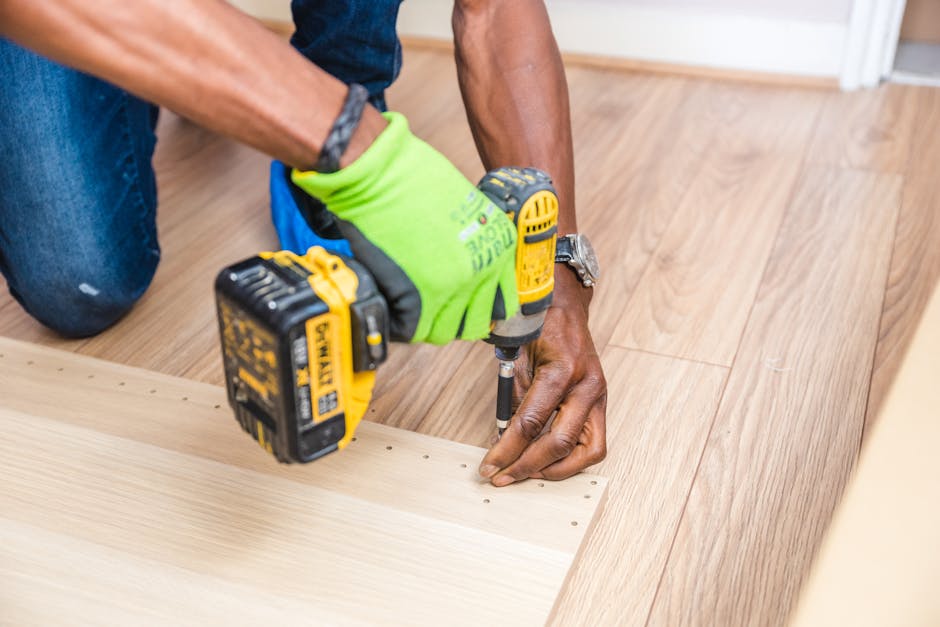
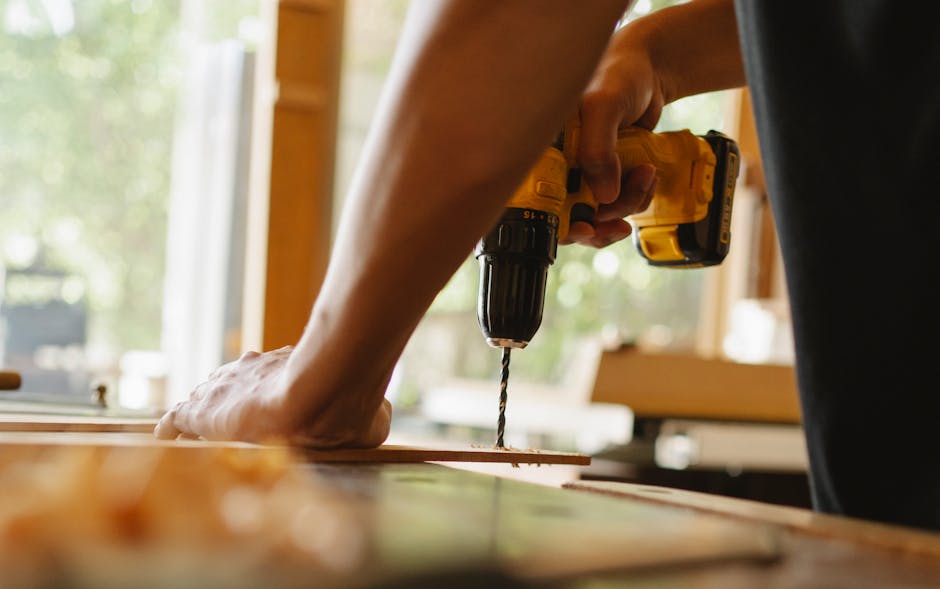
Gather your essential tools before starting: a drill with various bit sizes, appropriate screws for your floor type, and a stud finder to locate floor joists. For hardwood floors, you’ll need wood screws that penetrate at least 1 inch into the subfloor. Carpet installations may require specialized squeak-elimination screws that break off at floor level. Having the right tools prevents project delays and ensures professional results.
Start repairs by securing loose subfloor sections to floor joists from above when possible. Drill pilot holes at 45-degree angles into joists, then drive screws until heads sit slightly below the surface. For hardwood floors, countersink screws and fill holes with matching wood filler for invisible repairs. This method provides the strongest connection and longest-lasting squeak elimination.
Alternative approaches work when you cannot access areas from below or when dealing with finished floors. Thread-cutting screws designed for squeak repair can be driven through carpet and pad into subfloor, with heads breaking off cleanly at carpet level. For accessible areas from below, adding construction adhesive between subfloor and joists creates permanent bonds that eliminate movement and associated squeaks.
Best Fix Squeaky Floor DIY Cheap Easy Options
The Squeak Relief system represents the gold standard for DIY floor squeak elimination, offering professional results at fraction of contractor costs. This innovative system uses specially designed screws that secure loose subflooring while breaking off flush with finished surfaces. The included depth-control fixture ensures consistent screw placement, while the snap-off feature eliminates visible fastener heads. Success rates exceed 95% for typical squeak scenarios, making this the most reliable option available.
Traditional wood screws offer the most economical solution for accessible repair areas, particularly when working from basement or crawl space locations. Choose screws 2.5-3 inches long to ensure adequate penetration through subfloor into floor joists below. Pre-drilling prevents wood splitting while ensuring precise placement, and galvanized screws resist corrosion in humid environments. This method costs under $10 for most projects and provides permanent squeak elimination.
Construction adhesive application between loose subfloor sections and joists creates flexible bonds that accommodate natural wood movement while preventing squeaks. Apply generous beads of adhesive along joist edges, then secure with temporary clamps until curing completes. This approach works exceptionally well in combination with mechanical fasteners, creating belt-and-suspenders reliability. The adhesive method excels in situations where screw access is limited or where maintaining original floor integrity is paramount.
Specialized lubricants offer temporary squeak relief while you plan more permanent solutions. Powdered graphite, liquid wax, or specialized floor lubricants can quiet squeaks for months when applied to accessible friction points. These solutions work best on surface-level squeaks rather than structural separation issues. While not permanent fixes, lubricants buy time for proper repair planning and can eliminate seasonal squeaks that occur only during specific humidity conditions.

Pro Tips for Fix Squeaky Floor DIY Cheap Easy
Timing your repairs during optimal weather conditions significantly improves success rates and repair longevity. Plan squeak repairs during stable humidity periods when wood movement is minimal, typically during spring or fall months. Avoid repairs during extreme seasonal transitions when floors are actively expanding or contracting, as this movement can compromise new fastener placement. Consistent environmental conditions during repair ensure accurate problem identification and effective solutions.
Pre-drilling pilot holes prevents wood splitting while ensuring precise screw placement, especially important when working near floor edges or in hardwood installations. Use drill bits slightly smaller than screw shaft diameter to create clean holes without compromising holding power. Mark desired screw depth on drill bits with tape to prevent over-penetration that could damage finished flooring surfaces. These preparation steps separate professional-quality results from amateur attempts.
Address multiple squeaky areas during single repair sessions to maximize efficiency and tool setup time. Group nearby squeaks together and work systematically across affected rooms, maintaining consistent repair techniques throughout. This approach ensures uniform results while minimizing disruption to household routines. Document repair locations with photos for future reference, particularly helpful if additional squeaks develop in similar areas.
Common Mistakes to Avoid
Over-tightening screws represents the most frequent DIY squeak repair mistake, potentially causing more damage than the original problem. Excessive torque can strip screw holes, crack subfloor materials, or create new stress points that generate additional squeaks. Drive screws until snug, then add just enough additional torque to eliminate floor movement. The goal is secure attachment without material compression that creates new problems.
Using incorrect screw lengths either fails to adequately secure loose materials or penetrates too deeply into underlying systems. Measure total material thickness before selecting screws, ensuring adequate penetration into structural members without hitting electrical or plumbing systems. When in doubt, start with shorter screws and upgrade length if initial attempts prove ineffective. Proper screw selection prevents both inadequate repairs and accidental damage to building systems.
Ignoring underlying moisture issues often leads to recurring squeaks despite proper repairs. High humidity, plumbing leaks, or inadequate ventilation can cause continued wood movement that loosens even properly installed fasteners. Address environmental factors contributing to floor movement before implementing mechanical repairs. This comprehensive approach ensures long-lasting results rather than temporary fixes that require repeated attention.

Key Takeaways
- Most floor squeaks result from loose subfloor sections that can be permanently fixed with proper screw placement and technique
- DIY squeak repairs cost under $50 compared to $200-500 for professional services, offering substantial savings
- Specialized squeak elimination systems provide professional results while maintaining finished floor appearance
- Proper diagnosis and environmental considerations ensure repairs address root causes rather than just symptoms
- Strategic timing and quality tools significantly improve repair success rates and longevity
Frequently Asked Questions about Fix Squeaky Floor DIY Cheap Easy
Q: What is the best fix squeaky floor DIY cheap easy method for beginners?
A: The Squeak Relief screw system offers the most foolproof approach for beginners, featuring depth-control fixtures and break-away heads that prevent over-penetration while ensuring invisible repairs. This system requires minimal experience while delivering professional results consistently. The included instructions and specialized tools eliminate guesswork that often leads to DIY repair failures.
Q: How do I use fix squeaky floor DIY cheap easy techniques on carpeted areas?
A: Specialized carpet screws designed for squeak elimination can be driven through carpet and pad directly into subfloor and joists below. These screws feature break-away heads that snap off cleanly at carpet level, leaving no visible fastener evidence. Mark squeak locations carefully before starting, and use the provided depth-control fixture to ensure consistent placement throughout the repair area.
Q: Can I repair squeaky hardwood floors without visible damage?
A: Yes, using proper techniques including pre-drilling, countersinking, and wood filler application creates invisible repairs on hardwood floors. Drive screws at slight angles near board edges where grain patterns help camouflage filled holes. Choose wood filler that matches your floor’s stain color, and sand flush after curing for seamless results.
Q: How long do DIY squeak repairs typically last?
A: Properly executed DIY squeak repairs using appropriate fasteners and techniques should last 10-20 years or longer under normal conditions. Repair longevity depends on environmental factors like humidity control and the quality of initial installation. Addressing underlying moisture issues and using galvanized fasteners maximizes repair lifespan while preventing recurrence.
Q: What tools do I absolutely need for effective squeak repairs?
A: Essential tools include a cordless drill with various bit sizes, appropriate screws for your floor type, a stud finder for locating joists, and basic measuring tools. Specialized squeak elimination kits include necessary components and instructions for specific applications. Quality tools ensure consistent results and make the repair process more efficient and enjoyable.
Conclusion
Successfully learning how to fix squeaky floor DIY cheap easy transforms annoying household problems into manageable maintenance tasks that save significant money while building valuable skills. The techniques and products outlined in this guide provide multiple approaches suitable for various skill levels and floor types, ensuring every homeowner can achieve quiet, stable floors. Take action today by identifying your squeaky areas and selecting the appropriate repair method – your peaceful home environment and wallet will thank you for the effort.
Recommended Products on Amazon
As an Amazon Associate I earn from qualifying purchases.