How to install a smart thermostat
Install Smart Thermostat DIY Nest Ecobee: Complete 2025 Guide
Learning how to install smart thermostat DIY Nest Ecobee models can revolutionize your home’s energy efficiency while saving hundreds on professional installation costs. Modern smart thermostats offer advanced features like Wi-Fi connectivity, learning algorithms, and smartphone control that traditional thermostats simply can’t match. This comprehensive guide walks you through everything needed to successfully upgrade your home’s climate control system with confidence and precision.
Table of Contents
- Why Install Smart Thermostat DIY Nest Ecobee Matters
- Step-by-Step Install Smart Thermostat DIY Nest Ecobee Guide
- Best Install Smart Thermostat DIY Nest Ecobee Options
- Pro Tips for Install Smart Thermostat DIY Nest Ecobee Success
- Common Mistakes to Avoid
- Key Takeaways
- Frequently Asked Questions about Install Smart Thermostat DIY Nest Ecobee
- Conclusion
Why Install Smart Thermostat DIY Nest Ecobee Matters
Understanding why you should install smart thermostat DIY Nest Ecobee systems starts with recognizing the substantial benefits they provide over traditional thermostats. Smart thermostats can reduce heating and cooling costs by up to 23%, translating to hundreds of dollars in annual savings for average households. These devices learn your schedule automatically, adjusting temperatures when you’re away and ensuring optimal comfort when you return home.
Beyond energy savings, smart thermostats offer unparalleled convenience through smartphone apps that allow remote temperature control from anywhere in the world. You can adjust settings while at work, on vacation, or simply from bed without walking to the thermostat. Many models also provide detailed energy usage reports, helping you understand consumption patterns and identify additional opportunities for efficiency improvements.
Environmental benefits represent another compelling reason to upgrade to smart thermostat technology. By optimizing heating and cooling cycles, these devices significantly reduce your home’s carbon footprint while maintaining comfortable living conditions. The precision temperature control and advanced scheduling features ensure your HVAC system operates only when necessary, minimizing unnecessary energy consumption.
Professional installation typically costs $150-300, but DIY installation requires only basic tools and approximately two hours of your time. Most homeowners with minimal electrical experience can successfully complete the installation process following proper safety procedures and manufacturer instructions. The money saved on professional installation can offset a significant portion of the smart thermostat’s purchase price.

Step-by-Step Install Smart Thermostat DIY Nest Ecobee Guide
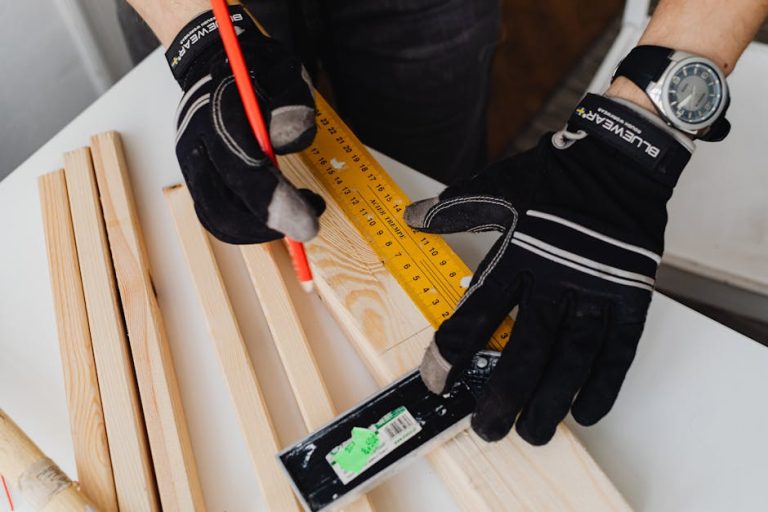
Before beginning your installation project, gather essential tools including a screwdriver set, wire strippers, level, drill with bits, and voltage tester for safety verification. Turn off power to your HVAC system at both the thermostat and circuit breaker to prevent electrical hazards during the installation process. Take photos of your existing thermostat’s wiring configuration before disconnecting anything, as this serves as a valuable reference if complications arise.
Remove your old thermostat by unscrewing it from the wall mount and carefully disconnecting the wires while noting their terminal positions. Most thermostats use standard wire color coding: red for power (R), white for heating (W), yellow for cooling (Y), green for fan (G), and blue or black for common (C). However, some installations may vary, making your reference photos crucial for successful completion.
Install the new mounting plate by checking level alignment and marking screw hole positions on your wall. Drill pilot holes if mounting into drywall, or use the provided screws for direct stud mounting. Connect wires to the appropriate terminals on your new smart thermostat base, ensuring tight connections that won’t work loose over time.
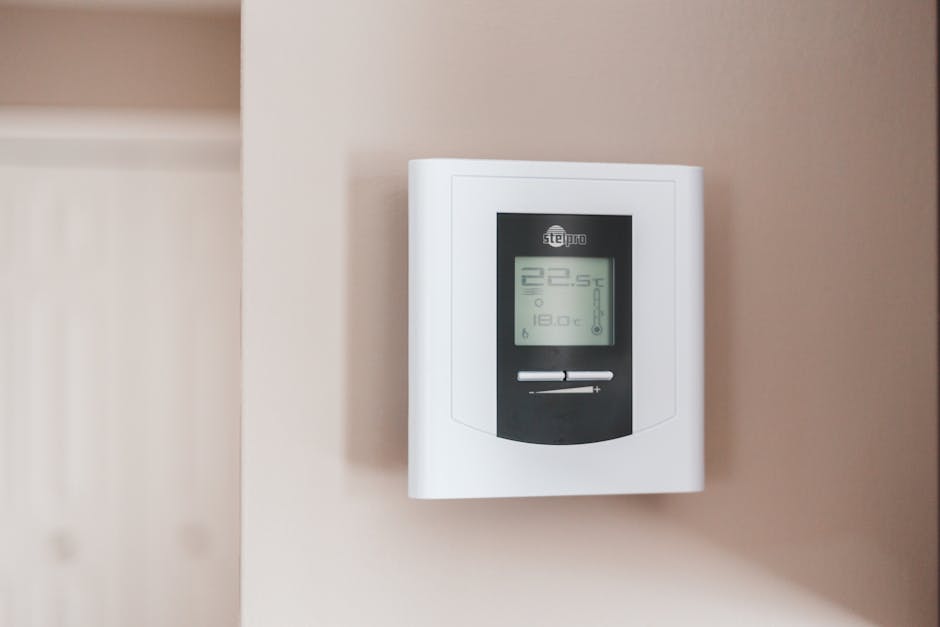
Attach the smart thermostat display unit to the mounted base plate, following manufacturer-specific instructions for your chosen model. Restore power to your HVAC system and thermostat, then follow the device’s setup wizard to configure Wi-Fi connectivity, create user accounts, and establish initial temperature preferences. Test both heating and cooling functions to verify proper installation before considering the project complete.

Best Install Smart Thermostat DIY Nest Ecobee Options
When choosing the best install smart thermostat DIY Nest Ecobee models, consider your home’s specific HVAC system requirements and desired feature set. The Google Nest Learning Thermostat represents the gold standard for smart climate control, featuring machine learning algorithms that adapt to your schedule automatically while providing sleek aesthetic appeal. Its auto-scheduling capabilities eliminate manual programming while the Farsight display shows time, weather, or temperature from across the room.
The Ecobee SmartThermostat excels in homes requiring precise temperature control across multiple zones through its innovative room sensor technology. These wireless sensors detect occupancy and temperature in different rooms, ensuring balanced comfort throughout your entire home rather than relying on single-point measurements. The built-in Alexa voice control adds convenient hands-free operation for temperature adjustments and smart home integration.
Budget-conscious homeowners should consider the Honeywell Home T9, which offers excellent value with smart room sensors, geofencing capabilities, and comprehensive app control at a lower price point. This model provides many premium features found in higher-end units while maintaining user-friendly installation and operation. The T9’s compatibility with multiple HVAC systems makes it suitable for most homes without requiring additional equipment or professional modifications.

Pro Tips for Install Smart Thermostat DIY Nest Ecobee Success
Successfully completing your install smart thermostat DIY Nest Ecobee project requires attention to several critical details that can make the difference between seamless operation and frustrating complications. Always verify your home’s C-wire (common wire) availability before purchasing, as many smart thermostats require this connection for reliable power supply and Wi-Fi connectivity. If your current system lacks a C-wire, consider models that include power extender kits or plan to install one separately.
Check your HVAC system’s compatibility using manufacturer websites or apps before making final product selections. Some older systems, heat pumps, or multi-stage setups may require specific thermostat models or additional equipment for proper operation. Taking time for compatibility verification prevents costly returns and installation delays while ensuring optimal performance from your new smart thermostat.
Document your installation process with photos at each step, creating a personal reference guide for future maintenance or troubleshooting needs. This documentation proves invaluable if you need to contact customer support or make adjustments later. Additionally, register your new thermostat immediately after installation to activate warranty coverage and receive firmware updates that improve functionality and security.
Consider installing your smart thermostat during moderate weather when you can easily test both heating and cooling functions without discomfort. This timing allows you to identify and resolve any issues before extreme temperatures make HVAC operation critical for comfort and safety.
Common Mistakes to Avoid
Many DIY installers encounter problems by rushing through the initial planning phase without properly assessing their HVAC system’s requirements and limitations. Failing to turn off power before beginning work creates serious safety hazards and potential equipment damage that far exceeds the cost of professional installation. Always use a voltage tester to confirm power disconnection before touching any wires or electrical connections.
Incorrect wire connections represent the most frequent installation error, often resulting from poor labeling or misunderstanding terminal designations. Take extra time to verify each connection against manufacturer diagrams and your reference photos before energizing the system. Loose wire connections can cause intermittent operation, system damage, or safety hazards that require professional repair.
Skipping the compatibility check frequently leads to purchased thermostats that cannot properly control specific HVAC equipment types or configurations. Heat pumps, multi-stage systems, and some older equipment require particular attention to compatibility requirements that may not be obvious without careful research. When in doubt, consult HVAC professionals or manufacturer technical support before proceeding with installation.

Key Takeaways
- Smart thermostats reduce energy costs by up to 23% while providing convenient smartphone control and advanced scheduling features
- DIY installation saves $150-300 in professional fees and typically requires only basic tools and two hours of work
- Proper planning, including compatibility verification and C-wire assessment, prevents costly mistakes and installation complications
- Google Nest and Ecobee models offer the best combination of features, reliability, and user satisfaction for most homes
- Safety must be the top priority – always turn off power and verify disconnection before beginning any electrical work
Frequently Asked Questions about Install Smart Thermostat DIY Nest Ecobee
Q: What is the best install smart thermostat DIY Nest Ecobee option for beginners?
A: The Google Nest Learning Thermostat offers the most user-friendly installation experience with excellent step-by-step guidance through their app. Its auto-configuration features minimize manual setup requirements while providing robust compatibility with most standard HVAC systems. The clear labeling and comprehensive documentation make it ideal for first-time smart thermostat installers.
Q: How do I use install smart thermostat DIY Nest Ecobee models without a C-wire?
A: Many modern smart thermostats include power extender kits that eliminate C-wire requirements by using existing wiring more efficiently. Alternatively, you can install a separate C-wire using thermostat wire run from your HVAC system’s control board. Some models can operate using power stealing technology, though this may cause compatibility issues with certain systems.
Q: Can I install a smart thermostat with a heat pump system?
A: Yes, but heat pump installations require thermostats specifically designed for this equipment type with proper auxiliary heat control. Models like the Ecobee SmartThermostat and Nest Learning Thermostat offer heat pump compatibility when properly configured during setup. Always verify heat pump compatibility before purchasing to ensure proper operation and efficiency.
Q: How long does smart thermostat installation typically take?
A: Most DIY installations require 1-3 hours depending on your experience level and any complications encountered. Simple replacements with compatible wiring can be completed in under an hour, while installations requiring C-wire addition or troubleshooting may take longer. Planning and preparation significantly reduce installation time and complications.
Q: What tools do I need for smart thermostat installation?
A: Essential tools include screwdrivers (Phillips and flathead), wire strippers, voltage tester, level, drill with bits, and possibly wire nuts or electrical tape. Most smart thermostats include mounting hardware and basic installation accessories. Having a smartphone or tablet available helps with setup and configuration processes after physical installation.
Conclusion
Successfully learning to install smart thermostat DIY Nest Ecobee systems empowers homeowners with significant energy savings, enhanced comfort control, and valuable hands-on experience with smart home technology. This comprehensive guide provides all the knowledge and confidence needed to complete professional-quality installations while avoiding common pitfalls that frustrate inexperienced installers. Take the first step toward a more efficient, comfortable home by choosing the right smart thermostat and following these proven installation techniques today.
Recommended Products on Amazon
As an Amazon Associate I earn from qualifying purchases.