How to fix a leaking faucet step by step
How to Fix a Leaking Faucet: Complete DIY Plumbing Repair Guide
A fix leaking faucet DIY plumbing repair project is one of the most common and rewarding home maintenance tasks that homeowners can tackle themselves. According to the Environmental Protection Agency, household leaks can waste nearly 10,000 gallons of water annually, with 10% of homes having leaks that waste 90 gallons or more per day. A single dripping faucet can waste more than 3,000 gallons of water per year, which translates to approximately $35 in water costs. The good news is that most faucet leaks can be fixed with basic tools and a little know-how, saving you both money on water bills and expensive plumber visits.
Whether you’re dealing with a persistent drip from your kitchen sink or a steady stream from your bathroom faucet, learning how to perform this essential DIY plumbing repair will empower you to maintain your home’s plumbing system effectively. Most faucet repairs can be completed in under two hours with materials costing less than $20, compared to professional plumber fees ranging from $150 to $350 for the same repair. This comprehensive guide will walk you through identifying the type of faucet you have, gathering the necessary tools, and completing the repair step-by-step, ensuring you have the confidence and knowledge to tackle this project successfully.

Table of Contents
- Understanding Different Types of Faucets
- Essential Tools and Materials Needed
- Step-by-Step Repair Process
- Common Problems and Troubleshooting
- Prevention and Maintenance Tips
- Frequently Asked Questions
- Conclusion
Understanding Different Types of Faucets
Before beginning any fix leaking faucet DIY plumbing repair, it’s crucial to identify the type of faucet you’re working with, as each requires a different approach. The four main types of faucets found in most homes are compression faucets, ball faucets, cartridge faucets, and ceramic disk faucets, each with distinct mechanisms and common failure points.
Compression faucets are the oldest and simplest design, typically found in homes built before 1960. These faucets have separate hot and cold handles that you turn to compress a rubber washer against a valve seat to stop water flow. When these faucets leak, it’s usually because the rubber washer has worn out or the packing around the stem has deteriorated. You can identify a compression faucet by the fact that you have to turn the handle multiple times to fully shut off the water, and the handles will have a grinding or rough feel when turned.
Ball faucets feature a single handle that controls a rotating ball with chambers and springs inside the faucet body. These are commonly found in kitchen sinks and were popular in the 1970s and 1980s. Delta is the primary manufacturer of this design. Ball faucets tend to leak when the rubber seats and springs wear out, or when the ball itself becomes corroded or damaged. The repair typically involves replacing the entire ball assembly, which costs around $15-25.
Cartridge faucets can have either one or two handles and use a cartridge mechanism to control water flow. Single-handle cartridge faucets move the cartridge up and down and side to side to control flow and temperature, while two-handle versions have separate cartridges for hot and cold water. Brands like Moen, Kohler, and Price Pfister commonly use this design. These faucets leak when the cartridge becomes worn or when the O-rings around the cartridge deteriorate.
Ceramic disk faucets represent the newest technology and are considered the most durable option. They feature a single handle that operates two ceramic disks within a cylindrical chamber called a pressure-balance cartridge. These faucets are less likely to leak but when they do, it’s usually due to worn inlet and outlet seals or a cracked ceramic disk, which typically requires replacing the entire cartridge assembly.
Essential Tools and Materials Needed
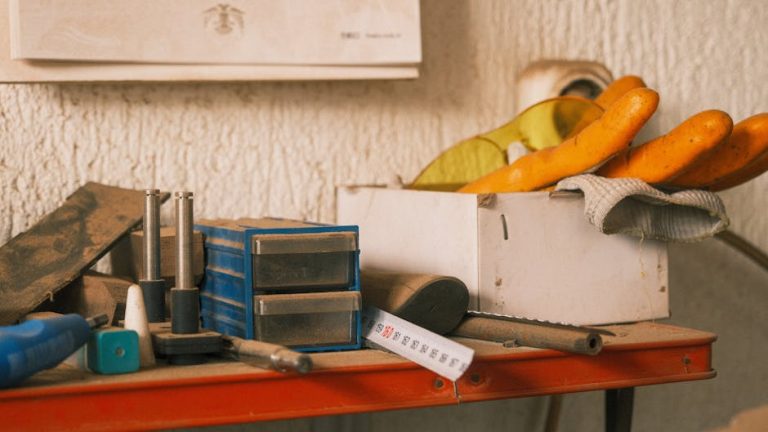
Success in any DIY plumbing repair project depends heavily on having the right tools and materials before you begin. Gathering everything you need upfront will save you multiple trips to the hardware store and ensure your repair goes smoothly. The basic tool kit for faucet repair is relatively simple and most homeowners already have many of these items.
Basic hand tools form the foundation of your repair kit. You’ll need an adjustable wrench (10-inch is ideal), needle-nose pliers, and a standard screwdriver set including both flathead and Phillips head drivers. A flashlight or headlamp is essential for seeing into dark spaces under the sink. Channel lock pliers or pipe wrench may be necessary for stubborn packing nuts or cartridge removal. The CRAFTSMAN 6-piece Pliers Set ($24.99 on Amazon) provides excellent value and includes the needle-nose and channel lock pliers you’ll need.
Specialized plumbing tools can make certain repairs much easier. A seat wrench or seat dresser tool ($8-12) is invaluable for compression faucet repairs where you need to replace or refinish valve seats. A cartridge puller ($15-20) can save significant time and frustration when removing stuck cartridges from cartridge-style faucets. The TEKTON Cartridge Puller Set ($18.95) includes multiple sizes to fit most common faucet brands.
Replacement parts vary depending on your faucet type, but having a universal repair kit on hand covers most common repairs. For compression faucets, stock up on various sizes of rubber washers, O-rings, and packing material. The Danco Universal Washer Kit ($7.99) contains 80 pieces covering most common sizes. For cartridge and ball faucets, consider purchasing a universal repair kit specific to your faucet brand. Delta ball faucet repair kits run about $12-15, while cartridge faucet repair kits range from $8-20 depending on the brand and cartridge type.
Safety and preparation materials should never be overlooked. Plumber’s silicone grease ($3-5) helps reassemble parts smoothly and prevents future sticking. Thread seal tape or pipe dope ($2-4) ensures watertight connections when reassembling threaded components. Drop cloths or old towels protect your floors and provide a clean workspace. Safety glasses protect your eyes from debris when working under sinks.

Step-by-Step Repair Process
The actual fix leaking faucet DIY plumbing repair process follows a logical sequence regardless of faucet type, though specific steps vary based on your faucet’s design. Following these steps methodically will ensure success and prevent damage to your faucet or plumbing system.
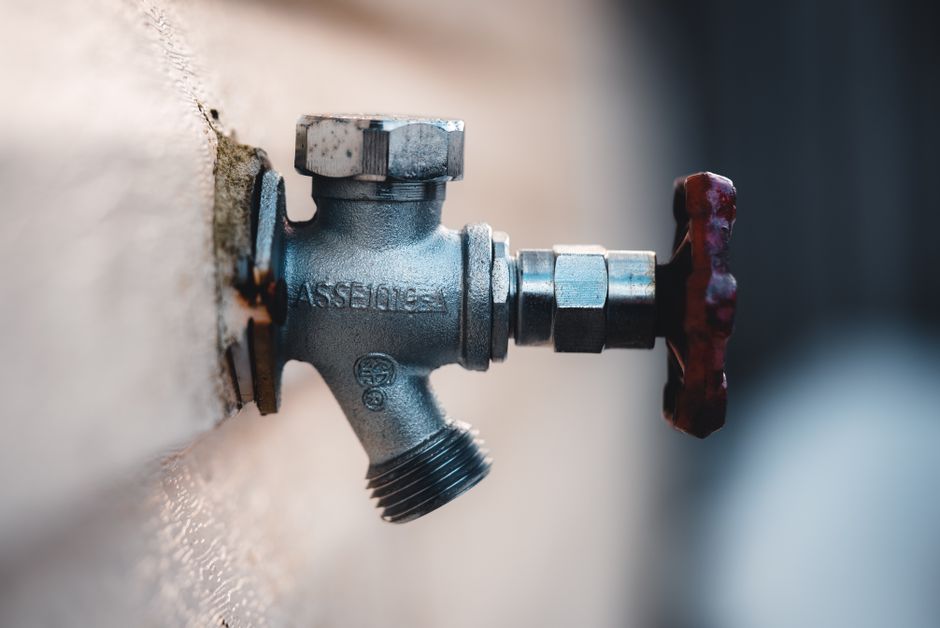
Preparation and safety steps are critical before touching any plumbing components. First, shut off the water supply to the faucet by turning the shutoff valves under the sink clockwise until fully closed. If you cannot locate shutoff valves or they don’t work, you may need to shut off water to the entire house at the main water meter. Test that water is off by trying to turn on the faucet – no water should flow. Remove any items from under the sink to give yourself adequate working space. Place a drop cloth or towels on the floor to catch any water or dropped parts.
Disassembly process requires patience and attention to detail. Start by removing the faucet handle, which may require removing a decorative cap or screw cover first. Take photos with your smartphone as you disassemble components – this will be invaluable during reassembly. For compression faucets, remove the packing nut with an adjustable wrench, then pull out the stem assembly. Examine the washer and O-rings for wear, cracking, or deformation. For cartridge faucets, remove the retaining clip or nut holding the cartridge in place, then pull the cartridge straight out using pliers or a cartridge puller tool.
Inspection and diagnosis determines what needs replacement. Compare old parts to new ones to ensure proper fit before installation. Clean all components thoroughly with a brush and mild detergent to remove mineral deposits and debris. Inspect valve seats in compression faucets for scratches, corrosion, or rough spots that could prevent proper sealing. If seats are damaged, they may need to be replaced or refinished with a seat dresser tool. Check all O-rings and rubber components for signs of wear, hardening, or cracking.
Reassembly and testing completes the repair process. Apply a thin coat of plumber’s silicone grease to all rubber components and threads before reassembly. Install new parts in reverse order of removal, being careful not to overtighten threaded components which can crack ceramic or plastic parts. Hand-tighten first, then use tools to snug connections without excessive force. Turn water supply back on slowly and check for leaks at all connections. Test faucet operation by turning handles through their full range of motion, checking for proper hot and cold water control and complete shutoff.
Common Problems and Troubleshooting
Even with careful preparation, DIY plumbing repair projects can encounter unexpected challenges. Understanding common problems and their solutions will help you complete your faucet repair successfully and avoid costly mistakes that could require professional intervention.
Stuck or corroded parts represent the most frequent obstacle in faucet repairs. Cartridges, packing nuts, and valve stems can become virtually welded in place by mineral deposits and corrosion, especially in areas with hard water. When standard tools won’t budge stuck components, try applying penetrating oil like Liquid Wrench ($4.99) and allowing it to work for 15-30 minutes before attempting removal again. Heat can also help – use a hair dryer to warm metal components, which expands them slightly and can break corrosion bonds. For extremely stubborn cartridges, a proper cartridge puller tool is essential and can prevent damage to the faucet body that would require complete faucet replacement.
Stripped threads or damaged components can turn a simple repair into a more complex project. If packing nuts have stripped threads, you may be able to clean and restore them with a thread chaser tool, or in severe cases, the entire faucet stem may need replacement. When cartridges break during removal, leaving pieces inside the faucet body, needle-nose pliers and patience are required to extract all fragments before installing the replacement. Document everything with photos and keep broken pieces – they’ll help the hardware store employee find the correct replacement parts.
Water pressure and flow issues may persist even after successful leak repair. If water flow is reduced after reassembly, check that all internal components are properly aligned and that debris hasn’t been pushed into water passages. Remove and clean the aerator, which often becomes clogged during repair work. Low water pressure can also indicate that you’ve inadvertently closed shutoff valves partway – ensure they’re fully open. If hot water flow is significantly different from cold water flow, you may have a mixing valve problem that requires additional attention.
Persistent leaking after repair usually indicates either improper part installation or the need for additional component replacement. Double-check that all rubber washers and O-rings are properly seated and not pinched or twisted during assembly. Ensure you’ve used the correct size replacement parts – even slight size differences can prevent proper sealing. If leaking continues from the base of the faucet, you may need to replace additional O-rings or packing material that wasn’t obviously worn during initial inspection.

Prevention and Maintenance Tips
Implementing proper maintenance practices will extend the life of your faucet repair and prevent future leaks, making your fix leaking faucet DIY plumbing repair investment last for years. Regular maintenance is far more cost-effective than emergency repairs and can prevent water damage to your home.
Regular inspection and cleaning should become part of your routine home maintenance schedule. Check faucets monthly for signs of dripping, loose handles, or reduced water flow. Clean aerators quarterly by unscrewing them and soaking in white vinegar overnight to dissolve mineral deposits. This simple maintenance task can prevent many flow and pressure problems. Wipe down faucets weekly with a soft cloth and mild detergent to prevent buildup of soap scum and mineral deposits that can interfere with proper operation.
Water quality management significantly impacts faucet longevity, especially in areas with hard water. Consider installing a whole-house water softener system if you have very hard water, as the mineral content accelerates wear on rubber components and causes corrosion of metal parts. Even a simple under-sink water filtration system can reduce chlorine and other chemicals that degrade rubber washers and O-rings prematurely. The Culligan WH-HD200-C whole house filter ($89.99) provides good protection for your entire plumbing system.
Proper usage habits can dramatically extend faucet life. Never overtighten faucet handles – just turn until water stops flowing. Excessive force wears out washers and valve seats more quickly and can damage internal components. Address small leaks immediately rather than waiting – a small drip can rapidly worsen and cause more extensive damage requiring complete faucet replacement. When you’ll be away from home for extended periods, know the location of your main water shutoff valve in case a leak develops while you’re gone.
Seasonal maintenance tasks help prevent problems before they start. Before winter, ensure outdoor faucets are properly winterized to prevent freezing damage that can affect indoor plumbing. Check all faucets after any plumbing work elsewhere in the house, as pressure changes can sometimes cause previously stable faucets to start leaking. Keep a basic faucet repair kit with common washers, O-rings, and packing material so you can address minor issues immediately rather than allowing them to worsen.
Frequently Asked Questions
How do I know if my faucet can be repaired or needs complete replacement?
Most faucets can be successfully repaired unless the faucet body itself is cracked or corroded beyond salvage. If your fix leaking faucet DIY plumbing repair attempts repeatedly fail, or if replacement parts for your faucet model are no longer available, replacement becomes necessary. Faucets over 15-20 years old may be more cost-effective to replace, especially if multiple components are failing. Signs that indicate replacement is better than repair include: extensive corrosion of the faucet body, cracks in ceramic components, stripped threads that cannot be repaired, and when repair costs approach 50% of replacement cost. Modern faucets are also much more water-efficient than older models, so replacement can provide long-term water savings.
What should I do if I can’t identify my faucet type or find replacement parts?
Take clear photos of your faucet from multiple angles, including close-ups of any manufacturer markings or model numbers, usually found on the faucet base or under the sink on supply lines. Bring the old parts with you to the hardware store or plumbing supply shop – experienced staff can often identify the manufacturer and model from the components. Many manufacturers have customer service departments that can help identify parts from photos. Online resources like the manufacturer’s website or plumbing forums can also provide identification help. If you still cannot identify the faucet, consider consulting a licensed plumber who has experience with various faucet types and can provide professional guidance on whether repair or replacement is the better option.
How long should a faucet repair typically last before needing attention again?
A properly executed DIY plumbing repair using quality replacement parts should last 3-5 years in average water conditions, and potentially much longer with soft water and proper maintenance. The longevity depends largely on water quality, usage frequency, and the quality of replacement parts used. Premium replacement parts may cost 20-30% more but often last twice as long as budget alternatives. Compression faucets typically need more frequent attention due to their reliance on rubber washers that compress and degrade over time. Ceramic disk and cartridge faucets generally require less frequent repair. Signs that your repair is wearing out include gradually increasing drip frequency, reduced water pressure, or difficulty achieving complete water shutoff.
Can I repair a faucet if I have no plumbing experience whatsoever?
Absolutely! Fix leaking faucet DIY plumbing repair projects are among the most beginner-friendly plumbing tasks and require no specialized training or licensing. The key to success is taking your time, following instructions carefully, and not being afraid to ask for help at the hardware store. Start with simple compression faucet repairs to build confidence before tackling more complex cartridge or ball faucet systems. Watch online video tutorials specific to your faucet type before beginning, and don’t hesitate to take photos during disassembly to guide reassembly. If you encounter problems beyond your comfort level, stopping and calling a professional prevents costly damage. Most homeowners find faucet repair quite satisfying once they complete their first successful repair.
What’s the most common mistake people make when repairing faucets themselves?
The most frequent error in DIY plumbing repair is failing to turn off the water supply completely before beginning work, which can result in flooding and water damage. The second most common mistake is using excessive force when removing or installing components, which can crack ceramic parts, strip threads, or damage the faucet body beyond repair. Many people also fail to clean mineral deposits and debris from components before reassembly, which prevents proper sealing and leads to continued leaking. Not taking photos during disassembly often results in incorrect reassembly, and using the wrong size replacement parts is another frequent problem. Finally, many DIYers don’t apply plumber’s grease to rubber components, leading to premature wear and difficult future repairs.
Conclusion
Mastering the fix leaking faucet DIY plumbing repair process empowers you to handle one of the most common household maintenance tasks while saving significant money on professional service calls. With the right tools, quality replacement parts, and systematic approach outlined in this guide, most homeowners can successfully repair their faucets and prevent thousands of gallons of water waste annually. Remember that patience and careful attention to detail are your best allies in this project – rushing through steps or using excessive force causes more problems than it solves.
The investment in learning this essential home maintenance skill pays dividends far beyond the immediate repair savings. You’ll gain confidence in tackling other household projects, reduce your home’s environmental impact through water conservation, and develop a better understanding of your home’s plumbing system. Keep your newly acquired knowledge sharp by helping neighbors and friends with their faucet repairs, and maintain a basic repair kit so you’re always prepared for future issues.
Ready to tackle your faucet repair project? Start by identifying your faucet type and gathering the necessary tools and materials. Take your time, follow safety procedures, and don’t hesitate to consult additional resources when needed. Your wallet and the environment will thank you for choosing the DIY approach to this common plumbing challenge.