How to repair concrete cracks in walls
Repair Concrete Crack Wall Filler Sealant: Complete Guide to Professional Results
Learning how to repair concrete crack wall filler sealant products effectively can save you thousands in structural damage and home maintenance costs. Concrete cracks are one of the most common issues homeowners face, whether in basement walls, foundation cracks, or exterior concrete surfaces. The good news is that with the right knowledge, tools, and repair concrete crack wall filler sealant materials, you can tackle this problem yourself and achieve professional-quality results. This comprehensive guide will walk you through everything you need to know about identifying, assessing, and repairing concrete cracks using the best filler and sealant solutions available on the market today.
Table of Contents
- Why Repair Concrete Crack Wall Filler Sealant Matters
- Step-by-Step Repair Concrete Crack Wall Filler Sealant Guide
- Best Repair Concrete Crack Wall Filler Sealant Options
- Pro Tips for Repair Concrete Crack Wall Filler Sealant
- Common Mistakes to Avoid
- Key Takeaways
- Frequently Asked Questions About Repair Concrete Crack Wall Filler Sealant
- Conclusion
Why Repair Concrete Crack Wall Filler Sealant Matters
Concrete cracks might seem like minor cosmetic issues, but they can quickly escalate into serious structural problems if left unaddressed. Water infiltration is the primary concern with any crack in your concrete walls, as moisture can penetrate through even hairline fractures and cause extensive damage to your foundation. When water enters through cracks, it can lead to mold growth, weakened structural integrity, and increased energy costs as your home loses temperature control through compromised walls.
The cost of ignoring concrete cracks can be exponential. A small crack that costs $50-100 to repair today could require a $5,000+ foundation repair tomorrow if water damage spreads and compromises the structural integrity of your entire foundation. Beyond structural concerns, cracks can also affect your home’s resale value and create safety hazards for your family. Buyers and inspectors immediately notice foundation cracks and use them as negotiating points during property transactions.
Using quality repair concrete crack wall filler sealant products prevents water infiltration, stabilizes the crack, and prevents further expansion. The right filler creates a waterproof seal that stops moisture from penetrating the concrete, while also accommodating minor structural movement that naturally occurs in buildings over time. Professional-grade sealants maintain their flexibility and adhesion for 10-20 years, providing long-term protection for your investment.
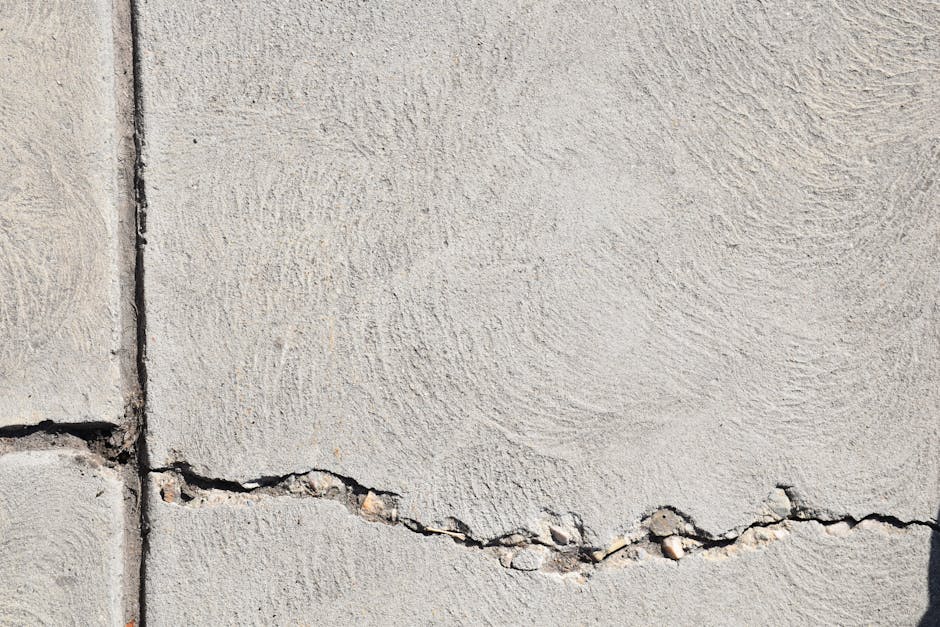
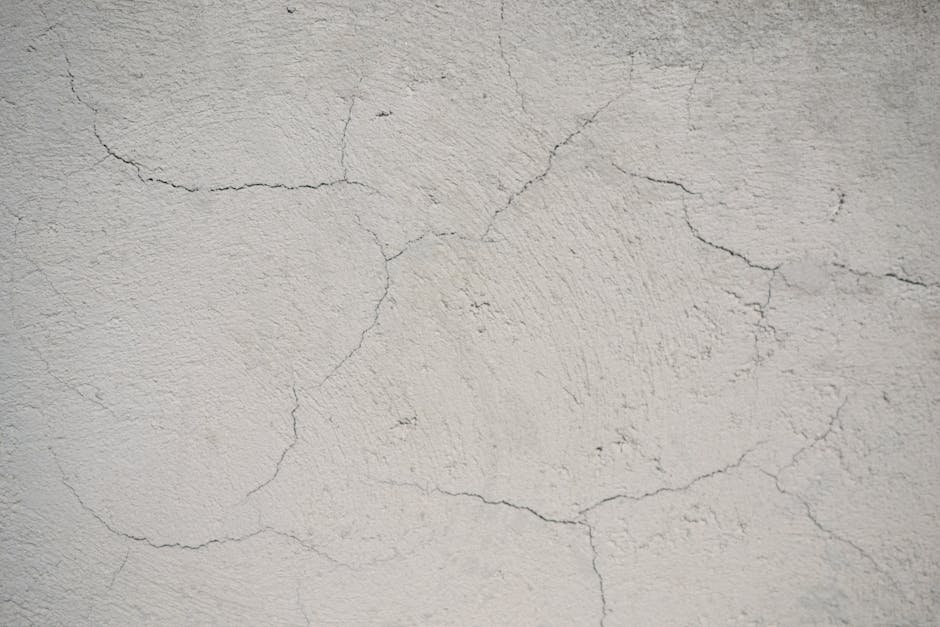
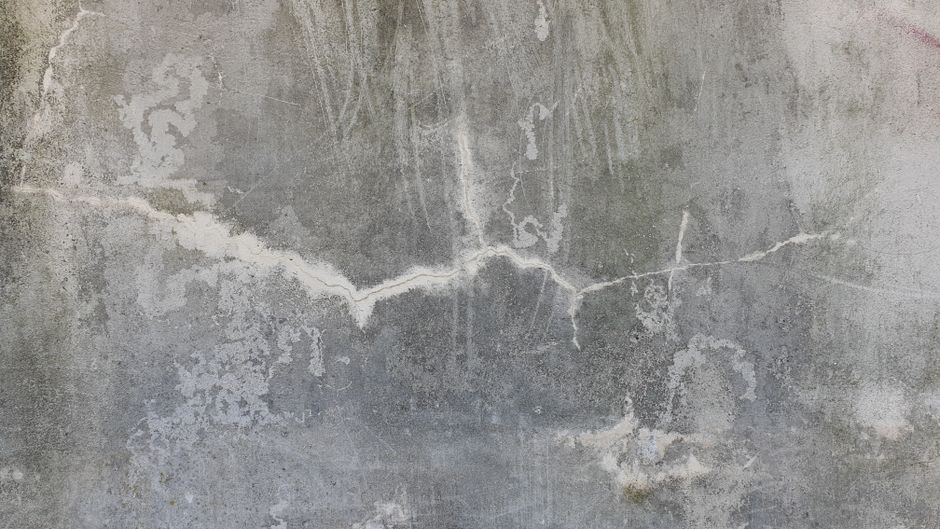
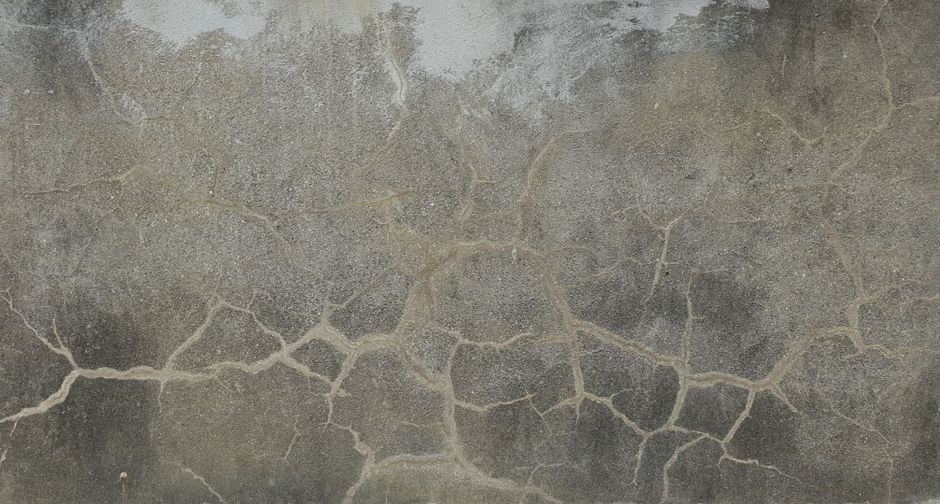
Understanding the difference between cosmetic and structural cracks is crucial before beginning repairs. Cosmetic cracks are typically hairline width (less than 1/8 inch) and pose no structural threat, while structural cracks are wider and often indicate foundation movement or settling. Repair concrete crack wall filler sealant solutions vary depending on crack severity, location, and whether the crack is actively leaking or dormant.

Step-by-Step Repair Concrete Crack Wall Filler Sealant Guide
Preparation and Assessment
Before you begin any repair work, you must properly assess the crack to determine the best repair approach. Measure the crack width using a crack width gauge or by comparing it to common objects like a credit card (0.76mm) or penny (1.5mm) to determine if it’s hairline or wider. Document the crack’s location, length, direction, and any visible water staining or seeping to understand the problem’s severity.
Clean the entire crack thoroughly using a wire brush, vacuum, and compressed air to remove all loose concrete, dust, and debris. A clean surface is absolutely essential for proper adhesion of your repair concrete crack wall filler sealant products. For wider cracks, use a concrete chisel and hammer to slightly enlarge the crack into a V-shape, creating a surface that gives your filler something to grip.
If the crack is actively leaking water, you may need to use a concrete crack injection system before applying topical sealants. Water must be completely dry before applying most repair concrete crack wall filler sealant products, so allow 24-48 hours for the surface to dry completely after cleaning.
Selecting Your Repair Method
The width of your crack determines which repair concrete crack wall filler sealant product you should use. Hairline cracks (less than 1/16 inch) are best treated with liquid concrete sealers or thin crack sealants that can penetrate deep into the fissure. These products are typically applied with a caulking gun and create a waterproof membrane on the surface.
Cracks between 1/16 and 1/4 inch wide should be repaired using flexible concrete caulk or polyurethane sealants, which can accommodate slight structural movement without failing. These materials maintain their flexibility over time and won’t crack or shrink excessively. For these medium-width cracks, you may need to apply a backer rod (foam rope) into the crack first to ensure proper product depth and performance.
Cracks wider than 1/4 inch require concrete patching compounds or concrete fillers before applying any sealant. These wider cracks need structural repair before surface sealing can be effective. Use a concrete patching compound to fill the crack completely, then sand smooth and apply sealant over the patch for optimal water protection.
Application Process
Start your repair concrete crack wall filler sealant application by cutting the caulking tube tip at a 45-degree angle, making an opening slightly smaller than your crack width. This allows for better control and prevents excessive product waste or overflow. Using a caulking gun, apply steady, continuous pressure as you move along the crack, keeping the gun at a consistent angle.
For hairline cracks, apply the sealant in a single smooth pass, ensuring the product fills the entire depth of the crack. Overfill slightly rather than underfill, as the material may shrink slightly as it cures. Smooth the bead with a wet finger, caulk tool, or wet knife to create a professional-looking finish that blends seamlessly with the surrounding surface.
Allow your repair concrete crack wall filler sealant to cure according to manufacturer instructions, which typically ranges from 24-72 hours depending on humidity, temperature, and product type. Avoid exposing the repaired area to water during the curing period, and don’t apply additional coats or stress to the repair until fully cured.
Best Repair Concrete Crack Wall Filler Sealant Options
Polyurethane-Based Sealants
Polyurethane sealants are among the most effective repair concrete crack wall filler sealant options available for homeowners because they provide superior flexibility and adhesion on concrete surfaces. These products can typically stretch 20-30% without losing their integrity, making them ideal for areas where minor structural movement occurs. Polyurethane sealants maintain their performance through extreme temperature changes and UV exposure, lasting 10-20 years with proper application.
The main advantage of polyurethane sealants is their exceptional water resistance and ability to bond permanently to concrete without additional primers in most cases. These products cure through moisture exposure, forming an incredibly durable waterproof seal that protects your concrete from further damage. The disadvantage is that polyurethane sealants require careful surface preparation and can be slightly more difficult to apply smoothly for inexperienced DIYers.
Acrylic Latex-Based Caulks
Acrylic latex caulks are water-based repair concrete crack wall filler sealant products that offer easier application and cleanup compared to polyurethane options. These products are non-toxic, odor-free, and can be painted over immediately after application, making them perfect for cosmetic repairs on visible wall cracks. Acrylic caulks are typically less expensive than polyurethane products and are more beginner-friendly.
However, acrylic latex caulks have a shorter lifespan (5-7 years) and less flexibility than polyurethane options, making them less suitable for areas with significant structural movement. These products perform best in protected locations like interior basement walls where temperature fluctuations and UV exposure are minimal. For exterior cracks or areas subject to freeze-thaw cycles, polyurethane or silicone products are superior choices.
Silicone-Based Sealants
Silicone sealants represent another excellent category of repair concrete crack wall filler sealant products, offering extreme flexibility and outstanding water resistance. These products maintain their flexibility at temperatures well below freezing, making them ideal for regions with harsh winters where concrete undergoes expansion and contraction. Silicone sealants never harden completely, remaining somewhat tacky to the touch even after full cure.
The primary disadvantage of silicone sealants is their cost, which is typically higher than polyurethane or acrylic options. Additionally, silicone products cannot be painted, limiting their use in situations where aesthetic finish is important. However, for pure functionality and longevity in extreme conditions, silicone remains the gold standard for concrete crack repair.
Concrete Patching Compounds
For wider cracks exceeding 1/4 inch, concrete patching compounds provide structural filler before surface sealant application. These products are typically cement-based and come in powdered form that you mix with water, or as pre-mixed compounds ready for immediate use. Patching compounds create a rigid repair that bonds chemically with the surrounding concrete, providing permanent structural support.
Quality concrete patching compounds shrink minimally during cure (less than 3%), adhere strongly to concrete surfaces, and can be sanded and painted to match surrounding areas. Fast-setting formulas cure in 30 minutes to 2 hours, allowing you to continue with finishing sealant application the same day. For best results, apply patching compound to slightly damp concrete surfaces, as this improves adhesion and reduces shrinkage.
Pro Tips for Repair Concrete Crack Wall Filler Sealant
Monitor your repair concrete crack wall filler sealant job regularly after completion to ensure proper curing and identify any issues early. Check the repair 24 hours after application to ensure the bead didn’t shrink excessively or pull away from crack edges. If you notice significant shrinkage, you can apply a second application of sealant to build up the coverage.
Temperature and humidity control significantly impact the success of your concrete crack repair project. Ideally, apply repair concrete crack wall filler sealant products when temperatures are between 50-85°F and humidity is below 85% for optimal curing. In cold or humid conditions, curing times extend significantly, and product performance may be compromised if applied outside manufacturer specifications.
Use high-quality caulking guns that provide smooth, consistent pressure for professional application results. Cheap guns can result in uneven bead patterns, wasted product, and unprofessional-looking repairs. A good caulking gun costs $15-30 but will last for many projects and give you much better control than budget alternatives.
For large concrete crack repair projects, consider using a concrete crack injection system for hairline cracks. These systems inject liquid epoxy or polyurethane deep into the crack, creating a strong bond throughout the entire crack depth. Injection systems are more expensive and require some technical skill but provide superior performance for structural cracks requiring maximum strength.
Practice your caulking technique on scrap concrete or cardboard before tackling visible areas of your home. A smooth, consistent bead demonstrates professional workmanship and prevents waste. The key to smooth application is maintaining consistent pressure, keeping the gun at a 45-degree angle, and moving at an even pace along the crack length.

Common Mistakes to Avoid
Applying repair concrete crack wall filler sealant products to wet or damp concrete is one of the most common mistakes homeowners make. Moisture prevents proper adhesion and curing, resulting in product failure within months. Always allow concrete to dry completely (24-48 hours minimum) after cleaning before applying any repair products.
Failing to properly prepare the crack by removing loose debris, dirt, and old sealant is another critical error that undermines repair success. Even small amounts of dust or loose concrete prevent proper adhesion and create weak points in your repair. Spending 30 minutes on thorough preparation saves you from having to redo the repair in six months.
Overfilling cracks or applying repair concrete crack wall filler sealant too thickly causes excessive shrinkage and cracking as the product cures. These materials shrink 3-10% during curing, so applying multiple thin coats is superior to applying one thick coat. Allow proper cure time between coats if applying multiple applications.
Applying sealant during temperature extremes or high humidity conditions results in poor curing and reduced product performance. Following manufacturer temperature and humidity guidelines is crucial for achieving the durability these products promise. Applying sealant on a hot, sunny day when surfaces exceed 100°F can cause premature curing and weak bonds.
Not allowing adequate cure time before exposing repairs to water or stress is a patience-related mistake that ruins many otherwise successful repairs. Different products have different cure times—some need 24 hours while others require 72 hours for full strength development. Read labels carefully and respect cure times even if the surface feels dry to the touch.
Key Takeaways
- Assess crack severity before repair—hairline cracks need different treatment than wide structural cracks
- Clean thoroughly and allow complete drying—surface preparation determines repair success more than any other factor
- Choose appropriate products—polyurethane for flexibility, acrylic for interior cosmetics, silicone for extreme conditions
- Apply in ideal conditions—temperature between 50-85°F and humidity below 85% for optimal curing
- Allow proper cure time—rushing this step guarantees failure; patience ensures long-term performance
Frequently Asked Questions About Repair Concrete Crack Wall Filler Sealant
Q: What is the best repair concrete crack wall filler sealant for basement cracks?
A: For basement cracks, polyurethane or silicone sealants work best because they resist water infiltration permanently and accommodate minor foundation movement. Choose polyurethane for cost-effectiveness and ease of application, or silicone for superior long-term flexibility in areas prone to freeze-thaw cycles. If cracks are wider than 1/4 inch, use concrete patching compound first, then seal the patch with your chosen sealant product.
Q: How do I use repair concrete crack wall filler sealant properly?
A: Clean the crack thoroughly and allow 24-48 hours for complete drying. Cut the caulk tube at 45 degrees with an opening slightly smaller than crack width. Apply steady pressure while moving along the crack, slightly overfilling rather than underfilling. Smooth with a wet finger or caulk tool for professional appearance. Allow full cure time (24-72 hours) before exposing to water or stress.
Q: Can I paint over repair concrete crack wall filler sealant?
A: Yes, acrylic latex and polyurethane sealants can be painted with concrete paint or masonry paint after proper curing. Silicone sealants cannot be painted, making them unsuitable for cosmetic repairs that need color matching. Always confirm the specific product can be painted before purchase, as some specialty sealants may have restrictions or require primer before painting.
Q: How long does repair concrete crack wall filler sealant last?
A: Lifespan varies by product type—acrylic latex caulks last 5-7 years, polyurethane sealants last 10-20 years, and silicone sealants can exceed 20 years. Longevity depends on climate conditions, UV exposure, structural movement, and maintenance. Regular inspection and touch-ups extend repair lifespan significantly.
Q: What’s the difference between patching compound and sealant for repair concrete crack wall filler sealant applications?
A: Patching compounds are rigid fillers designed for structural repair of wide cracks (over 1/4 inch), while sealants are flexible products that primarily provide waterproofing and accommodates minor movement. Wide cracks need patching compound for structure, then sealant on top for water protection. Narrow cracks can be sealed directly without patching compound.
Conclusion
Successfully using repair concrete crack wall filler sealant products requires proper assessment, thorough preparation, and careful application of the right product for your specific situation. By following this comprehensive guide’s steps and recommendations, you can repair concrete cracks professionally and protect your home from costly water damage and structural deterioration. Whether you’re dealing with hairline cosmetic cracks or wider structural issues, quality filler and sealant products combined with proper technique deliver results that last 10-20 years. Start your repair project today and save thousands in potential foundation damage—your home’s structural integrity depends on addressing these issues promptly and correctly.
Recommended Products on Amazon
As an Amazon Associate I earn from qualifying purchases.