How to install a dimmer switch
Install Dimmer Switch DIY Electrical Lighting: The Complete Homeowner’s Guide
Learning how to install dimmer switch DIY electrical lighting is one of the most rewarding home improvement projects you can tackle. Whether you want to create the perfect ambiance in your dining room, save energy in your bedroom, or enhance your home’s overall functionality, dimmer switches offer an affordable and practical solution. This comprehensive guide will walk you through everything you need to know about installing a dimmer switch, from understanding the basics to completing the installation with confidence. By the end of this tutorial, you’ll have the knowledge and skills to transform your lighting setup and take control of your home’s atmosphere.
Table of Contents
- Why Install Dimmer Switch DIY Electrical Lighting Matters
- Step-by-Step Install Dimmer Switch DIY Electrical Lighting Guide
- Best Install Dimmer Switch DIY Electrical Lighting Options
- Pro Tips for Install Dimmer Switch DIY Electrical Lighting
- Common Mistakes to Avoid
- Key Takeaways
- Frequently Asked Questions About Install Dimmer Switch DIY Electrical Lighting
- Conclusion
Why Install Dimmer Switch DIY Electrical Lighting Matters
Installing a dimmer switch offers numerous benefits that extend far beyond simply controlling brightness levels. One of the most significant advantages is energy efficiency—dimmer switches allow you to reduce power consumption by decreasing the amount of electricity flowing to your light bulbs, which can noticeably lower your monthly utility bills. Additionally, dimming your lights extends the lifespan of your bulbs, meaning fewer replacements and additional savings over time.
Beyond the practical financial benefits, dimmer switches dramatically enhance your home’s ambiance and functionality. You can create different moods for various occasions—bright, energizing light for cooking and cleaning, or soft, warm light for relaxing evenings and entertaining guests. This flexibility transforms how you experience your living spaces throughout the day and night.
Install dimmer switch DIY electrical lighting also adds value to your home. Potential buyers appreciate the modern conveniences and energy-efficient upgrades that come with professionally installed dimmer switches. Furthermore, taking on this project yourself builds your confidence as a homeowner and demonstrates your ability to handle basic electrical work safely and effectively.
The health benefits shouldn’t be overlooked either. Dimmed lighting can reduce eye strain during evening hours and support better sleep patterns by allowing you to control the intensity of blue light in your environment. For families with children, dimmers provide practical solutions for creating calming bedtime routines.

Step-by-Step Install Dimmer Switch DIY Electrical Lighting Guide
Before You Begin: Safety First
Before starting any electrical work, safety must be your top priority. Turn off the power to the circuit at your main electrical panel by switching off the appropriate breaker, then use a voltage tester to confirm that the power is completely off at the switch location. Never proceed with the installation until you’ve verified there’s no electrical current present.
Gather all necessary tools before you begin: a screwdriver set (both Phillips and flathead), wire strippers, a voltage tester, needle-nose pliers, and your new dimmer switch. Having everything ready prevents unnecessary trips back and forth and ensures you maintain focus throughout the process.
Step 1: Remove the Old Switch
Start by removing the switch cover plate by unscrewing the center screw. Set the screw and plate aside in a safe location where you won’t lose them. Once the plate is removed, you’ll see the switch mechanism itself held in place by two screws at the top and bottom.
Carefully unscrew these two screws and gently pull the old switch out of the electrical box. Don’t yank it forcefully, as the wires are still connected. The switch should come out slowly and deliberately, giving you access to the wiring.
Using your voltage tester, confirm once more that there’s no power running through these wires. This critical safety step prevents accidental electrical shock and should never be skipped, regardless of how confident you feel about the breaker being off.
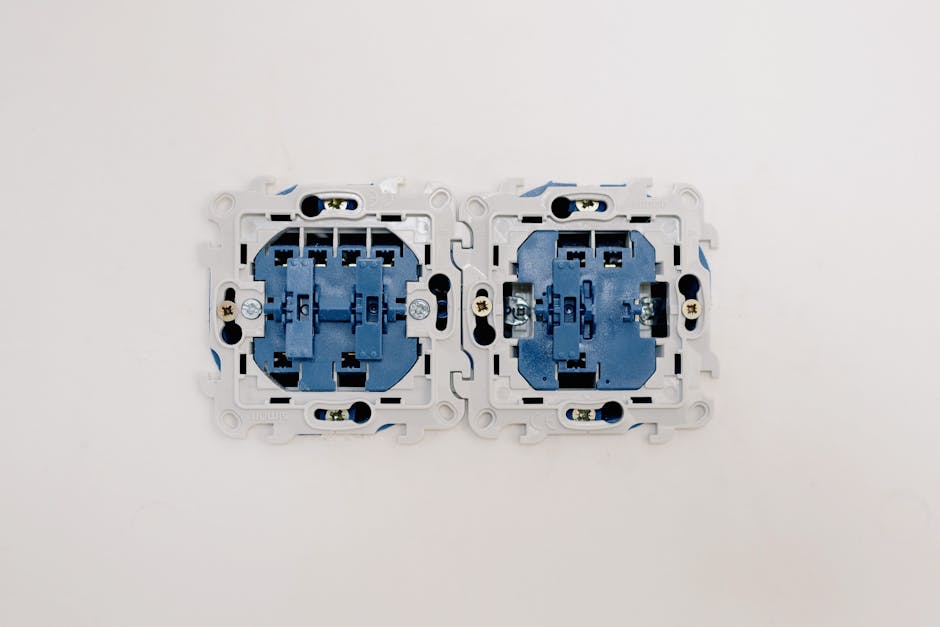
Step 2: Disconnect the Wires
Examine the back of your old switch carefully to identify the wire connections. Typically, you’ll see three wires: a hot wire (usually black), a neutral wire (usually white), and a ground wire (usually copper or green). Some switches may have slightly different configurations depending on your home’s electrical setup.
Using your needle-nose pliers, carefully loosen the terminal screws and disconnect each wire. If the wires are inserted into push-fit terminals rather than wrapped around screws, gently pull them straight out. Take a moment to straighten any bent wire tips, as this ensures better contact when connecting to your new dimmer switch.
Some homeowners like to use a small piece of masking tape to label each wire before disconnection, preventing confusion during reinstallation. This simple step proves invaluable, especially if you’re interrupted or need to step away from the project.
Step 3: Prepare Your Dimmer Switch
Before installing the new dimmer switch, examine its terminals and compare them to your old switch. Modern dimmer switches are designed similarly to standard switches, but you’ll notice some have specific markings for wire connections. Read the instructions that came with your dimmer switch carefully, as different brands may have slightly different requirements.
If your dimmer switch has push-fit terminals, strip approximately half an inch of insulation from the end of each wire. For screw terminals, strip about three-quarters of an inch of insulation from each wire. Proper wire preparation is crucial for achieving solid electrical connections.
Step 4: Connect the Wires to Your Dimmer Switch
Begin by connecting the ground wire (copper or green) to the ground terminal on your dimmer switch. If your dimmer has a green screw terminal, wrap the bare copper wire around it clockwise in a hook shape, then tighten securely. For push-fit terminals, insert the stripped wire end firmly until you feel resistance.
Next, connect the neutral wire (white) to the silver-colored terminal on your dimmer switch. Again, use the hook-and-wrap method for screw terminals, ensuring the wire wraps clockwise around the screw. Tighten firmly but don’t over-tighten, as this can damage the terminal or break the wire.
Finally, connect the hot wire (black) to the brass-colored terminal. This wire carries power and should be connected last to minimize the risk of accidental shock. Double-check all connections are tight and secure before proceeding to the next step.
Step 5: Carefully Push the Dimmer Into the Box
With all wires properly connected, gently push the dimmer switch back into the electrical box. Go slowly and carefully, ensuring no wires get pinched or bent as the switch enters the box. The wires should fold naturally into the box without being forced or compressed.
Once the switch is fully in position, align the mounting holes with those on the electrical box. Insert the top and bottom screws and tighten them gently, alternating between top and bottom to ensure even pressure. The switch should sit flush against the box face when properly installed.
Check that your dimmer switch is level before proceeding. An unlevel switch looks unprofessional and may indicate improper installation. Adjust if necessary before moving to the final steps.
Step 6: Attach the Cover Plate
Screw the cover plate back onto your dimmer switch, ensuring it sits evenly and smoothly against the wall. The plate should require only light pressure to mount—if it’s difficult to attach, something may be misaligned. Remove the plate and check the switch position before trying again.
Step 7: Restore Power and Test
Before flipping the breaker back on, take a moment to visually inspect your work one final time. All wires should be properly connected, the switch should be flush in the box, and the cover plate should be secure. Only then should you head to your electrical panel to restore power.
Turn the breaker back on and test your new dimmer switch. It should turn the lights on and off normally, and the dimming function should work smoothly across its full range. If the lights flicker, don’t dim properly, or the switch feels hot, immediately turn off power and check your connections.
Best Install Dimmer Switch DIY Electrical Lighting Options
When selecting the right dimmer switch for your needs, you’ll encounter several different types, each with unique features and benefits. Understanding these options helps you choose the best solution for your specific situation.
Traditional Rotary Dimmer Switches
Rotary dimmers remain the most popular choice for residential installations because they’re reliable, affordable, and easy to use. These switches feature a rotating dial or wheel that you turn to adjust brightness levels, with built-in on/off functionality. They work exceptionally well for incandescent and halogen bulbs and provide smooth, predictable dimming action.
The main advantage of rotary dimmers is their simplicity—they require no special programming or learning curve. However, they do have limitations with certain bulb types and aren’t ideal for controlling multiple fixtures from different locations.
Slide Dimmer Switches
Slide dimmers feature a sliding lever that moves up and down to control brightness, with an on/off button positioned above or below the slider. These switches appeal to homeowners who prefer a more modern aesthetic and appreciate the visual feedback that comes from seeing the slider position. Many people find slide dimmers more intuitive than rotary models.
Slide dimmers work well with LED bulbs and are increasingly popular in contemporary home designs. They typically take up slightly more wall space than rotary models and may offer additional features like preset brightness levels or soft-start technology.
Smart Dimmer Switches
Smart dimmers represent the cutting edge of dimmer technology, allowing you to control your lights remotely via smartphone apps, voice commands, or automated schedules. These sophisticated switches can integrate with your home automation system, creating custom scenes and lighting preferences. Some models even adjust color temperature throughout the day to support healthy circadian rhythms.
While smart dimmers offer impressive functionality and future-proofing, they’re more expensive than traditional options and may require a neutral wire and compatible smart home hub. Installation is similar to standard dimmers, but setup involves app configuration and network connectivity.
Toggle Dimmer Switches
Toggle dimmers combine the familiar on/off toggle with dimming capability, appealing to homeowners who want a traditional look with modern functionality. A slight push up or down adjusts brightness, while a full toggle turns the light on or off completely. These switches work well for those transitioning from standard switches to dimmer-controlled lighting.
Toggle dimmers are less common than rotary or slide models but offer an excellent middle ground between aesthetics and functionality. They typically cost more than basic rotary dimmers but less than smart options.

Pro Tips for Install Dimmer Switch DIY Electrical Lighting
Understanding a few professional techniques significantly improves your installation experience and results. Always check your dimmer switch packaging to verify compatibility with your bulb types—LEDs, CFLs, halogens, and incandescent bulbs each have different requirements, and using incompatible combinations can cause flickering or premature switch failure.
When working with older homes, you may encounter cloth-covered wires instead of plastic insulation. Handle these carefully, as the insulation becomes brittle with age and can crumble when bent. If you notice damaged wire insulation, wrap it carefully with electrical tape before connecting to your dimmer switch.
Consider the wattage rating of your dimmer switch before installation. Every dimmer has a maximum wattage limit—installing it on a circuit with lights that exceed this limit will cause the switch to fail or potentially create a fire hazard. Calculate your total fixture wattage and verify your dimmer can handle the load.
Test your installation thoroughly before declaring the project complete. Dim the lights to various brightness levels and listen for any buzzing or humming sounds, which indicate problems with the electrical connection or compatibility issues. If everything sounds and functions smoothly, you’ve successfully completed your installation.
For walls with multiple switches, installing dimmer switches in all locations provides the most flexibility and convenience. Dimmers installed alongside regular switches on the same circuit should be avoided, as this can cause compatibility issues and control problems.
Keep the original switch for reference or future use. If you need to remove the dimmer later, having the original switch available simplifies restoration. Additionally, the original switch serves as a helpful reference for wire colors and terminal positions if you encounter installation challenges.

Common Mistakes to Avoid
One of the most frequent mistakes homeowners make is failing to test for electrical current before beginning work. Some people assume the breaker is off and skip the voltage tester step, creating a serious safety hazard. Never skip this verification, regardless of your confidence level or experience.
Another common error involves improper wire stripping, where too much or too little insulation is removed from the wire ends. Too much bare wire can cause short circuits, while too little makes it difficult to form proper connections. Follow your dimmer’s instructions precisely regarding wire preparation requirements.
Incorrectly identifying wire colors leads to dangerous and non-functional installations. Always verify wire colors with a voltage tester before disconnecting anything—electrical codes vary by region and age of the home, and assumptions can be incorrect. When in doubt, consult your home’s electrical documentation or contact a licensed electrician.
Many installers over-tighten terminal screws, damaging the wire or breaking the screw entirely. Tighten connections firmly until snug, then stop—additional force provides no benefit and only causes problems. Hand-tight connections followed by a quarter-turn with a screwdriver provide adequate security for most applications.
Using the wrong dimmer type for your bulbs represents another significant mistake. Matching your dimmer to your specific bulb types ensures proper operation and prevents flickering, buzzing, or premature bulb failure. Always check compatibility specifications before purchasing your dimmer switch.

Key Takeaways
-
Safety comes first: Always turn off power at the breaker and verify it’s off with a voltage tester before touching any wires or electrical components.
-
Proper wire preparation is essential: Strip the correct amount of insulation from each wire end and ensure all connections are clean and tight for reliable operation.
-
Match your dimmer to your bulbs: Different bulb types require compatible dimmer switches—verify compatibility before installation to avoid flickering or equipment failure.
-
Follow manufacturer instructions carefully: Each dimmer model may have specific requirements, so read and follow the instructions provided in your switch’s packaging.
-
Test thoroughly before declaring success: Dim through the full range and listen for any buzzing or humming that indicates problems needing attention.
Frequently Asked Questions About Install Dimmer Switch DIY Electrical Lighting
Q: What is the best install dimmer switch DIY electrical lighting for LED bulbs?
A: LED-compatible dimmer switches like the Lutron Toggler C.L are designed specifically for LED bulbs and provide smooth, flicker-free dimming across the full brightness range. Look for dimmers labeled as “LED-compatible” or “universal” to ensure proper operation. Standard dimmers designed for incandescent bulbs often cause flickering with LEDs because the minimum voltage requirements differ significantly between bulb types. Some quality smart dimmers also offer excellent LED compatibility with the added benefit of remote control capabilities. Always verify LED compatibility before purchasing your dimmer switch.
Q: How do I use install dimmer switch DIY electrical lighting if my lights flicker after installation?
A: Flickering lights indicate compatibility issues or loose connections. First, ensure your dimmer is rated for your bulb type—LED flickering especially suggests an incompatible dimmer. Second, inspect all wire connections and tighten any loose terminal screws or push-fit connections. Third, verify your total fixture wattage doesn’t exceed your dimmer’s maximum rating. If flickering persists after checking these items, the dimmer switch itself may be defective. Contact the manufacturer for a replacement or consult a professional electrician to diagnose the problem. Never ignore flickering, as it indicates an electrical issue that could worsen over time.
Q: Can I install a dimmer switch on a ceiling fan or three-way switch circuit?
A: Standard dimmer switches cannot control ceiling fans, as dimming reduces motor power and can damage the fan mechanism. For ceiling fans, you need a special dimmer-rated fan control switch. Three-way switch circuits controlling lights from multiple locations require three-way dimmer switches specifically designed for this configuration. Installing a standard dimmer on a three-way circuit creates a non-functional installation. Consult your switch’s documentation or contact the manufacturer to determine if special installation procedures apply to your specific circuit configuration.
Q: How do I know which wire is the hot wire if it’s not black?
A: Use your voltage tester to identify the hot wire—it will show electrical current when the breaker is on. Older homes or regional electrical variations may use different wire colors, making color-coding unreliable. Once you’ve identified the hot wire with your voltage tester, mark it with tape before turning off the breaker. Never assume wire colors, even if they appear to match standard conventions. When in doubt, consult a licensed electrician who can verify proper wire identification using professional testing equipment.
Q: What’s the difference between a dimmer switch and a standard light switch?
A: Dimmer switches contain electronic components that regulate electrical current flowing to bulbs, allowing brightness adjustment from full brightness to complete darkness. Standard light switches simply complete or break the electrical circuit, turning lights fully on or off with no brightness variation. Dimmer switches are more complex internally and more expensive, but offer superior control and energy efficiency benefits. Not all light fixtures can be controlled with dimmers—check your fixture specifications before installation to ensure dimmer compatibility and safe operation.
Conclusion
Learning how to install dimmer switch DIY electrical lighting transforms your home’s functionality while developing valuable skills as a homeowner. This comprehensive guide has equipped you with the knowledge needed to safely select, plan, and execute your dimmer switch installation with confidence. By following these step-by-step instructions, prioritizing safety, and avoiding common mistakes, you’ll enjoy years of enhanced lighting control and energy efficiency.
Ready to transform your home’s lighting? Start with a single room and experience the immediate benefits of dimmer-controlled lighting, then expand to other areas as your confidence grows. Whether you’re creating the perfect ambiance for entertaining, reducing energy consumption, or simply enhancing your daily comfort, dimmer switches represent one of the most practical and rewarding home improvement investments you can make. Share your success with friends and family, and help others discover the transformative power of modern lighting control. Your perfectly lit home is just a few simple steps away.
Recommended Products on Amazon
As an Amazon Associate I earn from qualifying purchases.