How to repair a damaged wood floor
How to Repair Damaged Wood Floor DIY Scratch Dent: Complete Expert Guide
Introduction
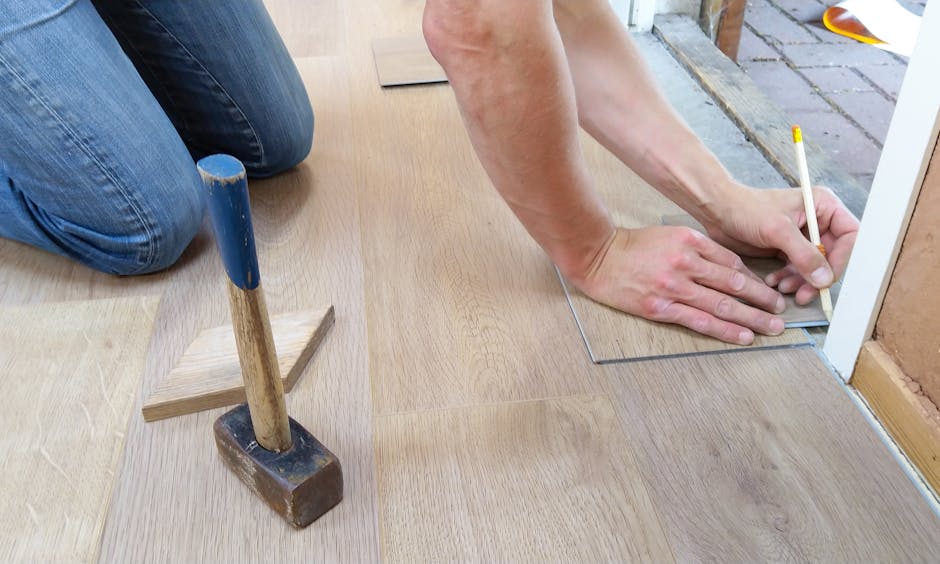
Learning how to repair damaged wood floor DIY scratch dent issues is one of the most valuable home maintenance skills you can develop. Wood floors are a beautiful investment that enhances your home’s aesthetic appeal and increases property value, but they’re also susceptible to everyday wear and tear. Whether you’re dealing with minor surface scratches, unsightly dents, or deep gouges, understanding the repair process empowers you to tackle these problems yourself without calling expensive professionals.
Table of Contents
- Introduction
- Why Repair Damaged Wood Floor DIY Scratch Dent Matters
- Step-by-Step Guide to Repair Damaged Wood Floor DIY Scratch Dent
- Best Repair Damaged Wood Floor DIY Scratch Dent Options
- Pro Tips for Repair Damaged Wood Floor DIY Scratch Dent
- Common Mistakes to Avoid
- Key Takeaways
- Frequently Asked Questions About Repair Damaged Wood Floor DIY Scratch Dent
- Conclusion
This comprehensive guide will walk you through everything you need to know about restoring your wood floors to their original glory. You’ll discover multiple repair techniques, learn which tools and products work best for different damage types, and gain insider tips that professionals use. By the end of this tutorial, you’ll feel confident handling any wood floor damage your home throws at you.

Why Repair Damaged Wood Floor DIY Scratch Dent Matters
Wood floors represent a significant investment in your home, often costing thousands of dollars to install professionally. When damage occurs—whether from pet claws, dropped objects, furniture movement, or heavy foot traffic—addressing it promptly prevents the damage from worsening and extending deeper into the wood. Ignoring small scratches and dents can eventually lead to moisture penetration, wood rot, and structural issues that compromise your entire floor system.
Beyond structural concerns, visible damage affects your home’s appearance and your quality of life. Walking across a floor you know is damaged can be mentally taxing, and the aesthetic issues can be embarrassing when entertaining guests. By learning how to repair damaged wood floor DIY scratch dent problems yourself, you save thousands in professional restoration costs while maintaining your flooring’s beauty and longevity.
Additionally, mastering these repair skills increases your home’s resale value. Potential buyers notice well-maintained floors immediately, and knowing you can handle minor repairs demonstrates care and attention to detail. DIY repairs also give you the satisfaction of solving problems yourself, building confidence for tackling other home improvement projects. Regular maintenance and prompt repairs create a safer, more beautiful living environment that you and your family can truly enjoy.
Step-by-Step Guide to Repair Damaged Wood Floor DIY Scratch Dent
Assessing the Damage Type
Before beginning any repair, accurately assess what you’re working with. Surface scratches only affect the finish layer and are the easiest to repair, typically requiring just sanding and refinishing. Shallow dents compress the wood but don’t penetrate deeply, while deep gouges and chunks removed from the wood require more intensive repair methods.
Gently run your hand across the damaged area to understand its extent. Inspect whether the wood is splintered, if the damage crosses wood grain lines, and how deep the imperfection goes. Taking clear photos before starting helps document the damage and provides reference points during the repair process.
Cleaning and Preparation
Start by thoroughly cleaning the damaged area with a soft brush and vacuum to remove all dust, debris, and pet hair. Use a wood-specific cleaner on a damp cloth to remove any residue or dirt that might interfere with repairs or finishing products.
Allow the area to dry completely before proceeding. Sand the edges of the damage lightly using fine-grit sandpaper (220-grit) to feather the surrounding finish, creating a smooth transition. This prevents your repair materials from creating visible edges that stand out against the rest of your floor.
Shallow Scratch and Minor Damage Repair
For shallow scratches that don’t penetrate the finish, use a wood scratch repair marker or crayon that matches your floor’s color. These products fill surface imperfections and blend seamlessly when applied correctly. Choose a color that matches your wood tone by comparing several markers against different areas of your floor in natural lighting.
Apply the marker directly to the scratch using firm pressure, working along the grain direction. Wipe away excess product with a soft cloth immediately after application. For best results, apply multiple thin coats rather than one thick application, allowing each layer to dry before adding more.
Medium Dent Repair Methods
Medium-depth dents respond well to water and heat treatment. Fill the dent partially with distilled water, then place a damp cloth over the area and press a hot iron on top. The steam penetrates the compressed wood fibers, encouraging them to expand back to their original shape.
Allow the wood to cool completely before checking results. If the dent remains slightly visible, apply a wood filler that matches your floor’s color. Use a putty knife to press the filler into the dent, overfilling slightly to account for shrinkage as it dries.
Deep Gouge and Significant Damage Repair
For deep gouges or missing wood pieces, wood filler becomes essential. Choose a two-part epoxy filler for structural integrity or a colored filler that matches your wood. Mix according to package directions, creating a consistency that’s thick enough to hold shape but workable.
Press the filler firmly into the damaged area using a putty knife, removing excess and feathering the edges. The filler should be slightly overfilled because it will shrink during the curing process. Follow the manufacturer’s drying time recommendations before sanding.
Sanding and Finishing
Once fillers cure completely, sand the repaired area smooth using progressively finer sandpaper grades. Start with 150-grit, then move to 180-grit, and finish with 220-grit for the smoothest surface. Sand with the grain whenever possible to avoid creating cross-grain scratches.
Test the smoothness by running your hand across the repair. It should feel flush with the surrounding floor with no raised edges or rough spots. Clear away all sanding dust with a tack cloth before applying finish.
Apply matching wood stain if necessary to color the repaired area, testing on a hidden spot first to ensure color match. Once stain dries, apply polyurethane or your original floor’s finish product. Multiple thin coats provide better results than one thick coat, with light sanding between applications.

Best Repair Damaged Wood Floor DIY Scratch Dent Options
Wood Stain Markers and Crayons
Stain markers represent the quickest solution for minor scratches affecting only the finish layer. These markers are available in dozens of wood tones and are incredibly convenient for small repairs. They work best on flat, non-textured finishes and can be applied in seconds.
The advantage of markers is their precision—you apply color exactly where needed without affecting surrounding areas. However, they work best on light scratches and may not fill deeper damage adequately. Keep several colors on hand for different rooms and furniture pieces.
Water-Based Wood Fillers
Water-based fillers offer quick drying times and low odor, making them ideal for indoor use in occupied homes. These fillers clean up easily with water and come in multiple colors matching popular wood tones. They’re environmentally friendly and suitable for homes with children or pets.
The trade-off is that water-based fillers don’t provide the same durability as epoxy-based products for high-traffic areas. They work excellently for closets, bedrooms, and low-traffic spaces but may wear away faster in living rooms or kitchens. Application is straightforward—simply press into the damage and smooth with a putty knife.
Two-Part Epoxy Fillers
Epoxy fillers provide superior strength and durability for structural repairs. These products harden to near-wood hardness and can be sanded, stained, and finished just like real wood. They’re ideal for repairing deep gouges in high-traffic areas where durability matters most.
Epoxy fillers require more careful mixing and application but deliver professional-quality results. They take longer to cure than water-based options but create repairs that last for years without degradation. The stronger smell requires adequate ventilation during application.
Polyurethane and Finishing Products
Polyurethane provides a durable, clear protective coating that blends with your existing finish. Water-based polyurethane dries quickly with minimal odor, while oil-based versions provide deeper amber tones that enhance wood character. Both options cure to similar hardness levels.
Applying polyurethane requires patience and attention to detail. Proper technique involves using quality brushes, applying thin even coats, sanding between applications, and maintaining appropriate temperature and humidity during curing. The result justifies the effort—a floor that looks freshly finished and feels protected against future damage.
Touch-Up Stains and Blending Solutions
Specialized touch-up stains contain pigments that match popular wood species perfectly. These stains dry quickly and blend invisibly with existing finishes when applied correctly. They’re essential when repairs require color correction to match your floor’s tone.
Test stains on inconspicuous areas first, as lighting conditions dramatically affect how colors appear. Apply thin coats, building color gradually rather than applying one heavy coat. Allow proper drying time between coats for the most accurate color representation.
Pro Tips for Repair Damaged Wood Floor DIY Scratch Dent
Lighting is Critical: Always assess damage and perform repairs in natural daylight. Artificial lighting can deceive your eyes about color matching and repair quality, leading to mismatched repairs that are obvious in daylight. Complete repairs during daytime hours whenever possible.
Test Everything First: Before applying any product to visible damage, test it on a hidden area or scrap wood. This allows you to verify color match, drying time, and application technique without risking your visible floors. Testing prevents costly mistakes on conspicuous repairs.
Work With the Grain: Whether sanding, staining, or applying finishes, always work parallel to the wood grain. Working against the grain creates cross-grain scratches that are harder to blend and may require additional sanding. Following the grain makes repairs blend more naturally into surrounding wood.
Feather Your Edges: When repairing damage, feather the edges by gradually blending the repair into surrounding finish. This technique prevents the repair from looking like a patch and makes the transition invisible. Use progressively finer sandpaper grades while sanding in circular motions at edges.
Humidity and Temperature Matter: Wood expands and contracts with humidity changes, affecting how fillers and finishes cure. Perform repairs when humidity is between 30-50% and temperature is above 65°F. Avoid repairs during humid summers or cold winters when wood movement is greatest.
Invest in Quality Tools: Using quality brushes, sandpaper, and application tools improves repair results dramatically. Cheap brushes shed fibers into finishes, creating an unprofessional appearance, while quality tools provide smooth, even application. Quality tools are reusable and more economical long-term.
Patience Yields Better Results: Rushing through repairs leads to mistakes and unsatisfactory results. Allow adequate drying time between coats, don’t sand until completely cured, and resist the temptation to apply thick coats. Patience and multiple thin applications produce professional-quality repairs.
Common Mistakes to Avoid
Skipping Surface Preparation: Many DIYers underestimate the importance of cleaning and sanding before repairs. Dirt and residue prevent products from adhering properly, and unsanded edges create visible repair lines. Thorough preparation takes minutes but dramatically improves results.
Mismatched Colors: Selecting wood stain or filler in artificial lighting commonly results in color mismatches that are obvious in daylight. Always compare colors in natural lighting and test on hidden areas before committing to visible repairs. Bring wood samples to hardware stores when selecting products.
Overfilling Damage: Applying too much filler creates bumps that require extensive sanding to smooth. Instead, slightly overfill and sand down—this technique removes air pockets while creating smooth finishes. Multiple thin applications beat one thick application every time.
Inadequate Sanding Between Coats: Skipping sanding between polyurethane coats results in rough finishes that lack clarity. Light sanding creates tooth for adhesion and removes dust, dust particles, and surface imperfections between coats.
Environmental Neglect: Applying finishes in cold, humid conditions causes slow drying, poor adhesion, and finish defects. Always check product instructions for temperature and humidity requirements. Wait for ideal conditions rather than rushing repairs in unfavorable environments.
Wrong Product Selection: Using interior wood filler in high-traffic areas or water-based stains in moisture-prone kitchens guarantees repair failure. Understand your damage type and location, then select products specifically designed for those conditions. Reading product labels prevents expensive mistakes.
Key Takeaways
- Assess damage type accurately to determine the most effective repair method for your specific situation
- Surface scratches need only finish touch-ups while deep gouges require wood filler and comprehensive repairs
- Test all products on hidden areas first to verify color match and application success before visible repairs
- Multiple thin coats outperform single thick applications for stains, fillers, and protective finishes
- Environmental conditions significantly impact repair success—always follow manufacturer guidelines for temperature and humidity
Frequently Asked Questions About Repair Damaged Wood Floor DIY Scratch Dent
Q: What is the best repair damaged wood floor DIY scratch dent product for minor scratches?
A: Wood stain markers represent the best solution for minor surface scratches that only affect the finish layer. These markers are quick, precise, and available in dozens of wood tones. For best results, select a marker matching your wood color, apply along the grain direction, and wipe excess immediately. They work excellently on flat finishes but may show more obviously on textured surfaces. Keep several colors on hand for different rooms throughout your home.
Q: How do I use repair damaged wood floor DIY scratch dent fillers correctly?
A: Begin by cleaning and preparing the damaged area thoroughly, removing all dust and debris. For water-based fillers, press the material firmly into the damage using a putty knife, overfilling slightly to account for shrinkage. Allow proper drying time before sanding smooth with progressively finer sandpaper grades. For epoxy fillers, mix components according to package directions, then apply the same technique. Always sand with the grain and feather edges into surrounding finishes.
Q: How long does it take to repair damaged wood floors?
A: Simple scratch touch-ups take 15-30 minutes from start to finish, including drying time. Medium dent repairs with fillers typically require 1-2 hours plus drying time (usually 4-24 hours depending on filler type). Deep gouge repairs involving multiple coats of filler, sanding, staining, and polyurethane application may require several days when accounting for proper drying between coats. Patience and following manufacturer drying times prevent problems and ensure quality results.
Q: Should I hire a professional or repair damage myself?
A: DIY repairs make sense for minor scratches, small dents, and damage in low-visibility areas. For extensive damage, numerous repairs throughout your home, or high-traffic areas where durability is critical, professional restoration may be worthwhile. Professionals have industrial-grade equipment and experience blending repairs invisibly. However, DIY repairs save $500-$2,000+ compared to professional services, making them worthwhile for most homeowners willing to invest time learning proper techniques.
Q: How can I prevent future wood floor damage?
A: Use felt pads under furniture legs, maintain humidity levels between 30-50%, avoid dragging heavy objects across floors, and clean spills immediately to prevent moisture damage. Place area rugs in high-traffic zones, trim pet nails regularly, and use doormats to minimize dirt and sand tracked inside. These preventative measures eliminate 80% of common wood floor damage, protecting your investment long-term while reducing repair needs.
Conclusion
Mastering how to repair damaged wood floor DIY scratch dent issues transforms you into a confident homeowner capable of maintaining one of your home’s most valuable assets. The repair process is entirely achievable for anyone willing to learn proper techniques, invest in quality materials, and exercise patience throughout the application process. Whether you’re addressing minor cosmetic scratches or structural damage, the methods and products outlined in this guide provide professional-quality results at a fraction of professional restoration costs.
Start with small repairs to build confidence, then tackle more challenging damage as your skills develop. Remember that environmental conditions, proper preparation, and multiple thin applications are keys to success. Your beautifully restored wood floors will reward your efforts every single day for years to come.
Recommended Products on Amazon
As an Amazon Associate I earn from qualifying purchases.