How to replace a bathroom exhaust fan
Replace Bathroom Exhaust Fan DIY Ventilation: Complete 7-Step Guide
Learning how to replace bathroom exhaust fan DIY ventilation is one of the most practical home improvement projects you can tackle yourself. A functioning bathroom exhaust fan removes moisture and odors, preventing mold growth and maintaining air quality in your home. This comprehensive guide will walk you through every step of the process, from turning off the power to installing your new fan, ensuring you can complete this project with confidence and safety. Whether you’re dealing with a noisy fan or upgrading to a more efficient model, replacing your bathroom exhaust fan is achievable for homeowners of all skill levels.
Table of Contents
- Why Replace Bathroom Exhaust Fan DIY Ventilation Matters
- Step-by-Step Replace Bathroom Exhaust Fan DIY Ventilation Guide
- Best Replace Bathroom Exhaust Fan DIY Ventilation Options
- Pro Tips for Replace Bathroom Exhaust Fan DIY Ventilation
- Common Mistakes to Avoid
- Key Takeaways
- Frequently Asked Questions about Replace Bathroom Exhaust Fan DIY Ventilation
- Conclusion
Why Replace Bathroom Exhaust Fan DIY Ventilation Matters
Understanding the importance of proper bathroom ventilation cannot be overstated for any homeowner. When moisture accumulates in your bathroom without adequate ventilation, it creates an ideal environment for mold, mildew, and mold spores to thrive, which can compromise your home’s structural integrity and pose health risks to your family. A working exhaust fan removes up to 90% of bathroom moisture, reducing the likelihood of water damage to walls, ceilings, and fixtures that can cost thousands of dollars to repair.
Beyond moisture control, replacing an old or malfunctioning bathroom exhaust fan improves indoor air quality significantly. Old fans often become clogged with dust and debris, reducing their effectiveness and forcing them to work harder, which increases energy consumption and your utility bills. Modern exhaust fans are engineered to be quieter, more energy-efficient, and often include features like humidity sensors and delayed-off timers that optimize performance while reducing unnecessary running time.
A failing exhaust fan can indicate serious underlying issues, including poor ductwork connections or inadequate ventilation pathways that allow moisture to infiltrate your attic space. By proactively replacing your bathroom exhaust fan DIY ventilation system, you prevent costly moisture-related damage and ensure your bathroom remains a healthy, dry environment. Additionally, upgrading to a new fan can improve your home’s resale value, as potential buyers appreciate updated, functional ventilation systems that demonstrate proper home maintenance.
The financial benefits of handling this project yourself are substantial. Professional installation can cost $200-$400 in labor alone, while the entire DIY project typically takes just 1-2 hours and saves you significant money. This makes replacing your bathroom exhaust fan an excellent entry-level DIY project that combines practical skill-building with immediate, tangible benefits for your home.
Step-by-Step Replace Bathroom Exhaust Fan DIY Ventilation Guide
Step 1: Turn Off the Power and Prepare Your Workspace
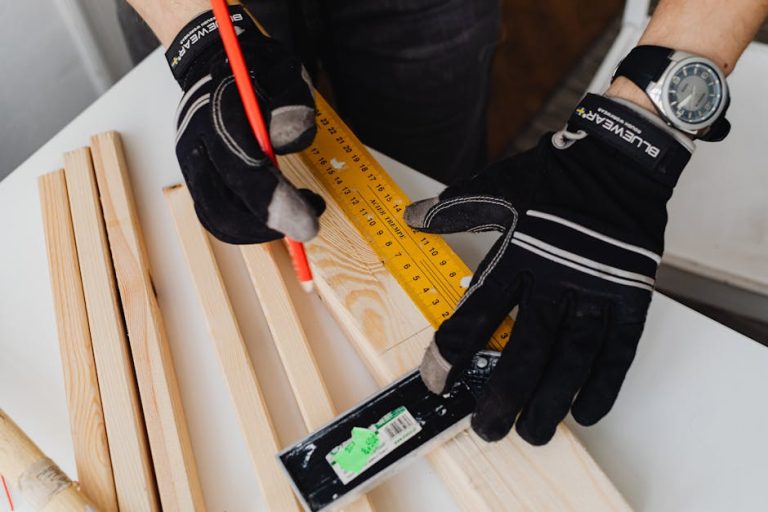
Before beginning any work, you must turn off the power to your bathroom exhaust fan at the circuit breaker and verify it’s off using a non-contact voltage tester. Safety is paramount when working with electrical appliances, and testing ensures no power is flowing to the fixture. Next, gather all your tools and materials in one convenient location: a screwdriver set, utility knife, drywall saw, adjustable wrench, wire strippers, wire connectors, ductwork tape, and your new exhaust fan unit.
Spread a drop cloth under the work area to catch any debris, dust, or insulation that may fall from the ceiling during removal. Use a ladder or step stool that’s sturdy and properly positioned beneath the exhaust fan location. Have a helper present if possible, as they can stabilize the ladder and assist with handling the heavier ceiling components during installation.
Step 2: Remove the Old Exhaust Fan Cover and Ductwork
Start by removing the old grille or cover from your bathroom exhaust fan by unclipping or unscrewing it from inside the bathroom. This exposes the internal damper and allows you to see the mounting mechanism clearly. Next, you’ll need to disconnect the flexible ductwork (dryer vent-style tubing) that connects the fan housing to your home’s ventilation system or exterior wall.
Loosen the ductwork connection by unraveling any ductwork tape and carefully sliding the duct off the exhaust fan connector. Be prepared for accumulated dust and debris, and avoid disturbing any insulation around the ductwork. If the ductwork is severely damaged or clogged, this is an excellent opportunity to replace it with new, more efficient ducting while you have access to the area.
Step 3: Disconnect Electrical Wiring
Locate the electrical connection box where the exhaust fan connects to the home’s wiring system, typically found above the damper assembly. Using your voltage tester one more time to confirm power is off, carefully disconnect the wire connectors joining the fan’s wiring to your home’s electrical system. Note the wire colors and connections for reference—typically black (hot), white (neutral), and bare copper (ground) wires.
If your exhaust fan has a separate damper switch or integrated humidistat, these wires also need to be disconnected carefully. Take a photo with your smartphone before disconnecting wires to serve as a reference guide during reinstallation. Label each wire connector to eliminate confusion during the reinstallation process.
Step 4: Remove the Fan Housing from the Ceiling
Locate the mounting brackets or fasteners securing the fan housing to your ceiling joists or support frame. These are typically found on either side of the housing and secured with bolts or screws that must be completely removed. Have your helper hold the fan unit firmly as you remove the final fasteners to prevent it from falling unexpectedly and causing injury or damage.
Carefully lower the old fan housing down through the ceiling opening and maneuver it to clear the opening fully. Take time to inspect the ceiling opening and remove any old insulation, debris, or deteriorated ductwork from the previous installation. This is also an ideal time to check for any signs of water damage or mold, which would indicate chronic ventilation problems that your new system will help resolve.
Step 5: Install the New Fan Housing
Position your new exhaust fan housing in the ceiling opening, ensuring the mounting brackets align perfectly with your ceiling joists or the existing support frame. If the new unit is larger than the old one, you may need to adjust mounting brackets or reinforce the frame, which typically involves attaching L-brackets to the joists with lag bolts or structural screws. Secure the housing to the mounting brackets using the hardware provided with your new unit, ensuring it’s level and properly aligned.
Check that the damper assembly moves freely without obstruction and that all internal components are positioned correctly before proceeding. The housing should be flush with the ceiling surface to prevent gaps where air can leak, compromising ventilation efficiency. Once the housing is secure, verify that no wiring or components are pinched or damaged during installation.
Step 6: Reconnect Electrical Wiring
Strip approximately ½ inch of insulation from each wire end using your wire strippers, ensuring clean, undamaged wire for optimal electrical connection. Connect the black (hot) wires from your home’s electrical system to the black wire on your new exhaust fan using an appropriate wire connector, twisting clockwise until secure. Repeat this process with the white (neutral) and ground (bare copper) wires, ensuring each connection is tight and properly insulated.
Bundle the connected wires neatly into the electrical junction box and secure the box cover according to manufacturer specifications. If your new fan includes features like humidity sensors or delayed-off timers, ensure all wiring for these components is properly connected and tested. Double-check every connection before proceeding to the next step, as loose connections are a fire hazard and can cause equipment failure.
Step 7: Reconnect Ductwork and Install the Cover
Slide the flexible ductwork back onto the exhaust fan connector and wrap it with ductwork tape to create an airtight seal that prevents moisture and air leaks. For new installations, use rigid or semi-rigid ductwork where possible, as it’s more durable and provides better airflow than flexible ducting. Ensure the ductwork slope slightly downward toward the exterior exit to prevent moisture from accumulating inside the duct and dripping back into your bathroom.
Install the new grille or cover by screwing or clipping it into place from inside the bathroom, ensuring it’s centered and secure. Turn the power back on at the circuit breaker and test your new fan, listening for unusual noises and confirming proper damper operation. Run the fan for several minutes to verify smooth operation before considering the project complete.

Best Replace Bathroom Exhaust Fan DIY Ventilation Options
Choosing the right replacement exhaust fan is crucial for optimal performance and durability. Modern fans range from basic models offering simple on-off operation to sophisticated systems with humidity sensors, integrated lighting, heated seats, and Bluetooth speakers. The best option depends on your specific needs, budget, available space, and desired noise levels.
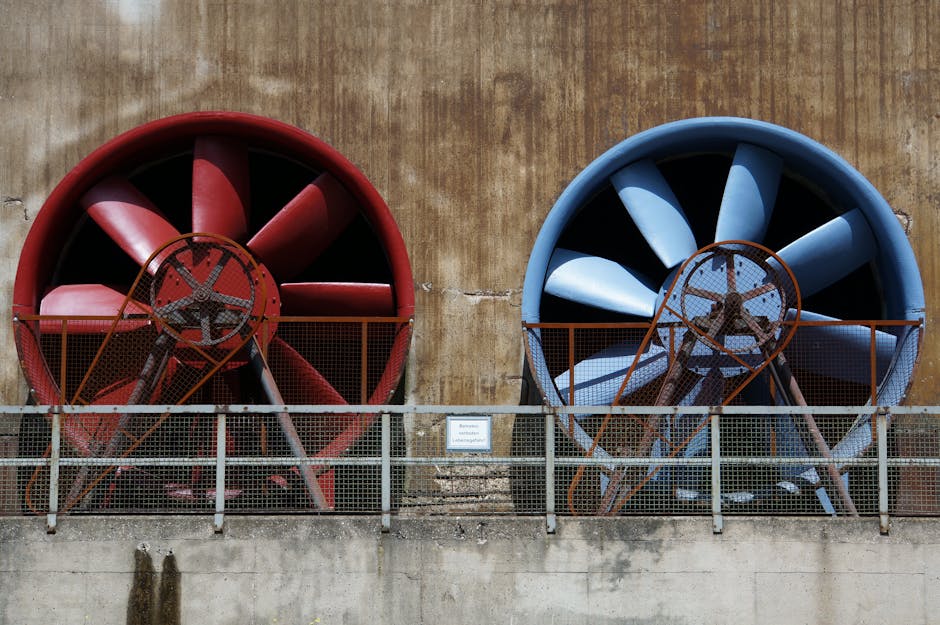
Inline Centrifugal Fans are powerful options that mount outside the bathroom, typically in an attic space, and connect via ductwork. These are ideal for bathrooms where ceiling space is limited or where you want minimal noise in the bathroom itself. They’re more expensive than standard models but offer superior performance and flexibility in installation options, making them worth the investment for renovation projects.
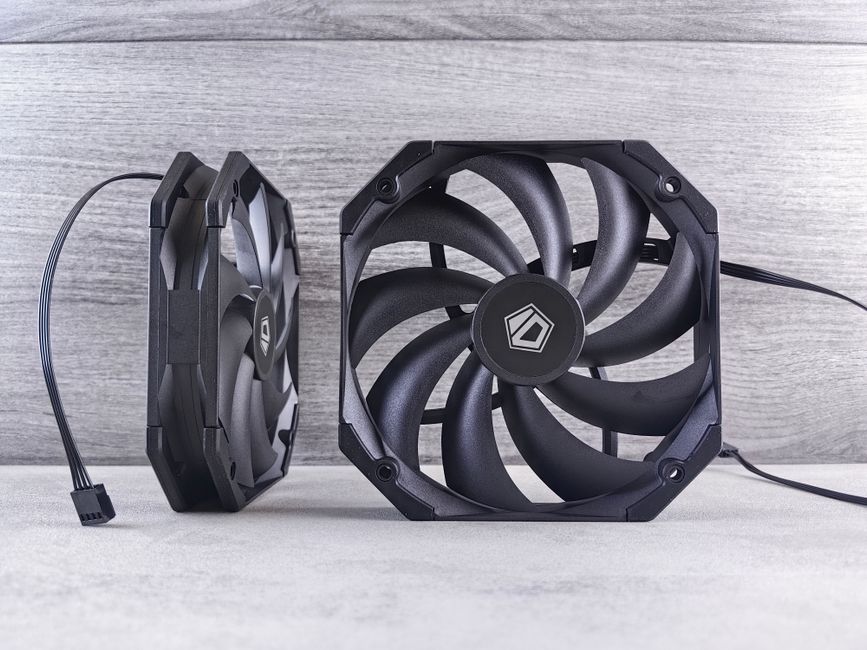
Standard Ceiling-Mounted Fans are the most common and affordable option, mounting directly in your bathroom ceiling with ducting connected to exterior walls or roof vents. These fans are available in numerous sizes, typically ranging from 50 to 200+ CFM (cubic feet per minute), which measures airflow capacity. Choose a CFM rating appropriate to your bathroom size—most building codes require 50 CFM for half baths and 100 CFM for full baths.
Humidity-Sensing Fans automatically detect moisture levels and adjust operation accordingly, removing excess moisture before it becomes problematic. These intelligent systems reduce energy consumption by preventing unnecessary runtime while ensuring reliable moisture removal during showers and baths. They’re slightly more expensive than basic models but provide superior performance and can extend the lifespan of your bathroom walls and fixtures.
Combination Units integrate exhaust fan functionality with lighting, heating, or night lights, perfect for bathrooms with limited space. While these all-in-one solutions simplify installation by consolidating multiple functions, they can be pricier than separate components. However, the convenience and space savings often justify the additional investment for many homeowners.
Ultra-Quiet Models produce minimal noise, typically 0.3-0.8 sones (standard models produce 1-2 sones), making them ideal for master bathrooms or homes where noise sensitivity is a concern. Premium manufacturers like Panasonic and Broan offer quiet models that operate so silently you might forget the fan is running. For anyone who values tranquility in their bathroom sanctuary, quieter models are well worth the premium price.
When selecting your new fan, always check the manufacturer’s specifications for noise levels (measured in sones), CFM rating, energy consumption, and warranty coverage. Look for Energy Star certified models that meet strict efficiency standards and can reduce energy costs significantly over their operational lifespan. Reading customer reviews provides valuable insights into real-world performance, durability, and any common issues reported by actual users.

Pro Tips for Replace Bathroom Exhaust Fan DIY Ventilation
Upgrade Your Ductwork Simultaneously: While you have easy access to the bathroom’s ventilation system, replace old flexible ducting with new rigid or semi-rigid ducts for improved airflow and durability. Old, crushed, or deteriorated ductwork significantly reduces fan efficiency, so this upgrade amplifies the benefits of your new fan installation and ensures optimal performance for years to come.
Install a Remote Wall Switch: If your new fan doesn’t include one, install a wall-mounted control switch that allows convenient operation from inside the bathroom. This is particularly useful for fans with delayed-off timers, as you can set the fan to run for 15-20 minutes after you leave, ensuring complete moisture removal without manual intervention.
Ensure Proper Ducting Routing: Never route exhaust ducting into your attic space without properly sealing and venting it to the exterior, as this causes moisture accumulation and structural damage. Similarly, avoid venting into soffit areas where exhaust moisture can re-enter your home. Always vent directly through roof jacks or wall vents to the exterior, ensuring dampers open properly during operation and close when the fan stops.
Maintain Your New Installation: Set a calendar reminder to clean the grille every 3-6 months, as dust and debris accumulation reduces efficiency significantly. Once annually, if accessible, inspect the ductwork and external vent for blockages or damage. Regular maintenance extends your fan’s lifespan and maintains optimal performance throughout its operational years.
Consider Humidity Levels: If your bathroom consistently stays humid even after replacement, you may have inadequate CFM rating or ducting issues. Most building codes suggest CFM ratings of 50-100 for residential bathrooms, but extremely large bathrooms or those with multiple showers may benefit from higher CFM units.
Plan Your Installation Timing: Choose a dry day for installation and avoid scheduling the project during cold weather if you’re venting through your roof, as temperature differences can cause condensation. Coordinate with your family’s schedule to ensure the bathroom is unoccupied during installation and for several hours afterward while you complete testing.
Use Quality Materials Throughout: Invest in quality ductwork tape (foil-based, not cloth), proper ductwork connectors, and wire connectors rated for your installation. Cheap materials fail prematurely and can compromise your installation’s integrity and safety, making premium options a smart long-term investment.

Common Mistakes to Avoid
One critical mistake many DIYers make is inadequate or improper ductwork installation, routing ducting through attics or into soffits rather than to exterior wall or roof vents. This traps moisture inside your home, defeating the entire purpose of the exhaust fan and creating conditions for mold growth. Always route ducting directly to the exterior using proper venting techniques and ensure dampers operate freely to prevent backdrafts.
Another common error is selecting a fan with insufficient CFM rating for the bathroom size, resulting in inadequate moisture removal despite proper installation. Many homeowners purchase the cheapest available option without considering performance specifications, compromising functionality for years to come. Always calculate your bathroom’s cubic footage and select a fan with appropriate CFM rating—higher CFM means better performance, though it may increase operational noise.
Failing to disconnect power before beginning work is an extremely dangerous mistake that can result in electrical shock or electrocution. Always turn off the circuit breaker and verify power is off using a non-contact voltage tester before touching any electrical components. Never assume the power is off based on appearance alone—always test to confirm.
Improper electrical connections cause fires and equipment failure, so take time to ensure wire connections are tight, properly insulated, and color-matched correctly. Using incorrect wire gauge or undersized connectors is a serious safety hazard that building inspectors will flag during inspections. If you’re uncomfortable working with electrical systems, consider hiring a licensed electrician for the electrical connections while you handle the mechanical aspects yourself.
Many people fail to seal gaps between the new fan housing and the ceiling drywall, allowing unconditioned air to leak into your attic or conditioned air to escape into unconditioned spaces. Use quality ductwork tape or spray foam to seal these gaps completely, improving your HVAC system’s efficiency and preventing air leaks. This simple step significantly improves overall performance and energy efficiency.
Forgetting to remove the plastic shipping caps from damper assemblies before operation can damage the fan and prevent proper operation. Always inspect the entire assembly before installation and remove all protective plastic components, labels, and packaging materials that could interfere with operation.
Key Takeaways
- Turn off power at the circuit breaker and verify using a non-contact voltage tester before starting any work on your exhaust fan system.
- Select appropriate CFM rating for your bathroom size—typically 50 CFM for half baths and 100 CFM for full baths, with larger bathrooms requiring higher ratings.
- Route ductwork to exterior vents rather than attics or soffits to prevent moisture accumulation and ensure optimal ventilation performance and home protection.
- Upgrade to modern, Energy Star-certified models to improve efficiency, reduce noise levels, and potentially add smart features like humidity sensors and delayed-off timers.
- Maintain your installation regularly by cleaning grilles every 3-6 months and inspecting ductwork annually to ensure consistent performance and extend the fan’s lifespan.
Frequently Asked Questions about Replace Bathroom Exhaust Fan DIY Ventilation
Q: What is the best replace bathroom exhaust fan DIY ventilation solution for my home?
A: The best solution depends on your bathroom size, budget, and specific needs. For most homeowners, a 100 CFM humidity-sensing model with a 0.3-0.8 sone rating provides excellent performance and moisture control. Calculate your bathroom’s CFM requirements based on square footage and select an Energy Star-certified model from reputable manufacturers like Panasonic, Broan, or Delta for reliability and warranty support.
Q: How do I use replace bathroom exhaust fan DIY ventilation to prevent mold growth?
A: Run your exhaust fan during showers and for 15-20 minutes afterward to remove moisture before it condenses on walls and creates mold-friendly conditions. Install a humidity-sensing fan to automatically adjust operation based on moisture levels, or use a wall-mounted timer switch to ensure consistent runtime. Maintain proper ductwork routing to exterior vents and clean grilles regularly to ensure optimal performance.
Q: Can I install a larger CFM fan than my current installation?
A: Yes, but verify your ductwork can handle increased airflow without becoming a bottleneck. If your existing ductwork is undersized or restrictive, upgrade to larger diameter ducting or rigid ductwork for improved performance. Ensure your electrical circuit can handle any additional power draw from the larger motor, as some high-performance fans require dedicated circuits.
Q: How long does a typical bathroom exhaust fan installation take?
A: Most installations take 1-2 hours for someone with basic DIY experience, though complex electrical work or ductwork upgrades may require additional time. Having a helper present significantly speeds up the process and improves safety during ceiling work. Plan for extra time if you’re upgrading ductwork or addressing any unexpected issues discovered during removal of the old fan.
Q: What should I do if I smell exhaust coming back into my bathroom after installation?
A: Check that the damper assembly moves freely and closes properly when the fan stops—a stuck damper allows odors to return. Verify ductwork connections are sealed tightly with foil tape and inspect for any separation or loose connections. If problems persist, check the exterior vent for blockages or damage and ensure ductwork slopes properly toward the exit to prevent moisture accumulation.
Conclusion
Learning how to replace bathroom exhaust fan DIY ventilation is a rewarding project that protects your home’s structural integrity, improves air quality, and increases property value simultaneously. By following this comprehensive guide and taking time to properly disconnect old systems, install new components correctly, and maintain your investment, you’ll enjoy reliable, efficient ventilation for years to come. Don’t delay addressing ventilation issues—start planning your exhaust fan replacement today and enjoy a healthier, drier bathroom tomorrow.
Recommended Products on Amazon
As an Amazon Associate I earn from qualifying purchases.