How to install cabinet hardware yourself
Install Cabinet Hardware Knobs Pulls DIY: Complete Guide for Perfect Results
Learning how to install cabinet hardware knobs pulls DIY is one of the most rewarding home improvement projects you can tackle on your own. Whether you’re updating your kitchen, bathroom, or bedroom cabinets, installing new hardware transforms the entire look of your space without requiring professional help or expensive labor costs. This comprehensive guide will walk you through every step of the process, from selecting the right tools to avoiding common mistakes that can ruin your cabinets. By the end, you’ll have the confidence and knowledge to complete this project like a seasoned DIY enthusiast, saving money while achieving professional-quality results that you can be proud of.
Table of Contents
- Why Install Cabinet Hardware Knobs Pulls DIY Matters
- Step-by-Step Install Cabinet Hardware Knobs Pulls DIY Guide
- Best Install Cabinet Hardware Knobs Pulls DIY Options
- Pro Tips for Install Cabinet Hardware Knobs Pulls DIY
- Common Mistakes to Avoid
- Key Takeaways
- Frequently Asked Questions about Install Cabinet Hardware Knobs Pulls DIY
- Conclusion
Why Install Cabinet Hardware Knobs Pulls DIY Matters
Installing cabinet hardware yourself is one of the most cost-effective ways to refresh your home’s appearance without undertaking a complete cabinet overhaul. New knobs and pulls can dramatically change the aesthetic of your kitchen, bathroom, or any room with cabinetry, instantly elevating the style from outdated to contemporary or classic, depending on your chosen hardware style. When you choose to install cabinet hardware knobs pulls DIY, you eliminate labor costs that can range from $100 to $300 or more, depending on the number of cabinets and your location.
Beyond the financial benefits, tackling this project yourself gives you complete creative control over your design choices. You can select hardware that perfectly matches your interior design vision, whether you prefer modern minimalist handles, vintage brass knobs, sleek stainless steel pulls, or ornate decorative options. This level of customization simply isn’t possible when relying on pre-installed hardware or hiring contractors who might push you toward their preferred options.
The skills you develop while learning to install cabinet hardware knobs pulls DIY translate directly to other home improvement projects. Measuring accurately, drilling precise holes, and using power tools correctly are fundamental abilities that will serve you well in future renovations. Additionally, completing this project yourself builds confidence in your DIY abilities and demonstrates that professional-quality results are achievable without special training or expensive equipment.
Step-by-Step Install Cabinet Hardware Knobs Pulls DIY Guide
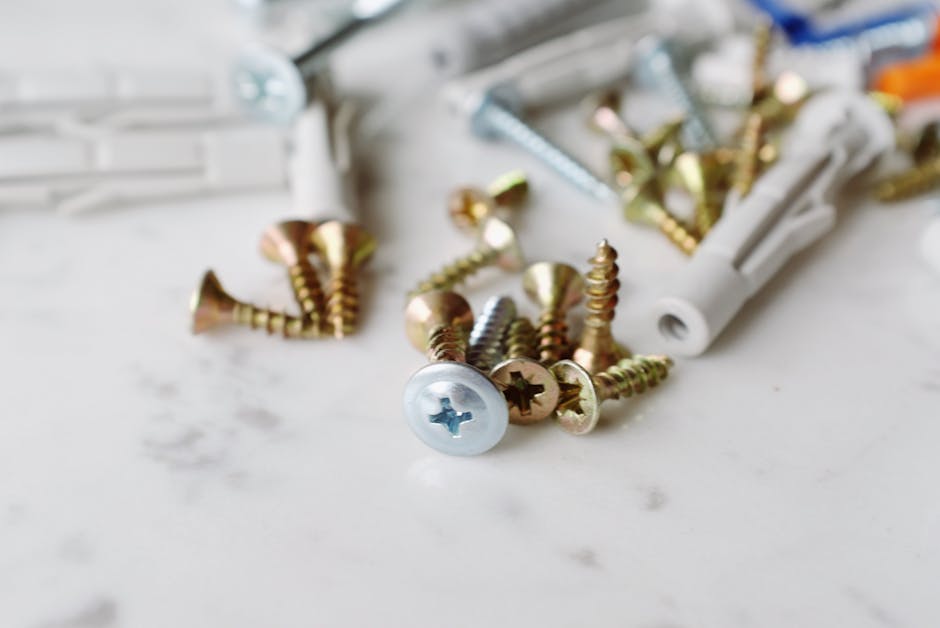
Before you begin, gather all necessary materials and tools to ensure a smooth installation process. You’ll need your new hardware, a measuring tape, a pencil, a drill with appropriate bits, a level, a template (if available), painter’s tape, a screwdriver set, and safety glasses. Taking time to organize your workspace and lay out all tools prevents frustration during the installation process.
Step 1: Remove Old Hardware
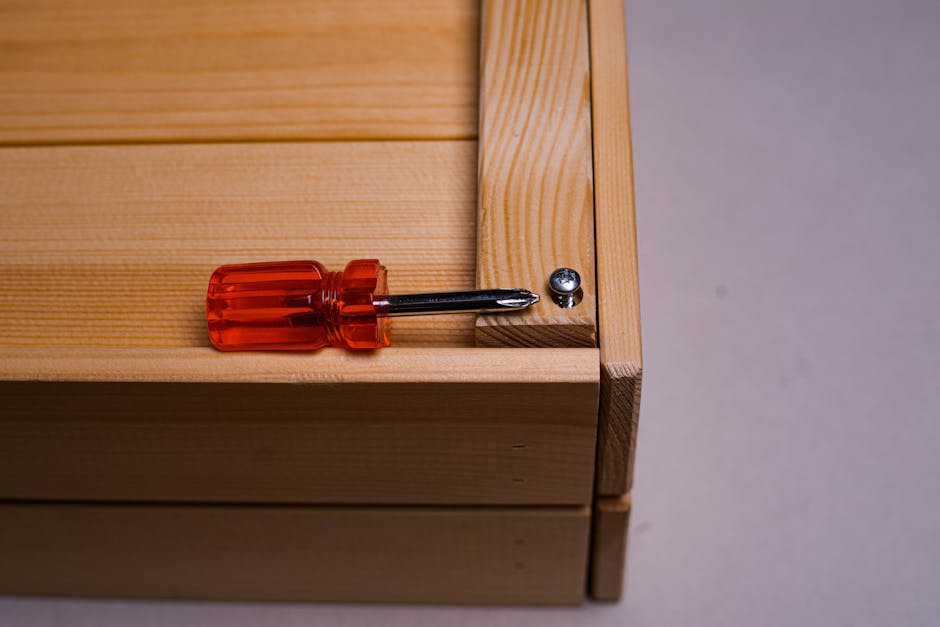
Start by removing all existing hardware from your cabinets using the appropriate screwdriver. Most hardware is held in place with simple screws that are easily removed by turning them counterclockwise. If screws are stuck or rusted, apply a small amount of penetrating oil and wait 15 minutes before attempting removal again.
Once removed, fill the old screw holes with wood filler if you’re not replacing them in the same location. Allow the filler to dry completely according to manufacturer instructions, typically 2-4 hours, then sand smooth with fine-grit sandpaper. This creates a clean surface for your new installation.
Step 2: Measure and Mark
Accurate measurement is crucial for professional-looking results when you install cabinet hardware knobs pulls DIY. For knobs, the standard placement is centered on cabinet doors, typically 2-3 inches down from the top or 2-3 inches up from the bottom. For pulls on drawers, position them 2-3 inches from the top or center the pull horizontally on the drawer front.
Use your measuring tape to find these locations on each cabinet piece and mark them with a pencil. Double-check all measurements before proceeding to drilling. Consider using painter’s tape under your marks to prevent the drill bit from slipping on the cabinet surface, which can cause unsightly scratches.
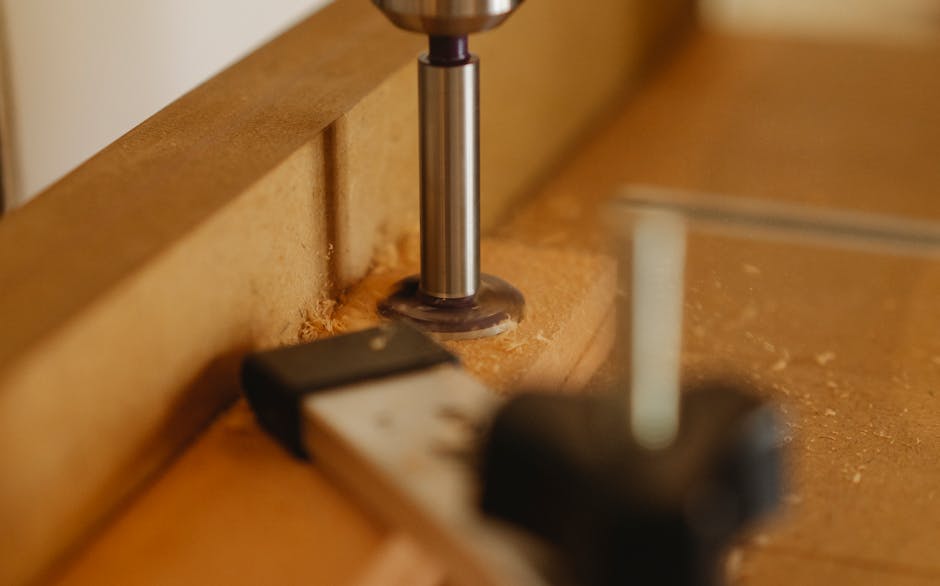
Step 3: Create a Drilling Template
If your new hardware came with a drilling template, place it over your marked location and secure it with painter’s tape. These templates are specifically designed to ensure proper hole spacing for hardware with multiple attachment points. If no template came with your hardware, you can create one using cardboard or heavy paper.
For simple single-hole knobs, mark the drill point and use a center punch to create a small indentation. This prevents the drill bit from slipping when you start drilling. For multi-hole pulls, measure the distance between holes according to your hardware’s specifications and mark both locations clearly.
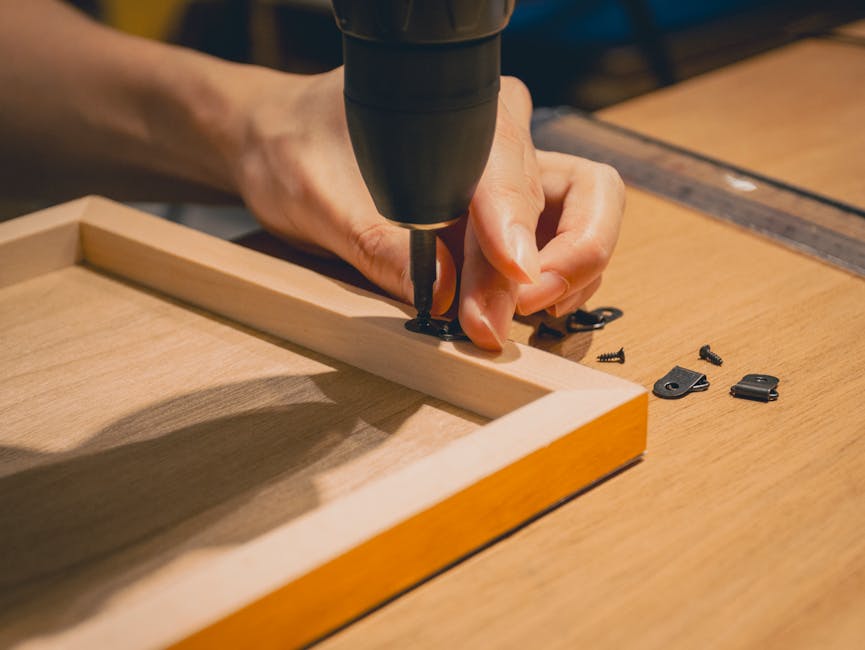
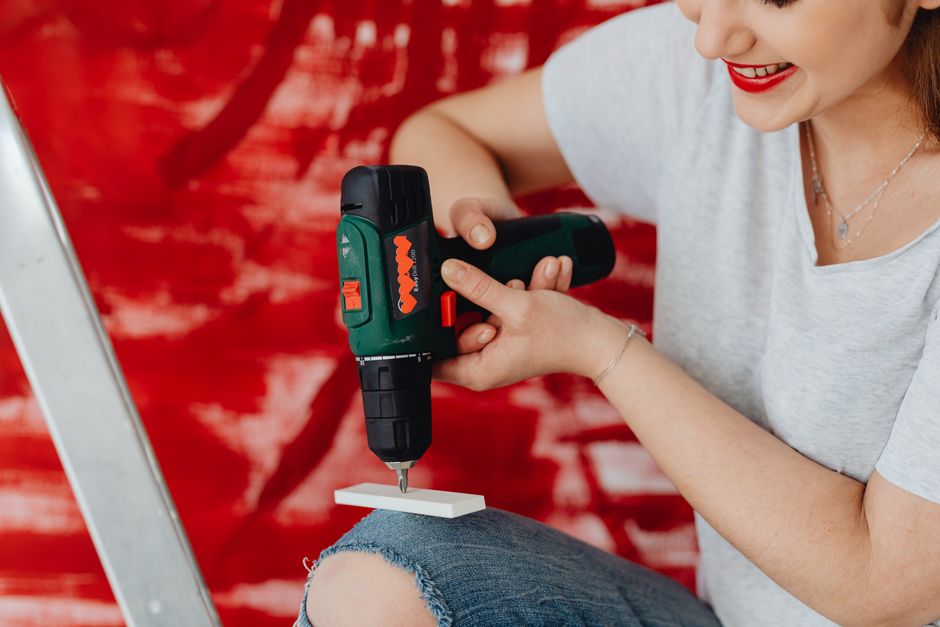
Step 4: Drill the Holes
Select the appropriate drill bit size for your hardware—most cabinet hardware uses either 35mm or 1-1/8 inch bits for European-style cup hinges, or smaller bits (typically 1/8 to 1/4 inch) for screw holes. Install the correct bit in your drill and set it to the appropriate speed for your cabinet material. Hardwoods require lower speeds, while softwoods can use higher speeds.
Position your drill perpendicular to the cabinet surface and apply steady, even pressure. Let the drill do the work without forcing it through the wood. Drilling too fast or at an angle can damage your cabinets and create misaligned holes that won’t accept hardware properly.
Step 5: Install the Hardware
Once holes are drilled, align your new hardware with the holes and insert screws through the back of the hardware into the holes you’ve created. For knobs, screw them in until snug but not overly tight—over-tightening can crack knobs or strip wood. For pulls, ensure both screws are tightened evenly so the pull sits flush against the cabinet.
Check alignment frequently as you install hardware on each cabinet. Step back periodically to verify that all hardware is level and properly positioned. Adjusting one piece slightly might be necessary to achieve visual harmony across all your cabinets.
Step 6: Final Adjustments and Cleanup
After all hardware is installed, do a final inspection of your work. Verify that every knob and pull is securely fastened, properly aligned, and at the same height across matching cabinets. Test each piece by gently tugging and turning to confirm everything is secure and functional.
Clean any pencil marks, tape residue, or dust from the cabinet surfaces using a appropriate cleaner for your cabinet finish. Step back and admire your completed project—you’ve successfully learned how to install cabinet hardware knobs pulls DIY!
Best Install Cabinet Hardware Knobs Pulls DIY Options
When selecting hardware for your install cabinet hardware knobs pulls DIY project, consider the style, material, finish, and functionality that best suits your home. Modern minimalist kitchens look stunning with sleek stainless steel or matte black hardware, while traditional spaces benefit from antique brass, bronze, or decorative knobs with detailed designs.
Metal Finishes and Materials
Stainless steel hardware resists fingerprints and corrosion, making it ideal for kitchen cabinets where moisture and frequent touching occur. Brass and bronze finishes add warmth and character to traditional and transitional spaces, though they may require occasional polishing to maintain their shine. Matte black or charcoal finishes have become increasingly popular for contemporary homes, offering a sophisticated look that complements both light and dark cabinet colors.
Chrome and nickel finishes provide a bright, reflective quality that works well in modern and industrial-style spaces. Consider the overall finish scheme in your room—matching hardware to faucets, light fixtures, and other metal accents creates a cohesive, intentional design. Some homeowners prefer mixing metals intentionally for an eclectic or transitional aesthetic that feels current and stylish.
Knob Versus Pull Design
Knobs work well for cabinet doors and smaller cabinet pieces, while pulls are better suited for drawers and heavier cabinet doors that require more leverage to open. Recessed handles integrate seamlessly into minimalist cabinetry, while modern bar pulls add visual interest and contemporary appeal. Mushroom knobs and bin pulls offer a vintage or country aesthetic perfect for farmhouse or cottage-style homes.
Consider combining knobs and pulls strategically—using knobs on upper cabinets and pulls on lower cabinets and drawers creates visual interest while optimizing functionality. Test different options if possible before making your final purchase decision, as the feel and look of hardware can significantly impact your satisfaction with the finished project.
Budget Considerations
Hardware prices range dramatically, from budget-friendly options at $5-10 per piece to high-end designer hardware costing $50+ per piece. For a typical kitchen with 15-20 cabinet doors and drawers, this can mean a difference of $75 versus $1,000 or more. Mid-range hardware ($15-30 per piece) typically offers excellent quality and style without excessive cost.
Consider your cabinet quality and overall kitchen investment when selecting hardware price points. High-end cabinetry deserves quality hardware, while budget or semi-custom cabinets work fine with moderately priced options. Remember that hardware is visible and regularly touched, so quality construction that feels solid and functions smoothly is worth the extra investment.
Pro Tips for Install Cabinet Hardware Knobs Pulls DIY
Use a Jig or Template System
Investing in a cabinet hardware jig ensures perfectly aligned holes every time and eliminates measuring errors. These specialized tools are available online and in home improvement stores, ranging from $20-50. Using a jig dramatically speeds up the process and guarantees professional results, especially if you’re working on multiple cabinets or rooms.
Create a Spreadsheet
Before beginning, create a spreadsheet documenting each cabinet’s location, current hardware position, and planned hardware position. This reference prevents confusion, especially in larger projects spanning multiple rooms. Take photos of your cabinet layout and reference them frequently to maintain consistency.
Take Your Time with Measurements
The most common mistake is rushing through measurements, resulting in misaligned hardware. Spend extra time double and triple-checking measurements before drilling any holes. A few extra minutes measuring saves hours of frustration fixing misaligned hardware or filling unwanted holes.
Test Fit Before Permanent Installation
Before fully tightening hardware, do a test fit to ensure everything aligns properly. You can make small adjustments at this stage without permanent damage. Once you’re satisfied with alignment and feel, tighten screws completely and securely.
Consider Lighting
Work in well-lit conditions to see your markings, holes, and alignment clearly. A headlamp or work light positioned to illuminate your cabinet fronts helps prevent errors. Shadows can make marks difficult to see and alignment problems less obvious until after installation.
Common Mistakes to Avoid
One critical error is drilling holes at incorrect depths, which can create holes that go completely through cabinet fronts, visible from the inside. Measure your cabinet thickness and set your drill to stop at the appropriate depth, or wrap tape around your drill bit to mark the correct depth. This prevents embarrassing visible holes that compromise cabinet appearance and functionality.
Another common mistake is poor measurement consistency, resulting in hardware positioned at different heights across matching cabinets. Always measure from the same reference point—either the top or bottom of the cabinet—and verify measurements multiple times before drilling. Inconsistent hardware placement makes even beautiful knobs and pulls look amateur.
Over-tightening hardware screws can crack knobs, damage cabinet finishes, or crack the wood itself. Tighten screws firmly but not with maximum force—they should feel solid without requiring excessive effort. Over-tightened hardware is difficult to adjust later if alignment issues emerge.
Failing to remove old screw holes before installing new hardware in different locations leaves visible holes that detract from your finished project. Always fill old holes with wood filler that matches your cabinet finish, then sand smooth before installing new hardware. This simple step makes a dramatic difference in overall appearance.

Key Takeaways
- Accurate measurement is essential: Double-check all measurements before drilling to ensure professional alignment across all cabinets
- Select hardware matching your style: Choose finishes and designs that complement your home’s overall aesthetic and existing fixtures
- Use appropriate tools: Invest in quality drill bits, measuring tools, and templates to achieve precise, professional results
- Fill old holes properly: Use wood filler matching your cabinet finish to hide previous hardware locations for a polished appearance
- Test fit before final tightening: Verify alignment and function before permanently tightening all hardware screws
Frequently Asked Questions about Install Cabinet Hardware Knobs Pulls DIY
Q: What is the best install cabinet hardware knobs pulls DIY spacing for kitchen cabinets?
A: Standard spacing for kitchen cabinet hardware depends on cabinet type. For cabinet doors, center hardware either 2-3 inches from the top or 2-3 inches from the bottom, ensuring consistency across all doors. For drawers, position pulls 2-3 inches from the top center or at the horizontal center of the drawer front. Most cabinet hardware manufacturers provide specific spacing recommendations in their documentation—always follow these specifications for optimal results.
Q: How do I use install cabinet hardware knobs pulls DIY templates correctly?
A: Templates provided with hardware should be carefully aligned with your marked installation points and secured with painter’s tape to prevent shifting. Drill or punch holes exactly through the template’s marked locations, maintaining firm pressure to ensure accurate placement. If your hardware didn’t include a template, create one using cardboard by marking hole locations and using it as a drilling guide.
Q: Can I install cabinet hardware on frameless cabinets?
A: Yes, installing hardware on frameless (European-style) cabinets is straightforward and often easier than frame-and-panel styles. Frameless cabinets typically use cup hinges with standard spacing, making template use essential for proper alignment. Follow your hardware manufacturer’s specific instructions for frameless cabinet installation, as spacing may differ slightly from traditional framed cabinetry.
Q: What drill bit size should I use for cabinet hardware?
A: Drill bit size depends on your specific hardware and screw diameter. Most cabinet knobs use 35mm European-style cup hinges, while pulls typically require 1/8 to 1/4 inch bits depending on screw size. Always check your hardware’s specifications or test fit the screw in a practice hole first to determine the correct bit size for your project.
Q: How do I prevent my drill from slipping when installing cabinet hardware?
A: Use a center punch to create a small indentation at your marked drilling point before using the drill—this gives the drill bit a guide to follow and prevents slipping. Additionally, applying painter’s tape under your mark reduces slipping on smooth cabinet surfaces. Drilling slowly and maintaining perpendicular pressure also helps prevent the bit from wandering.
Conclusion
Learning how to install cabinet hardware knobs pulls DIY is an achievable project that delivers immediate, visible improvements to your home’s appearance and functionality. This straightforward task requires basic tools, careful measurements, and attention to detail, but no special skills or professional training. By following the step-by-step guide, avoiding common mistakes, and incorporating pro tips, you’ll achieve professional-quality results that transform your cabinets and boost your DIY confidence. Start with one cabinet to build familiarity with the process, then work systematically through your space. Your newly updated cabinets will look stunning and provide years of enjoyment while proof that beautiful home improvements are absolutely within your capabilities.
Recommended Products on Amazon
As an Amazon Associate I earn from qualifying purchases.