How to install a storm door yourself
Install Storm Door DIY Exterior Frame: Complete Guide to Success
Learning how to install storm door DIY exterior frame projects can save you hundreds of dollars in professional installation fees while giving you complete control over the process. Storm doors are excellent additions to any home, providing extra protection against harsh weather, improving energy efficiency, and enhancing your home’s curb appeal. Whether you’re a seasoned DIY enthusiast or tackling your first home improvement project, this comprehensive guide will walk you through every step of the installation process with detailed instructions and expert tips.
Table of Contents
- Why Install Storm Door DIY Exterior Frame Matters
- Step-by-Step Install Storm Door DIY Exterior Frame Guide
- Best Install Storm Door DIY Exterior Frame Options
- Pro Tips for Install Storm Door DIY Exterior Frame
- Common Mistakes to Avoid
- Key Takeaways
- Frequently Asked Questions About Install Storm Door DIY Exterior Frame
- Conclusion
Why Install Storm Door DIY Exterior Frame Matters
Storm doors serve multiple critical functions for homeowners looking to protect and improve their properties. Beyond the obvious aesthetic improvements, these doors act as a barrier against wind, rain, snow, and debris that can damage your primary entry door and frame. They extend the lifespan of your main door by reducing direct exposure to harsh weather conditions, which means fewer replacements and repairs over time.
Energy efficiency represents another compelling reason to invest in a quality storm door. During winter months, the insulating air pocket created between your storm door and primary door helps maintain interior temperatures, reducing heating costs significantly. In summer, many storm doors feature full-screen options that allow you to ventilate your home naturally without opening your main door to insects and debris. This passive climate control can translate to substantial savings on your monthly energy bills.
Installing a storm door yourself eliminates the labor costs associated with professional installation, which can range from $200 to $500 depending on your location and the door’s complexity. Most homeowners can complete this project in a single afternoon with basic tools and minimal carpentry experience. The sense of accomplishment and knowledge gained from completing this project yourself provides value that extends beyond monetary savings.
Beyond practical benefits, storm doors dramatically enhance your home’s curb appeal and can increase property value when you eventually sell. Modern storm door designs come in various styles and finishes that complement virtually any architectural style, from traditional to contemporary homes. Potential buyers often view well-maintained storm doors favorably because they demonstrate property care and provide immediate weather protection benefits.

Step-by-Step Install Storm Door DIY Exterior Frame Guide
Preparation and Measurement
Before purchasing your storm door, accurate measurements are absolutely essential for ensuring proper fit and function. Measure the height of your doorway from the threshold to the top of the frame, taking measurements at three different points—left, center, and right—to account for any irregularities. Record the narrowest measurement to ensure the door will fit without binding or gaps. Measure the width similarly at the top, middle, and bottom of the frame, again using the smallest measurement for your purchase.
Check that your existing door frame is square using a carpenter’s level and a 4-foot straightedge positioned diagonally across corners. If your frame deviates more than a quarter-inch from square, you may need shims to correct the alignment before installation. Take time to document these measurements precisely, as incorrect dimensions are a leading cause of installation problems and wasted materials.
Gather Your Tools and Materials
Having all necessary tools and materials assembled before beginning prevents frustrating mid-project runs to the hardware store. You’ll need a power drill with bits, a screwdriver set, a hammer, a carpenter’s level, a tape measure, a pencil, exterior caulk, shims, screws appropriate for your specific door model, and weatherstripping.
Some homeowners prefer working with a helper for storm door installation because holding the door frame perfectly level while securing fasteners becomes significantly easier with an extra set of hands. Ensure you have adequate lighting in your work area, as storm door installation requires precision and attention to detail that poor lighting conditions can compromise.
Remove the Old Storm Door (If Applicable)
If you’re replacing an existing storm door, remove it carefully before proceeding with your new installation. Locate all fasteners holding the frame to your exterior trim and door jamb, removing them with appropriate tools while supporting the door frame to prevent dropping or damage. Some older storm doors may have been caulked in place, requiring a caulk removal tool or utility knife to carefully separate the frame from the surrounding woodwork.
Once removed, clean the entire door frame area thoroughly using a wire brush to remove old weatherstripping, paint, and debris. Inspect the exposed frame and threshold for rot, damage, or deterioration that might affect your new installation. Address any structural issues before installing your new storm door to ensure proper fit and long-term durability.
Position and Level the New Frame
Carefully center your new storm door frame within the opening, then use shims beneath the sill (threshold) to level the frame perfectly. Place shims at key points under the sill—typically at both ends and in the center—adjusting until your level reads perfectly horizontal in both directions. This step is crucial because an unlevel frame will cause the door to swing incorrectly and may result in improper closure or water infiltration.
Once the threshold is level, use additional shims on the hinge side to plumb the frame vertically. Check plumb at multiple heights using your level, ensuring the jamb remains perfectly vertical from top to bottom. Secure shims in place by driving a single fastener partially through the frame, allowing for minor adjustments if necessary before final tightening.
Secure the Frame to the Exterior
Begin securing the frame by driving screws through the hinge side jamb at upper and lower locations, leaving them slightly loose to permit final adjustments. Install screws every 12 inches along both vertical jambs, then across the top header and bottom sill, again keeping fasteners moderately loose initially.
Before tightening all fasteners completely, perform a final check of frame alignment using your level. Make any necessary micro-adjustments by tapping shims deeper or shallower with your hammer. Once everything checks out perfectly, tighten all fasteners securely, taking care not to overdrive screws which can strip the frame or pull it out of alignment.
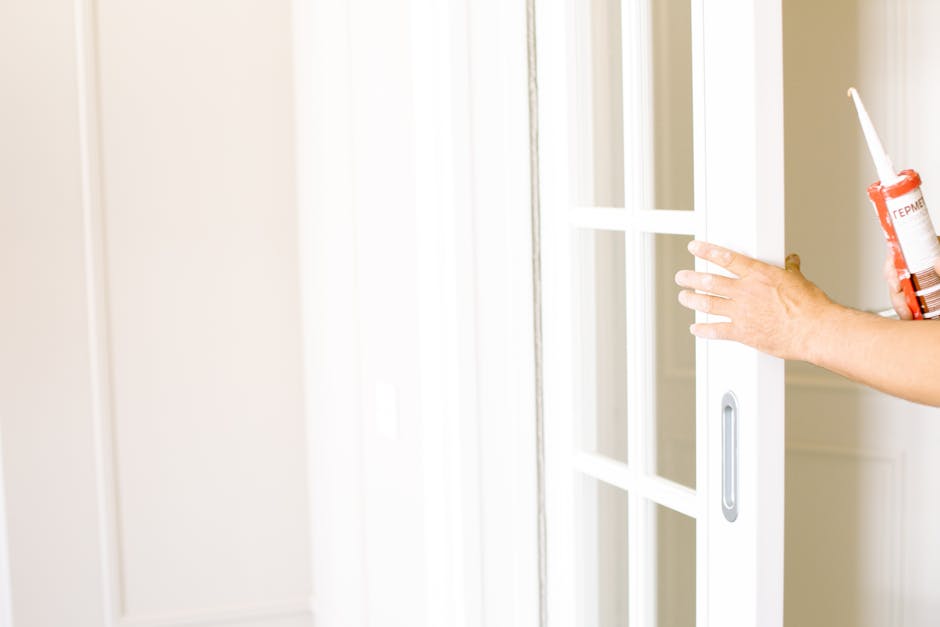
Install Weatherstripping and Caulk
Apply weatherstripping tape along the entire perimeter of the frame where it contacts your primary door and frame. This creates an effective seal that prevents air infiltration and water intrusion. Some storm doors include self-adhesive weatherstripping, while others require nailing—follow your specific door manufacturer’s instructions for proper installation.
Apply exterior-grade caulk along all gaps between the storm door frame and your existing trim and house exterior. Use a caulking gun to apply consistent beads and smooth with a wet finger or tool for clean, attractive results. Caulking represents the most critical step for preventing water infiltration around door frames, directly affecting your home’s long-term structural integrity and energy efficiency.
Hang the Door and Adjust
Carefully lift the door and position it within the frame, aligning hinges with their corresponding receiver brackets. Most modern storm doors feature adjustable hinges that allow for fine-tuning of door position after installation. Hang the door and perform careful checks to ensure it closes smoothly without binding, dragging, or leaving visible gaps around the perimeter.
Make hinge adjustments by turning small screws that control horizontal and vertical door position. Door-closing behavior should feel smooth and consistent from any opening position, closing fully without requiring excessive pressure. This adjustment phase requires patience and precision but ultimately determines whether your installation succeeds or fails.

Best Install Storm Door DIY Exterior Frame Options
Full-View Aluminum Doors
Full-view aluminum storm doors represent the most popular choice for modern homes because they maximize visibility and light transmission while providing excellent weather protection. These doors typically feature a large glass panel with minimal framework, creating a sleek appearance that works with virtually any architectural style. Aluminum construction provides durability and low maintenance requirements, needing only occasional cleaning with soap and water to maintain appearance.
Full-view designs typically incorporate interchangeable bottom sections that allow switching between glass and screening options seasonally. This versatility makes them ideal for homeowners who want the flexibility to ventilate their homes during pleasant weather while maintaining security and protection during harsh seasons. The aluminum frame resists rust, rot, and warping—problems that plague older wooden-frame storm doors.
Retractable Screen Storm Doors
Retractable screen storm doors eliminate the need for removing and storing seasonal screens, featuring screens that disappear into the frame when not needed. This convenience appeals to homeowners who value functionality and modern aesthetics over traditional storm door appearances. These doors maintain clean sightlines when screens aren’t in use, providing an updated look that complements contemporary home designs.
The mechanical screen retraction system requires slightly more careful operation and occasional maintenance, but reliability has improved dramatically in recent years. Premium models from established manufacturers carry good warranties and generally perform reliably for many years with minimal issues. The premium price point is justified by convenience and improved aesthetics for many homeowners.
Combination Storm Doors
Combination storm doors feature interchangeable upper and lower sections that allow easy switching between glass and screen configurations without removing the entire door. This traditional design provides maximum flexibility and affordability, making it popular among budget-conscious homeowners and those living in climates with extreme seasonal variations. These doors work particularly well on older homes where period-appropriate styling matters.
Lower-end combination doors can become difficult to operate as mechanical components age and wear, requiring regular maintenance and occasional replacement of damaged screens or glass panels. Investing in quality mid-range options rather than the cheapest available models typically results in better long-term reliability and user satisfaction. Look for models featuring weather-tight construction and smooth operating mechanisms that feel refined rather than loose or sticky.
High-Performance Energy-Efficient Models
Premium storm doors specifically engineered for energy efficiency feature triple-pane glass, low-emissivity coatings, and superior weatherstripping systems that significantly reduce heating and cooling losses. These high-performance models are ideal for homeowners in extreme climates or those with significant energy efficiency concerns. While more expensive initially, the energy savings often justify the investment over 5-10 years.
High-performance doors often include features like insulated frames, magnetic closure systems that seal tightly without effort, and premium finishes that resist weathering and fade. These doors typically come with extended warranties reflecting manufacturer confidence in durability and performance. If energy costs represent a significant concern for your household, these premium options deserve serious consideration despite their higher price points.

Pro Tips for Install Storm Door DIY Exterior Frame
Choose the Correct Door Style for Your Climate
Your local climate should heavily influence which storm door type and features you select. Homeowners in areas with severe winters and heavy snow loads should prioritize insulation and strength, potentially selecting full-view doors with low-E glass and reinforced frames. Conversely, homes in mild climates with significant summer heat might prioritize ventilation and screening capabilities to maximize natural cooling through cross-ventilation.
Research your area’s typical weather patterns, seasonal temperature ranges, and rainfall amounts to make informed decisions. Consulting with neighbors or local hardware store staff can provide valuable insights into which products perform well in your specific climate. This research investment pays dividends through improved comfort and reduced energy consumption.
Take Extra Time with Measurements and Frame Preparation
Rushing the measurement and preparation phase leads to frustrating problems later that often require removing and reinstalling your door. Spend extra time documenting your existing frame’s condition, squareness, and plumb before purchasing your storm door. This investment of time and attention prevents costly mistakes and ensures successful installation.
Many seasoned DIYers recommend measuring multiple times and even purchasing a door slightly smaller than maximum frame dimensions, using shims to achieve proper fit. This conservative approach builds in safety margins that accommodate frame irregularities that might otherwise cause fitting problems or improper operation. Better to be slightly conservative with measurements than to install an ill-fitting door.
Use Quality Fasteners and Weatherproofing Materials
Cheap fasteners corrode quickly and fail prematurely, particularly on exterior installations exposed to moisture and temperature fluctuations. Invest in stainless steel or galvanized fasteners specifically rated for exterior use, avoiding bargain bins where fasteners often lack proper coatings. Quality fasteners cost marginally more but prevent rust stains and structural failures that result from using inappropriate materials.
Similarly, don’t skimp on caulk and weatherstripping—these materials directly protect your home from water intrusion and air leaks that compromise both comfort and structural integrity. Premium exterior caulks designed for storm door installation perform better and last longer than general-purpose alternatives. The small additional cost pays substantial dividends in performance and longevity.
Don’t Over-Tighten Fasteners
While it might seem that tightening fasteners as much as possible improves security, over-tightening actually damages frame components and can pull them out of square. Drive fasteners until they’re snug, then verify alignment before final tightening—fasteners that are “finger-tight-plus-a-quarter-turn” typically provide optimal security without damage. This counterintuitive approach actually results in more reliable long-term performance.
Stripped screw holes and cracked frame components are common results of over-tightening, particularly in softer aluminum or composite frames. If you encounter resistance while driving fasteners, stop immediately and verify alignment rather than forcing fasteners to turn. Proper technique respects the materials you’re working with and produces superior results.
Common Mistakes to Avoid
Incorrect Measurements
Measuring once and trusting your initial measurements causes more storm door installation problems than any other factor. Taking measurements at multiple points and using the most conservative dimension accounts for frame irregularities and out-of-square conditions. Purchasing a door slightly smaller than maximum dimensions allows room for adjustment without forcing improper fit.
Skipping the Squaring and Leveling Process
Rushing through frame alignment seems to save time initially but creates cascading problems throughout the rest of the installation. Doors that aren’t properly squared or leveled won’t close smoothly, may leak water, and can bind or stick when operated. Taking extra time to verify perfect alignment using quality tools prevents these problems entirely.
Using Inappropriate Materials
Mixing interior-grade materials with exterior applications leads to premature failure, rust, and water intrusion. Every material touching your storm door installation—fasteners, caulk, weatherstripping, and shims—must be rated for exterior use. Reading product labels and selecting appropriate materials prevents problems that would otherwise require costly repairs or door replacement.
Inadequate Weatherproofing
Incomplete caulking, gaps in weatherstripping, or missed sealing opportunities result in water infiltration that damages your primary door and surrounding woodwork. Treat weatherproofing as seriously as structural aspects of your installation, applying caulk and weatherstripping meticulously across all potential water infiltration points. This care protects your investment in both the storm door and your home’s structure.
Forcing Door Components
Binding doors that don’t close smoothly indicate misalignment problems, not defective products. Forcing doors closed or open can damage hinges, latches, and frames, creating problems that require professional repair. If your door doesn’t operate smoothly, pause and diagnose the alignment issue rather than proceeding with force.

Key Takeaways
- Accurate measurements at multiple points are essential for proper storm door fit and function
- Quality fasteners and materials specifically rated for exterior use prevent premature failure and corrosion
- Perfect frame leveling and squaring directly affects door operation and weather protection
- Comprehensive weatherproofing with caulk and weatherstripping prevents water infiltration and air leaks
- Don’t rush the installation process—patience and attention to detail determine success or failure
Frequently Asked Questions About Install Storm Door DIY Exterior Frame
Q: What is the best install storm door DIY exterior frame for extreme climates?
A: High-performance energy-efficient models featuring triple-pane glass, low-E coatings, and insulated frames provide maximum protection and efficiency. Prioritize quality over cost in harsh climates, as superior construction directly impacts comfort and energy bills. Research local performance data and consult with neighbors about which models perform well in your specific climate.
Q: How do I use install storm door DIY exterior frame techniques for non-standard openings?
A: Non-standard openings require additional problem-solving, including custom measurement work and potentially professional fitting. Start by measuring your specific opening meticulously, then contact storm door manufacturers about custom sizing options. Some manufacturers offer partial customization that can accommodate slightly oversized or undersized openings through creative shimming and framing adjustments.
Q: Can I install a storm door myself without professional help?
A: Most homeowners with basic DIY experience can successfully install storm doors, particularly with a helper for frame positioning. The process requires patience, proper tools, and attention to detail rather than advanced skills. If your existing frame is significantly out of square or damaged, professional assessment might be worthwhile before proceeding with installation.
Q: What tools are absolutely essential for storm door installation?
A: Essential tools include a power drill, screwdrivers, carpenter’s level, tape measure, hammer, caulking gun, and shims. A helper is valuable though not strictly essential, and proper lighting ensures you can see and work accurately. Having all tools assembled before beginning prevents frustrating interruptions during the installation process.
Q: How long does a typical storm door installation take?
A: Most homeowners can complete installation in 2-4 hours, with time varying based on frame condition and door complexity. Rushing the process increases error probability, so allocate generous time rather than attempting installation on a tight schedule. Breaks for measuring verification and frame adjustment ultimately save time by preventing problems requiring rework.
Conclusion
Learning how to install storm door DIY exterior frame projects puts you in control of your home’s weather protection and energy efficiency while saving hundreds of dollars on professional installation services. This comprehensive guide provides all information necessary for successful installation, from initial measurements through final weatherproofing. With quality materials, proper preparation, and careful attention to frame alignment and weatherproofing, most homeowners can achieve professional-quality results.
The investment of time and effort in learning proper installation techniques pays ongoing dividends through improved comfort, reduced energy costs, and enhanced home protection. Don’t hesitate to reach out to manufacturer support or consult online resources if specific questions arise during your project. Start your storm door installation today and enjoy the security and efficiency improvements this valuable home upgrade provides.
Recommended Products on Amazon
As an Amazon Associate I earn from qualifying purchases.