How to install a bathroom towel warmer
How to Install a Bathroom Towel Warmer Electric DIY: Complete 2025 Guide
Introduction
Learning how to install a bathroom towel warmer electric DIY is an excellent home improvement project that transforms your bathroom experience while adding a touch of luxury to your daily routine. Whether you’re upgrading an existing bathroom or completing a renovation, installing an electric towel warmer doesn’t require professional help or extensive plumbing knowledge. This guide will walk you through every step of the process, from selecting the right unit to connecting it safely to your electrical system. With the right tools, materials, and preparation, you can have warm towels ready whenever you need them. Let’s explore everything you need to know about bringing this spa-like amenity into your home.
Table of Contents

- Introduction
- Why Install a Bathroom Towel Warmer Electric DIY Matters
- Step-by-Step Guide to Install Bathroom Towel Warmer Electric DIY
- Best Install Bathroom Towel Warmer Electric DIY Options
- Pro Tips for Install Bathroom Towel Warmer Electric DIY
- Common Mistakes to Avoid
- Key Takeaways
- Frequently Asked Questions about Install Bathroom Towel Warmer Electric DIY
- Conclusion
Why Install a Bathroom Towel Warmer Electric DIY Matters
Installing a bathroom towel warmer electric DIY project offers numerous benefits that extend far beyond simply having warm towels. The primary advantage is the enhanced comfort and luxury factor—stepping out of a hot shower to wrap yourself in a pre-warmed towel is an experience that feels indulgent and spa-like. This simple addition can transform your everyday bathroom routine into a more enjoyable and relaxing experience.
Beyond comfort, electric towel warmers provide practical benefits for your home and health. Warm towels help your body regulate temperature more efficiently after bathing, which can be particularly beneficial during colder months. Additionally, towel warmers help dry and freshen your towels between uses, reducing moisture accumulation that can lead to mildew and unpleasant odors. This functionality extends the lifespan of your towels by keeping them fresher longer and prevents the bacterial growth that thrives in damp environments.
From a home value perspective, modern bathrooms with amenities like towel warmers are more appealing to potential buyers and renters. Installing an electric towel warmer positions your home as updated and well-maintained, which can positively impact resale value. The project is also surprisingly affordable compared to other bathroom upgrades, making it an excellent return on investment for minimal cost.
Energy efficiency is another compelling reason to consider this upgrade. Modern electric towel warmers are designed to consume minimal electricity, with many units operating on standard 110-120V circuits and using approximately 50-150 watts. When compared to the cost of heating your entire bathroom with space heaters, an electric towel warmer is remarkably economical. Many models include timer functions and automatic shut-off features that prevent unnecessary energy consumption and reduce your utility bills.
Finally, the DIY installation aspect empowers you to take control of your home improvement projects and avoid expensive contractor fees. This sense of accomplishment when you complete the installation yourself adds personal satisfaction to the practical benefits. Most homeowners with basic electrical knowledge and the right tools can successfully complete this project in under two hours.

Step-by-Step Guide to Install Bathroom Towel Warmer Electric DIY
Preparation and Safety First
Before beginning any installation, safety must be your primary concern. Turn off power to your bathroom at the circuit breaker and verify it’s truly off using a voltage tester on existing outlets. Read your towel warmer’s instruction manual thoroughly, as different models may have specific requirements or variations in installation procedures. Gather all necessary tools and materials before starting—this includes a voltage tester, screwdriver set, level, stud finder, drill with bits, wall anchors or screws appropriate for your wall type, and any hardware included with your unit.
Check your bathroom’s electrical capacity to ensure it can handle the additional load. Most electric towel warmers require a dedicated 20-amp circuit, though some lower-wattage models can share a circuit with other bathroom fixtures. If you’re unsure about your home’s electrical capacity, consult a licensed electrician before proceeding. Never attempt to install the unit on a circuit that’s already heavily loaded, as this creates a fire hazard.
Locating the Perfect Installation Spot
Choose a location that’s convenient to your shower or bathtub but not directly in the path of water spray or excessive moisture. The ideal placement is typically on a wall opposite the shower or on a wall near the towel racks where towels are normally stored. Ensure the location has adequate clearance—most codes require at least 12 inches of clearance from water sources and 24 inches from tubs or showers. Use a stud finder to locate wall studs, as mounting directly into studs provides the strongest support for heavier units.
Consider height and accessibility when choosing your spot. Mount the towel warmer between 24 and 48 inches from the floor, ensuring it’s easily accessible for hanging and retrieving towels. Verify there are no plumbing pipes or electrical lines running behind your chosen location by checking your home’s blueprints or carefully knocking on walls. Mark your mounting holes lightly in pencil once you’ve determined the perfect location.
Mounting the Unit
Use a level to ensure your mounting marks are perfectly horizontal—this is crucial for proper towel distribution and professional appearance. If mounting into drywall without studs, use heavy-duty wall anchors rated for the weight of your specific towel warmer unit. Drill pilot holes at your marked locations using a drill bit slightly smaller than your screws or anchors. For studs, use 2.5-inch wood screws; for drywall, use appropriate toggle bolts or heavy-duty anchors.
Carefully position your towel warmer according to the pre-drilled holes and hand-tighten all fasteners before fully securing them. Use your level again to ensure perfect alignment, then tighten all fasteners securely with your screwdriver. Some models include decorative covers that hide the mounting hardware—install these according to manufacturer instructions. Double-check all connections are tight before moving to electrical installation, as loose mounting can cause vibrations and noise during operation.
Electrical Installation for Install Bathroom Towel Warmer Electric DIY
This is where safety becomes absolutely paramount. For hardwired units, you’ll likely need to install a dedicated circuit from your electrical panel, which requires turning off the main breaker and working with live electricity—this step is best left to licensed electricians. If your towel warmer is plug-in style, locate a nearby GFCI (Ground Fault Circuit Interrupter) outlet, as all bathroom outlets must be GFCI-protected by code.
If no nearby outlet exists, you’ll need to install one, which again requires working with your electrical panel. However, many modern towel warmers include long cords (6-8 feet) that reach nearby outlets. Route the power cord neatly along baseboards or use cord covers to maintain a clean appearance. Never run cords under carpets, through walls, or in ways that pinch or damage the insulation.
Final Connections and Testing
Once your towel warmer is securely mounted and the electrical connection is made, turn the power back on at the circuit breaker. Check that your unit powers on correctly and begins heating—most units take 10-15 minutes to reach full temperature. Test the heating by placing your hand near the rods to feel warmth, and verify that any indicator lights function properly. If the unit doesn’t heat or seems to have connection issues, turn it off immediately and check all electrical connections.
Hang your towels properly on the rods, distributing them evenly to prevent overloading one area. Different models accommodate varying numbers of towels—check your manual for maximum capacity recommendations. Avoid hanging excessively damp towels, as this can overwork the heating element and potentially damage the unit. Once fully operational, monitor the unit during its first week to ensure everything functions properly and there are no overheating issues.
Best Install Bathroom Towel Warmer Electric DIY Options
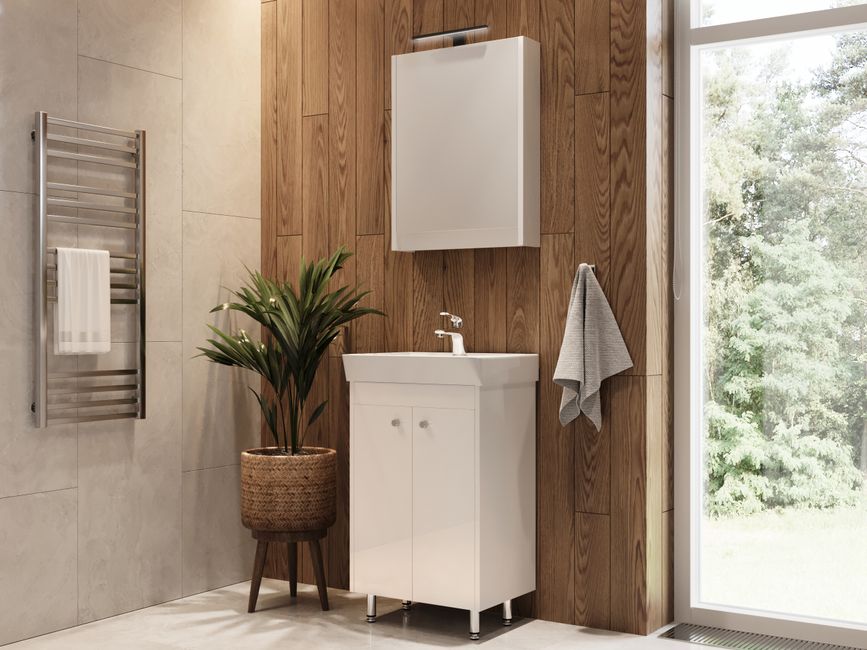
Wall-Mounted Rack Style Warmers
Wall-mounted rack-style towel warmers are the most popular choice for DIY installation because they’re aesthetically pleasing and mount directly to walls. These units typically feature multiple horizontal bars that hold towels while heating them evenly. They range from compact units holding 2-3 towels to larger models accommodating 8+ towels, making them suitable for various bathroom sizes.
The Westinghouse and Drying Trend models represent excellent mid-range options offering reliable heating in sleek designs. These units typically consume 60-100 watts and heat quickly to comfortable temperatures. Wall-mounted racks work particularly well in renovated bathrooms where you want a contemporary look, and they integrate seamlessly into modern décor. Their visible design also makes them easy to assess for maintenance and cleaning.
Curved and Designer Models
For those prioritizing aesthetics alongside functionality, curved and designer towel warmers offer visual appeal while delivering excellent heating performance. These models often feature sculptural designs that serve as bathroom décor elements rather than purely utilitarian fixtures. Brands like Amba create stunning pieces that elevate bathroom aesthetics while warming towels effectively.
Curved models typically cost more than basic racks but provide superior comfort due to their thoughtful design. They often accommodate more towels while taking up less wall space through their artistic configuration. If you’re renovating your bathroom or upgrading fixtures, these designer options justify their premium pricing through style and functionality combined. Installation remains equally simple despite the sophisticated design.
Compact and Space-Saving Options
For smaller bathrooms or powder rooms, compact electric towel warmers provide warming functionality without consuming significant wall space. These units often mount in narrow spaces between fixtures and come in sleek, streamlined designs. Perfect for apartments, tiny homes, or bathrooms with limited wall space, compact warmers still deliver reliable heating for 2-4 towels.
These space-saving models are often the most affordable option and require minimal mounting hardware. They’re ideal for rental properties where you don’t want to damage walls excessively. Despite their size, modern compact warmers heat efficiently and often include convenient features like automatic timers.
Hydronic Models (Plumbing-Connected)
For homes with existing hot water circulation systems or during major renovations, hydronic towel warmers connect to your home’s heating system rather than requiring electricity. These models use hot water from your boiler to heat towels, making them incredibly energy-efficient. However, installation requires plumbing work and typically demands professional installation, making them less suitable for DIY projects.
Hydronic models work wonderfully if you’re already planning plumbing renovations, as the additional connections integrate seamlessly. They’re particularly popular in homes with radiant floor heating systems. The initial cost is higher due to plumbing requirements, but long-term energy savings often justify the investment for permanent residences.

Pro Tips for Install Bathroom Towel Warmer Electric DIY
Use painter’s tape to mark your mounting holes before drilling—this prevents the drill from slipping and ensures perfectly placed fasteners. When selecting wall anchors, choose ones rated for at least twice the weight of your specific towel warmer unit. This safety margin prevents catastrophic failure if the unit is overloaded with excessive towels or if someone accidentally applies extra weight.
Consider running electrical connections before final wall paint or tile work if renovating, as this simplifies installation considerably. Label your circuit breaker clearly once you’ve dedicated it to the towel warmer—future electricians and residents will appreciate this safety consideration. Install a dedicated GFCI outlet within 6 feet of your towel warmer to comply with electrical codes and provide necessary protection.
Test your installation thoroughly before considering the project complete. Leave the unit running for 30 minutes and check that it’s heating evenly across all rods. Verify that mounting is secure by gently pressing on the unit from different angles—there should be zero movement. Clean the installation area of dust before final use, as particles can be sucked into heating elements if ventilation ports aren’t covered.
Establish a maintenance routine from the start. Check electrical connections monthly to ensure nothing has loosened from vibration or heat expansion. Wipe down the unit quarterly to remove dust and bathroom moisture that can affect heating efficiency. Keep the area immediately in front of and beneath the towel warmer clear of obstructions to ensure adequate air circulation and prevent fire hazards.

Common Mistakes to Avoid
Insufficient Electrical Capacity: The most dangerous mistake is installing a towel warmer on an already overloaded circuit. This creates fire hazards and can damage your electrical panel. Always verify adequate capacity before proceeding, and install a dedicated circuit if necessary.
Improper Mounting: Using inadequate wall anchors or mounting directly into drywall without proper support can cause the unit to fall, injuring someone below. Always use hardware rated for your unit’s weight and preferably mount into studs for maximum security.
Wet Installation: Never touch electrical connections or the unit itself with wet hands, and avoid installing near active water sources where spray might contact electrical components. Keep the installation area dry throughout the process.
Ignoring Manufacturer Instructions: Each towel warmer has specific requirements and safety guidelines. Ignoring these instructions voids warranties and creates safety risks. Read everything thoroughly before beginning installation.
Poor Cord Management: Running cords under carpets, through walls, or in ways that pinch or damage insulation is a fire hazard. Always use proper cord routing and covers designed for bathroom environments where moisture might be present.
Inadequate Clearance from Water: Installing too close to tubs, showers, or sinks exposes electrical components to moisture. Maintain the required clearance of at least 12 inches from active water sources and keep bathroom humidity within reasonable levels.
Key Takeaways
-
Safety First: Always turn off power at the circuit breaker, use a voltage tester, and verify proper electrical capacity before beginning installation.
-
Proper Mounting: Use wall anchors rated for your unit’s weight, preferably mounting into studs, and always ensure perfectly level installation using a quality level tool.
-
Electrical Compliance: Use GFCI protection, maintain required clearance from water sources, and consider professional help if installing new circuits.
-
Regular Maintenance: Check connections monthly, clean quarterly, and monitor the unit’s first week of operation to identify any issues immediately.
-
Aesthetic Placement: Choose locations that balance accessibility, safety requirements, and bathroom décor while maintaining adequate clearance from water sources.
Frequently Asked Questions about Install Bathroom Towel Warmer Electric DIY
Q: What is the best install bathroom towel warmer electric DIY option for small bathrooms?
A: For small bathrooms, choose compact models like the KyotoKo Slim Electric Towel Warmer that mount in narrow spaces while still accommodating 2-4 towels effectively. These units consume minimal wall space, cost less than larger models, and still deliver reliable heating performance. Look for designs that mount vertically or at angles to maximize space efficiency while maintaining safety clearance requirements and aesthetic appeal.
Q: How do I use install bathroom towel warmer electric DIY safely around children and pets?
A: Mount the unit high enough to prevent children from reaching heating elements, typically above 48 inches from the floor. Use safety covers or consult your manual for child-safety accessories. Teach children that the unit gets hot and shouldn’t be touched. Keep cords out of reach, use GFCI protection, and inspect the unit regularly for damage that might expose electrical components.
Q: Can I install a towel warmer in a rental apartment?
A: Yes, compact plug-in towel warmers work perfectly in rental properties since they don’t require permanent wall modifications. Simply plug into a nearby outlet and use temporary mounting if desired. This approach allows you to enjoy the luxury of warm towels without risking your security deposit or creating permanent changes landlords might object to.
Q: How much electricity does an electric towel warmer use?
A: Most electric towel warmers consume between 50-150 watts, with mid-range models averaging around 100 watts. Assuming 24/7 operation, this typically costs $4-18 per month depending on your local electricity rates. Using timer functions to run the unit only when needed can reduce costs by 50-70%, making this amenity quite economical.
Q: What should I do if my towel warmer doesn’t heat properly after installation?
A: First, verify the unit is receiving power and the circuit breaker hasn’t tripped. Check that the outlet or circuit is functioning with a voltage tester. Ensure no safety switches are blocking operation. If the unit still doesn’t heat, turn it off immediately and contact the manufacturer’s customer service before attempting further troubleshooting, as continued operation might indicate an electrical fault.
Conclusion
Learning how to install a bathroom towel warmer electric DIY is an achievable project that delivers significant comfort and lifestyle benefits with minimal investment. By following this comprehensive guide, understanding safety requirements, and taking time to properly mount and connect your unit, you’ll have a functioning towel warmer within hours. The luxury of warm towels combined with improved energy efficiency and enhanced bathroom aesthetics makes this project worthwhile for any homeowner. Start planning your installation today and transform your bathroom experience with this spa-like amenity that’s easier to add than you might imagine.
Recommended Products on Amazon
As an Amazon Associate I earn from qualifying purchases.