How to replace a kitchen countertop yourself
How to Replace Kitchen Countertop DIY Laminate Successfully: Complete 2025 Guide
Introduction
Learning how to replace kitchen countertop DIY laminate is one of the most rewarding home improvement projects you can tackle yourself. Whether your current countertops are outdated, damaged, or simply don’t match your kitchen’s aesthetic anymore, replacing them doesn’t necessarily require hiring an expensive contractor. With the right tools, materials, and step-by-step guidance, you can transform your kitchen’s appearance while saving thousands of dollars in labor costs. This comprehensive guide will walk you through every aspect of the process, from preparation to installation, ensuring your new laminate countertops look professional and last for years to come.
Table of Contents

- Introduction
- Why Replacing Kitchen Countertop DIY Laminate Matters
- Step-by-Step Guide to Replace Kitchen Countertop DIY Laminate
- Best Replace Kitchen Countertop DIY Laminate Options
- Pro Tips for Replace Kitchen Countertop DIY Laminate
- Common Mistakes to Avoid
- Key Takeaways
- Frequently Asked Questions about Replace Kitchen Countertop DIY Laminate
- Conclusion
Why Replacing Kitchen Countertop DIY Laminate Matters
Your kitchen countertops are one of the most visible and functional elements in your home. They endure daily wear and tear from cooking, cleaning, spills, and heat exposure, making them prone to damage over time. When laminate countertops become scratched, chipped, or stained beyond repair, replacing them can dramatically improve your kitchen’s appearance and functionality.
Beyond aesthetics, replacing outdated countertops increases your home’s overall value and appeal. A modern kitchen with fresh countertops is often a deciding factor for potential home buyers, potentially returning up to 70% of your investment when you sell. Additionally, newer laminate materials offer improved durability, stain resistance, and heat tolerance compared to older versions, making them a smart long-term investment.
The DIY approach to replacing kitchen countertops allows you to maintain complete control over the project timeline and design choices. You won’t be at the mercy of contractor schedules, and you can work at your own pace without worrying about labor costs accumulating. For many homeowners, the personal satisfaction of completing a major renovation project is invaluable and creates a stronger connection to their living space.
Step-by-Step Guide to Replace Kitchen Countertop DIY Laminate
Preparation and Planning
Before you begin the physical work of replacing your kitchen countertop with DIY laminate installation, proper preparation is essential for success. Start by measuring your countertops accurately, accounting for any angles, corners, or sink cutouts that require special attention. Measure the length and width at multiple points, as older kitchens often have slightly uneven dimensions.
Next, turn off the power and water supply to your kitchen, especially if you’ll be working near the sink. Remove any items from the countertops and clear the space as much as possible to give yourself room to work safely and efficiently. If your existing countertops are laminate, you’ll need to remove them first, which involves disconnecting the sink and range if they’re mounted on top.
Create a detailed project plan including a materials list, timeline, and budget estimate. Take photographs of your existing countertops and kitchen layout for reference during installation. Having a clear plan prevents costly mistakes and ensures you purchase the correct materials before beginning the demolition phase.
Removing Old Countertops
Removing your old countertops requires careful planning to avoid damaging your cabinets and plumbing. Start by turning off water valves under the sink and disconnecting the plumbing connections if applicable. Use a utility knife to cut any caulk sealing the countertops to the wall, making removal easier without cabinet damage.
Most laminate countertops are attached with construction adhesive and sometimes nails or screws along the underside. Work your way along the countertop, using a reciprocating saw or pry bar to carefully separate it from the cabinets below. Take your time during this step, as rushing can result in damage to your cabinet boxes that would require expensive repairs.
Once the countertops are free, cut them into manageable pieces for easier removal and disposal. Laminate is lightweight compared to stone, making it more manageable for DIYers. Properly dispose of the old materials or donate them if they’re still in good condition.
Preparing the Cabinet Base
After removing the old countertops, inspect the cabinet structure carefully for damage or rot. The cabinet tops should be clean, dry, and level before installing new countertops. Use a level to check for high spots or low areas, and sand down any rough surfaces that might prevent proper installation.
If the cabinets show signs of water damage or rot, address these issues before proceeding with new countertop installation. You may need to reinforce weakened areas or replace damaged sections to ensure your new countertops have proper support. Proper cabinet preparation prevents future problems and ensures your countertops remain level and functional throughout their lifespan.
Apply a thin bead of construction adhesive along the cabinet tops where the new countertops will sit. This creates a strong, permanent bond that prevents movement and shifting over time. Ensure the adhesive is appropriate for use with laminate materials as recommended by the manufacturer.
Installing New Laminate Countertops
Begin installation by carefully positioning your new laminate countertops on the prepared cabinet base. Start with the main run of countertops, ensuring they’re properly aligned and level before pressing them firmly into the adhesive. Use wooden shims or adjustable supports to maintain level positioning while the adhesive cures.
Work methodically to install the countertops, checking frequently with a level to ensure no sections slope or dip. If you’re installing multiple sections, use countertop connectors and bolts to join pieces securely underneath. Apply caulk to all seams between countertops and walls, using color-matched caulk that blends seamlessly with your laminate finish.
After installation, allow the adhesive to cure for the manufacturer’s recommended time before using the countertops or exposing them to water. Most construction adhesives require 24 hours of curing time, though this varies by product. Read all instructions carefully to ensure proper bonding and longevity of your installation.
Sink and Appliance Installation
Once the countertops are securely installed and the adhesive has fully cured, you can reinstall your sink and reconnect plumbing. If you’re using the same sink, carefully position it in its designated cutout and secure it according to the manufacturer’s instructions. Apply plumber’s putty or silicone caulk around the sink edges to create a watertight seal.
For drop-in sinks, apply a bead of silicone caulk around the underside rim before setting it in place. For undermount sinks, you may need special brackets or clips depending on your sink model and laminate type. Take time to ensure the sink is level and properly sealed, as leaks can damage both the countertops and cabinets below.
Reconnect water supply lines and test for leaks before considering the project complete. Install drain pipes and test the drainage system thoroughly to ensure everything functions properly. If you have a cooktop or range, follow manufacturer guidelines for safe installation distance from countertop edges and any splash guards.

Best Replace Kitchen Countertop DIY Laminate Options
Understanding Laminate Quality and Styles
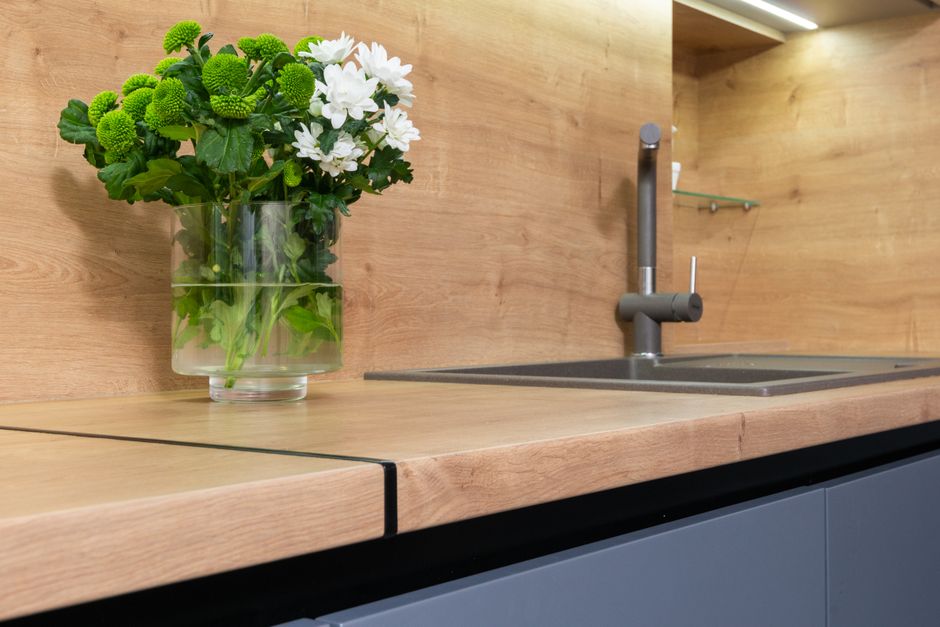
Modern laminate countertops offer far more variety and quality than previous generations. High-pressure laminates (HPL) provide superior durability and resistance to scratches, heat, and moisture compared to budget alternatives. When selecting materials for your replace kitchen countertop DIY laminate project, consider the laminate grade, thickness, and edge finishing options available.
Laminate thickness typically ranges from 3/4 inch to 1.5 inches, with thicker options providing better durability and stability. Premium brands offer textured finishes that mimic natural stone, wood, and other materials, allowing you to achieve virtually any aesthetic for your kitchen. Color options are nearly unlimited, from solid colors to intricate patterns that complement any kitchen design style.
Edge banding is another important consideration when choosing laminate materials. Options include standard straight edges, rounded edges for safety, and decorative edge profiles. Choosing appropriate edge treatments affects both the appearance and durability of your countertops, particularly in high-traffic areas prone to damage.
Comparing DIY Laminate Brands
Several manufacturers produce quality laminate countertops suitable for DIY installation. Formica is one of the longest-established brands, offering proven durability and an extensive color selection. Their laminates are widely available at home improvement stores and come with detailed installation instructions suitable for homeowners.
Wilsonart specializes in premium laminate options with superior durability and aesthetic appeal. Their laminates feature innovative technology that resists bacteria growth, making them excellent for food preparation areas. Prices are slightly higher than budget alternatives, but the enhanced durability often justifies the additional investment.
Arborite and Pionite are additional quality options that offer good durability at competitive prices. These brands provide reliable performance for DIY installations and are readily available through most home improvement retailers. Comparing prices, styles, and specifications helps you choose the best option for your specific kitchen needs and budget constraints.
Selecting Appropriate Thicknesses and Edges
For residential kitchen applications, 3/4-inch laminate provides adequate thickness for most DIY installations. This thickness offers sufficient support when properly installed over cabinet bases and provides good resistance to impacts and daily wear. Thicker options (1.5 inches) offer enhanced durability but are more expensive and may be unnecessary for typical residential use.
Edge treatments significantly impact both safety and appearance. Beveled edges add visual interest and are more resistant to chipping than sharp edges. Rounded edges provide safety benefits, particularly in kitchens with children, and offer a softer, more refined appearance. Consider your kitchen style and lifestyle needs when selecting edge profiles.
Post-formed countertops, which have integrated backsplashes and rounded edges, eliminate the need for cove bases or backsplash installation. These pre-fabricated options simplify DIY installation considerably and produce professional-looking results. However, they offer less flexibility in customization compared to sheet laminate installed over custom-built substrates.

Pro Tips for Replace Kitchen Countertop DIY Laminate
Using Proper Tools and Techniques
Investing in quality tools makes the entire installation process easier and produces better results. A laminate cutter or circular saw with a fine-toothed blade prevents chipping and delivers clean, precise cuts. Wet cutting methods using a diamond blade generate less dust and produce superior edge quality compared to dry cutting.
A laminate roller, also called a J-roller, ensures complete adhesive contact between laminate and substrate, creating a strong permanent bond. Applying consistent pressure with this tool prevents air pockets and weak spots that could eventually separate or bubble. Rent this inexpensive tool from most home improvement stores if you don’t own one already.
Accurate measuring and marking prevent costly mistakes during cutting and installation. Use a quality tape measure and carpenter’s pencil for marking cut lines. Transfer measurements carefully from your cabinet base to the laminate sheets, double-checking dimensions before cutting to ensure accuracy and prevent wasted materials.
Managing Seams and Corners
Creating seamless transitions between countertop sections requires careful planning and execution. Butt joints where two laminate sheets meet should be cut precisely with minimal gaps. Countertop connectors and bolts underneath provide strength at these junction points, while color-matched caulk hides any visible seams.
For inside corners, radius edges round the transition, creating a professional appearance and preventing sharp edges that could cause injury. Outside corners benefit from edge banding or trim pieces that protect the laminate edges from damage and chipping. Proper corner treatment significantly impacts the finished appearance of your installation.
Apply caulk to all seams after allowing adhesive to cure completely. Use paintable caulk if you plan to color-match with paint, or choose caulk that matches your countertop color for seamless integration. Allow caulk to cure according to manufacturer instructions before exposing seams to moisture or heavy use.
Protecting During and After Installation
Protect your new countertops during and immediately after installation by covering them with roofing felt or cardboard. This prevents adhesive stains, dust contamination, and accidental damage during the curing phase. Keep traffic and work activity in the kitchen to a minimum while adhesive cures completely.
Avoid exposing countertops to moisture, excessive heat, or heavy use for at least 24 hours after installation. This allows the construction adhesive to reach full strength and prevents potential failure. Follow the specific curing time recommendations of your adhesive manufacturer, as different products vary in curing duration.
Establish a countertop care routine immediately after installation to protect your investment. Use appropriate cutting boards to prevent knife marks and scratches, avoid placing hot cookware directly on the surface, and clean spills promptly to prevent stains. Proper maintenance extends laminate lifespan significantly and keeps your countertops looking beautiful for years.
Common Mistakes to Avoid
Poor Preparation and Measurement
One of the most common mistakes in DIY countertop installation is inadequate preparation and inaccurate measurements. Failing to measure multiple points along uneven walls results in gaps and poor fitment. Always measure at least three points along each wall, accounting for variations that are common in older homes.
Insufficient cabinet inspection and leveling creates unstable countertops that shift and crack under normal use. Take time to properly level the cabinet base and address any structural issues before installing new countertops. Skipping this step might seem like time savings, but it inevitably leads to expensive repairs or complete reinstallation.
Improper Adhesive Application
Applying insufficient adhesive creates weak bonds that eventually separate or bubble under stress. Use the adhesive type and application method recommended by the laminate manufacturer, as different products have specific requirements. Generally, a thin, even bead of construction adhesive applied to the entire cabinet surface produces the strongest bond.
Conversely, applying too much adhesive causes it to squeeze out from under the laminate, creating a mess and potentially weakening the bond. Strike a balance by using manufacturer-recommended quantities and applying consistent pressure with a laminate roller. Excess adhesive should be wiped away before it hardens, preventing cleanup challenges and potential damage to the countertop finish.
Inadequate Curing Time
Rushing to use countertops before adhesive cures completely is a critical mistake that compromises the installation. Construction adhesive requires proper curing time to develop full strength, typically 24 hours for most products. Using countertops during this window can shift or separate joints, requiring costly repairs or reinstallation.
Exposing new countertops to moisture before the adhesive fully cures is equally problematic. Water can interfere with adhesive curing and seep into seams, creating potential damage and mold growth. Plan your installation carefully to ensure adequate curing time before normal kitchen activities resume.
Neglecting Proper Sink Installation
Installing the sink improperly or without adequate sealing creates water damage risks that extend beyond the countertop surface. Take time to create a proper waterproof seal using plumber’s putty or silicone caulk appropriate for your sink type. Ensure all plumbing connections are secure and leak-free before considering the installation complete.
Failing to support undermount sinks adequately can result in separation, cracks, or complete failure over time. Use appropriate brackets and fastening methods specified by your sink manufacturer, as laminate countertops cannot support undermount sinks without proper reinforcement. Improper sink installation represents one of the most expensive mistakes in DIY countertop projects.
Key Takeaways
-
Accurate measurements and careful planning prevent costly installation mistakes – Measure multiple times, account for wall irregularities, and create a detailed project plan before purchasing materials.
-
Proper cabinet preparation ensures long-lasting, stable countertops – Level the base, address any structural issues, and clean thoroughly before applying adhesive.
-
Quality adhesive application creates permanent, reliable bonds – Use manufacturer-recommended adhesive types and quantities, apply evenly, and use a laminate roller for complete contact.
-
Adequate curing time is essential for countertop durability – Allow full adhesive curing (typically 24 hours) before using countertops or exposing them to water and heat.
-
Professional-quality results require attention to detail in seams, edges, and sink installation – Invest in proper tools, use color-matched caulk, and follow manufacturer guidelines for all components to achieve beautiful, long-lasting results.
Frequently Asked Questions about Replace Kitchen Countertop DIY Laminate
Q: What is the best replace kitchen countertop DIY laminate material for high-traffic kitchens?
A: High-pressure laminate (HPL) from premium brands like Formica or Wilsonart offers superior durability for busy kitchens. Choose thicker options (1.5 inches) and matte or textured finishes that hide fingerprints and show less wear. These materials resist scratches, stains, and heat better than budget alternatives, making them ideal for families with heavy kitchen use patterns.
Q: How do I use replace kitchen countertop DIY laminate properly to prevent bubbling and separation?
A: Proper installation prevents bubbling by ensuring complete adhesive contact between the laminate and substrate using a laminate roller. Apply manufacturer-recommended adhesive types in consistent beads across the entire cabinet surface. Avoid water exposure and heavy use during the full curing period (typically 24 hours), and maintain proper ventilation to facilitate adhesive curing.
Q: How much does it cost to replace kitchen countertop DIY laminate yourself?
A: DIY laminate countertop replacement typically costs $500-$2,000 depending on kitchen size and material quality. Budget countertops start around $3-5 per square foot, while premium options reach $10-15 per square foot. Tools and supplies add $200-400, making DIY installation significantly cheaper than hiring contractors who charge $3,000-$8,000+ for the same work.
Q: Can I install new laminate countertops over existing countertops?
A: Yes, you can install laminate over existing countertops if the base is solid, level, and in good condition. This approach saves time and money by eliminating demolition. However, the additional height might create issues with sink overhang or appliance clearances, so measure carefully before proceeding with this approach.
Q: How long do DIY laminate countertops last?
A: Quality laminate countertops typically last 10-20 years with proper care and maintenance. Premium brands and thicker materials extend this lifespan, while budget options may require replacement sooner. Protecting surfaces with cutting boards, avoiding excessive heat, and promptly cleaning spills maximizes countertop longevity and appearance.
Conclusion
Learning how to replace kitchen countertop DIY laminate is an achievable goal for homeowners willing to invest time and attention to detail in the process. By following this comprehensive guide, measuring accurately, preparing properly, and using quality materials and tools, you can achieve professional-looking results that rival contractor installations. The satisfaction of completing this major renovation yourself, combined with substantial cost savings, makes it one of the most rewarding DIY projects available to homeowners. Take your time with each step, allow proper curing periods, and don’t hesitate to consult manufacturer guidelines when questions arise. Your new kitchen countertops will provide years of beauty and functionality while increasing your home’s value and appeal.
Recommended Products on Amazon
As an Amazon Associate I earn from qualifying purchases.