How to install a barn door yourself
How to Install Barn Door Sliding Hardware DIY: Complete Guide for Beginners
Learning to install barn door sliding hardware DIY is one of the most rewarding home improvement projects you can tackle, transforming any room with rustic charm and modern functionality. Whether you’re looking to add a stylish touch to your bedroom, bathroom, or living space, barn doors have become increasingly popular for their aesthetic appeal and space-saving benefits. This comprehensive guide will walk you through every step of the installation process, from selecting the right materials to hanging your door like a professional. By the end of this tutorial, you’ll have the confidence and knowledge to complete this project successfully without hiring expensive contractors.
Table of Contents
- Why Install Barn Door Sliding Hardware DIY Matters
- Step-by-Step Install Barn Door Sliding Hardware DIY Guide
- Best Install Barn Door Sliding Hardware DIY Options
- Pro Tips for Install Barn Door Sliding Hardware DIY
- Common Mistakes to Avoid
- Key Takeaways
- Frequently Asked Questions About Install Barn Door Sliding Hardware DIY
- Conclusion
Why Install Barn Door Sliding Hardware DIY Matters
Installing barn doors yourself offers numerous advantages that make this project worth your time and effort. First and foremost, you’ll save considerable money by avoiding professional installation costs, which can range from $500 to $1,500 depending on your location and door complexity. Beyond the financial savings, installing your own barn door gives you complete control over the design, placement, and customization to match your home’s unique style perfectly.
The growing popularity of barn doors in modern interior design stems from their versatility and functionality. Unlike traditional swinging doors that require clearance space to open fully, barn doors slide smoothly along a track mounted above the doorway, making them ideal for small spaces, tight hallways, or rooms with limited square footage. This space-saving feature has made them particularly popular in tiny homes, apartments, and modern farmhouse designs.
Furthermore, tackling this DIY project builds your confidence for future home improvement endeavors. You’ll learn valuable skills that apply to other installations, such as working with power tools, taking precise measurements, leveling hardware, and ensuring structural integrity. The sense of accomplishment when you step back and admire your newly installed barn door is truly unmatched and makes every effort worthwhile.

Step-by-Step Install Barn Door Sliding Hardware DIY Guide
Gathering Your Materials and Tools
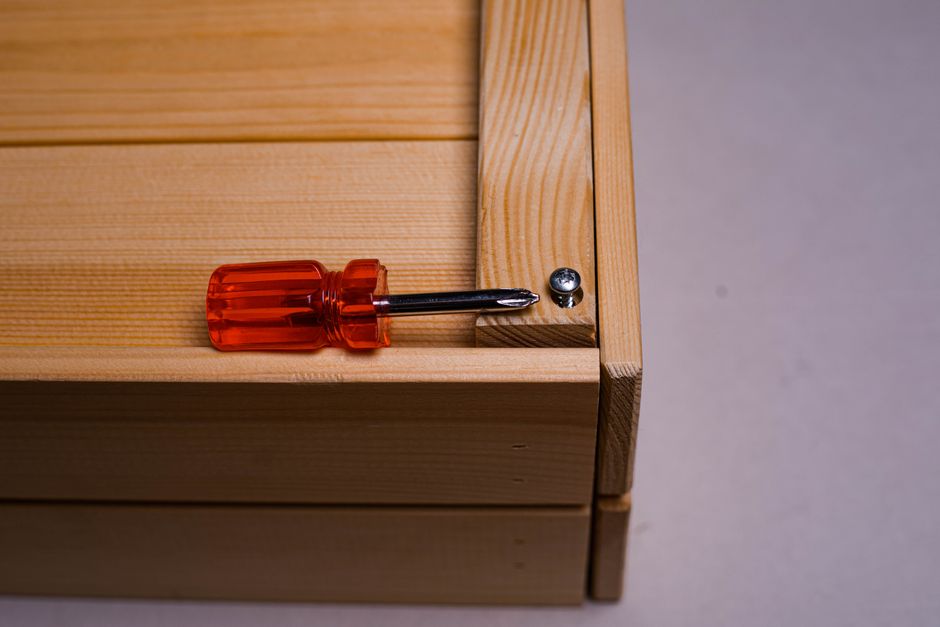
Before beginning your install barn door sliding hardware DIY project, you’ll need to assemble all necessary materials and tools to ensure a smooth workflow. Essential tools include a stud finder, level, drill with bits, measuring tape, pencil, and a socket wrench set for tightening bolts and hardware. You’ll also need a saw if you’re cutting your door to size, sandpaper for finishing edges, and safety equipment including gloves and safety glasses.
On the materials side, you’ll need the barn door itself (either purchased or DIY-built), a complete sliding hardware kit with track and rollers, and mounting brackets designed for your wall type. For drywall installations, toggle bolts or lag bolts into studs provide the strongest support, while plaster or brick walls require specialized anchors. Don’t forget finishing touches like hinges for the latch mechanism and paint or stain to protect and beautify your door.
Step 1: Measure Your Doorway and Gather Hardware
Accurate measurements form the foundation of any successful install barn door sliding hardware DIY project. Measure your doorway width at the top, middle, and bottom, as some older homes have slightly out-of-square openings. The track should be installed approximately 10-12 inches above the door opening for standard clearance, though you can adjust based on your aesthetic preferences.
When selecting your sliding hardware kit, ensure it supports the weight of your door material—a typical 3-foot by 6.5-foot barn door weighs between 75 to 150 pounds depending on wood type and thickness. Choose hardware rated for at least 50 percent more than your door’s actual weight to ensure smooth operation and longevity. Most quality kits include the track, rollers, guide brackets, and all necessary mounting hardware with detailed instructions specific to your setup.
Step 2: Locate Studs and Mark Track Position
Use your stud finder to locate wall studs above your doorway, as these provide the strongest mounting points for your track. Mark stud locations with pencil on both sides of the wall to ensure you can see them when positioning your track. If studs aren’t ideally positioned for your track placement, use heavy-duty toggle bolts rated for your door’s weight as an alternative to direct stud mounting.
Mark a horizontal line approximately 10-12 inches above your doorway using a level to ensure perfectly straight track placement. Double-check this line with your level at multiple points along the wall, as even slight misalignments will cause your door to bind or operate poorly. Snap a chalk line if it helps you visualize the track position more clearly before beginning installation.
Step 3: Install the Track
Position your track along the marked line with the mounting brackets aligned over your stud marks. Begin by installing bolts into the outermost brackets first, leaving them slightly loose to allow for track adjustment. Once end brackets are loosely secured, install intermediate brackets according to your hardware kit’s specifications, typically spaced 16-24 inches apart for proper support.
Check your track alignment with a level both horizontally and vertically before fully tightening all bolts. Make final adjustments to ensure the track is perfectly level—even a quarter-inch deviation can affect door operation significantly.
Step 4: Prepare Your Door
Before hanging, inspect your barn door for damage, warping, or rough spots that need sanding. If you’re using reclaimed wood or building a door from scratch, sand all surfaces with 120-220 grit sandpaper depending on your desired finish smoothness. Apply your chosen stain or paint at this stage, allowing adequate drying time before installation—typically 24-48 hours depending on the product.
Drill holes in the top of your door where the rollers will attach, following measurements provided by your hardware kit. Most residential barn door systems position rollers 3-4 inches from the top and 2-3 inches from each side, creating a balanced appearance and stable operation. Use a drill press if available to ensure holes are perfectly perpendicular to the door surface for smooth roller operation.
Step 5: Attach Rollers to Your Door
Position the roller brackets on your door according to the hardware kit specifications, ensuring they’re positioned identically on both sides for balanced rolling. Pre-drill holes to prevent wood splitting, then use lag bolts or wood screws provided with your kit to secure brackets firmly. The rollers should spin freely without binding, so don’t overtighten hardware—secure until snug with slight resistance when manually spinning the roller.
Insert the rollers into the track carefully, ensuring they seat properly in the track channel. If your track has a wheel guide component, ensure the rollers are properly guided before fully tightening all brackets. Test the door’s movement by gently rolling it along the track—it should move smoothly with minimal resistance.
Step 6: Install Guide Brackets
Lower guide brackets prevent your door from swinging away from the wall and ensure smooth, straight operation. Install these brackets 6-12 inches from the bottom of the door on both sides, mounted to the wall studs or with heavy-duty anchors. The guides should sit close to the door without binding—typically 1/8 to 1/4 inch clearance is ideal.
Check door movement after installing guides, making fine adjustments as needed to ensure smooth operation without binding or excessive wobbling. Test the door several times from fully open to fully closed positions, listening for unusual sounds that indicate improper installation. Once operation is smooth and quiet, verify all hardware bolts are properly tightened with appropriate tools.

Best Install Barn Door Sliding Hardware DIY Options
Traditional Rustic Systems
Traditional rustic barn door hardware systems feature heavy-duty steel tracks and decorative elements that complement farmhouse and cottage aesthetics beautifully. These systems typically use V-groove tracks that provide excellent wheel support and durability for daily use over many years. Brands specializing in rustic hardware often include decorative brackets, handles, and finishing components that enhance your door’s visual appeal while maintaining functionality.
The aesthetic appeal of rustic systems makes them popular for bedrooms, bathrooms, and entertainment spaces where style matters as much as function. These kits often include everything needed for installation, though decorative elements may require additional finishing work. The investment in quality rustic hardware typically pays dividends through reliable long-term operation and timeless visual appeal.
Modern Minimalist Systems
Modern barn door hardware systems feature sleek designs with minimal visual footprint, perfect for contemporary homes and minimalist interiors. These systems often use flat-profile tracks that blend seamlessly with modern wall aesthetics, and some incorporate soft-close mechanisms for quiet, controlled operation. Stainless steel and black powder-coat finishes are popular choices for modern applications, offering durability and sophistication.
Contemporary hardware systems may feature ball-bearing wheels for smoother operation and reduced maintenance compared to traditional roller systems. Some advanced options include roller wheels with sealed ball bearings that require minimal lubrication and maintain smooth operation for years. The cleaner aesthetic of modern systems appeals to homeowners seeking to integrate barn doors into contemporary design schemes without compromising visual cohesion.
Soft-Close and Automatic Systems
Premium barn door hardware systems include soft-close mechanisms that gently decelerate the door as it approaches fully closed position, preventing slamming and reducing wear. Some advanced systems incorporate automatic closing features that pull the door closed after manual opening, ideal for spaces requiring privacy maintenance without constant adjustment. These systems command higher price points but offer unmatched convenience and quiet operation.
Automatic and soft-close systems utilize hydraulic or pneumatic components that smoothly regulate door movement throughout its travel range. Installation for these systems follows similar principles to standard hardware, though careful setup ensures proper function of dampening and closing mechanisms. The investment in premium features often appeals to homeowners building custom homes or undertaking significant renovation projects where quality justifies premium pricing.
Heavy-Duty Commercial Systems
For extra-wide doors, high-traffic environments, or demanding applications, commercial-grade barn door hardware offers superior durability and load capacity. These systems feature reinforced tracks, heavy-duty roller wheels, and industrial-strength mounting brackets rated for continuous daily use. Commercial systems often accommodate doors weighing 300+ pounds and remain reliable even in challenging environmental conditions.
Installation of commercial-grade hardware follows similar principles to residential systems but requires more robust mounting infrastructure and careful attention to load calculations. These systems appeal to businesses, commercial properties, and homeowners with demanding requirements that exceed standard residential hardware capabilities. The durability and reliability of commercial systems justify premium pricing for applications requiring maximum performance.
Pro Tips for Install Barn Door Sliding Hardware DIY
Start your install barn door sliding hardware DIY project by assembling all materials and tools before beginning any drilling or installation work. This preparation prevents frustrating mid-project supply runs and allows you to work efficiently without interruptions. Take photographs throughout the installation process as documentation and reference for any troubleshooting needed during or after installation.
Use painter’s tape to mark track placement and test alignment before committing to permanent installation. This simple technique allows you to visualize the final position and make adjustments without damaging walls or mounting hardware. Consider the door’s visual balance—many designers position barn doors slightly off-center for contemporary interest, while traditional applications typically center the door within the wall opening.
Allow adequate drying time for paint or stain before installation to prevent finish damage during the hanging and adjustment process. Work with a helper during installation—barn doors are awkward and heavy, making the process significantly easier and safer with two people. Test door operation multiple times before considering the project complete, adjusting hardware as needed to achieve smooth, quiet, reliable movement.
Apply silicone lubricant to roller wheels and track periodically to maintain smooth operation and extend hardware lifespan. Most manufacturers recommend lubrication every 6-12 months depending on usage frequency and environmental conditions. Regular maintenance prevents squeaking, binding, and premature wear that can develop with extended use of unlubricated hardware.

Common Mistakes to Avoid
One of the most common errors during install barn door sliding hardware DIY projects involves improper track leveling, which causes doors to bind, stick, or drift open or closed. Many homeowners rush the leveling process or trust their eyes rather than using proper tools—invest in a quality level and use it at multiple points along the track length. Even quarter-inch deviations can cause significant operational issues that become increasingly frustrating with daily use.
Failing to locate and use wall studs for mounting hardware represents another critical mistake that can result in track failure, wall damage, or injury. Studs provide the necessary structural support for your door’s weight—drywall alone cannot safely support the loads transmitted through a heavy-duty barn door system. If studs aren’t positioned ideally for your application, use appropriate heavy-duty anchors rated for the door weight, and never compromise on mounting security.
Installing rollers and guides at incorrect heights or spacing causes alignment problems that prevent smooth door operation. Many homeowners skip the detailed measurements provided with hardware kits, leading to installation errors that require correction or complete reinstallation. Take time to measure twice, mark precisely, and drill carefully—rushing this stage inevitably leads to frustration and poor results.
Choosing undersized or poorly-rated hardware for your door weight creates safety hazards and operational problems. Always select hardware rated for at least 50 percent more than your actual door weight to ensure reliable long-term performance. Cheap hardware saves money initially but leads to frequent maintenance, repair, or replacement that costs far more than investing in quality components from the outset.

Key Takeaways
-
Proper measurement and planning form the foundation of successful install barn door sliding hardware DIY projects—measure multiple times before making permanent marks or holes.
-
Track leveling is absolutely critical—even minor deviations cause binding, sticking, and poor door operation that becomes increasingly frustrating with use.
-
Always mount hardware into wall studs or use heavy-duty anchors rated for your specific door weight—never rely on drywall alone.
-
Quality hardware investment pays dividends through reliable operation, extended lifespan, and reduced maintenance requirements compared to budget alternatives.
-
Test door operation thoroughly before considering the project complete, and plan for periodic maintenance including wheel lubrication and hardware inspection.
Frequently Asked Questions About Install Barn Door Sliding Hardware DIY
Q: What is the best install barn door sliding hardware DIY system for beginners?
A: For beginners, traditional rustic barn door hardware systems from reputable manufacturers like AmazonBasics or Rustic State offer excellent value with comprehensive instruction sets and readily available replacement parts. These systems typically feature straightforward installation processes that don’t require extensive tool collections or specialized knowledge. Starting with proven, well-documented systems significantly increases success probability and reduces frustration throughout your project.
Q: How do I use install barn door sliding hardware DIY if I have textured or uneven walls?
A: Textured or uneven walls require extra preparation before track installation—use a straight edge to identify high and low spots, then sand high areas or shim low areas to create a level mounting surface. Shim material, available at any home improvement store, allows you to adjust mounting bracket height to compensate for wall irregularities without compromising track levelness. This extra preparation time ensures your track is perfectly level despite underlying wall imperfections.
Q: Can I install a barn door on textured or wallpapered walls?
A: Textured and wallpapered walls require different mounting approaches than smooth drywall—textured walls need anchors specifically designed for irregular surfaces, while wallpaper should be removed from mounting areas to ensure proper hardware adhesion. For wallpapered areas, carefully score and remove wallpaper from bracket locations, then clean the underlying surface thoroughly before installation. Always prioritize finding studs when available, as stud mounting proves more reliable than relying on anchors alone.
Q: What weight can standard residential barn door hardware support?
A: Most standard residential barn door hardware systems support doors weighing 75-150 pounds, though some premium systems accommodate weights up to 250+ pounds. Check your specific hardware kit documentation for weight ratings, and always select hardware rated for at least 50 percent more than your actual door weight for safety margins. If your door exceeds standard hardware capacity, upgrade to heavy-duty commercial-grade systems designed for demanding applications.
Q: How often should I maintain my barn door hardware?
A: Plan to inspect your barn door hardware quarterly and lubricate wheels and tracks semi-annually or whenever you notice squeaking or sticking sounds. Most manufacturers recommend using silicone spray lubricants rather than oil-based products that attract dust and debris. Regular maintenance prevents most operational issues and extends hardware lifespan significantly compared to systems that operate unlubricated.
Conclusion
Learning to install barn door sliding hardware DIY empowers you to transform any space with stylish, functional doors that enhance both aesthetics and functionality. This comprehensive guide has walked you through every step of the installation process, from careful planning and measurement through final hardware adjustment and testing. By following these detailed instructions and avoiding common mistakes, you’ll achieve professional-quality results that rival contractor installations while saving significant money and building valuable DIY skills. Start your project today and discover the satisfaction of completing this rewarding home improvement endeavor yourself!
Recommended Products on Amazon
As an Amazon Associate I earn from qualifying purchases.